Code
Now that we have a couple codes, let’s use them to do some coding. To open up one of our imported files, from the Document System panel, go to the Interviews document group and double click on the first interview transcript to open it in MAXQDA. Note: MAXQDA can open a lot of different file types directly in the tool. The files will be open as read-only, meaning you can’t edit them. This is intentional to prevent error. However, if you happen to notice an error you want to correct, you can toggle Editing on using the Pencil toggle at the top left of the Document Browser. Then, you will be able to make changes to the file. You can toggle editing off when you’re done to save the edits.
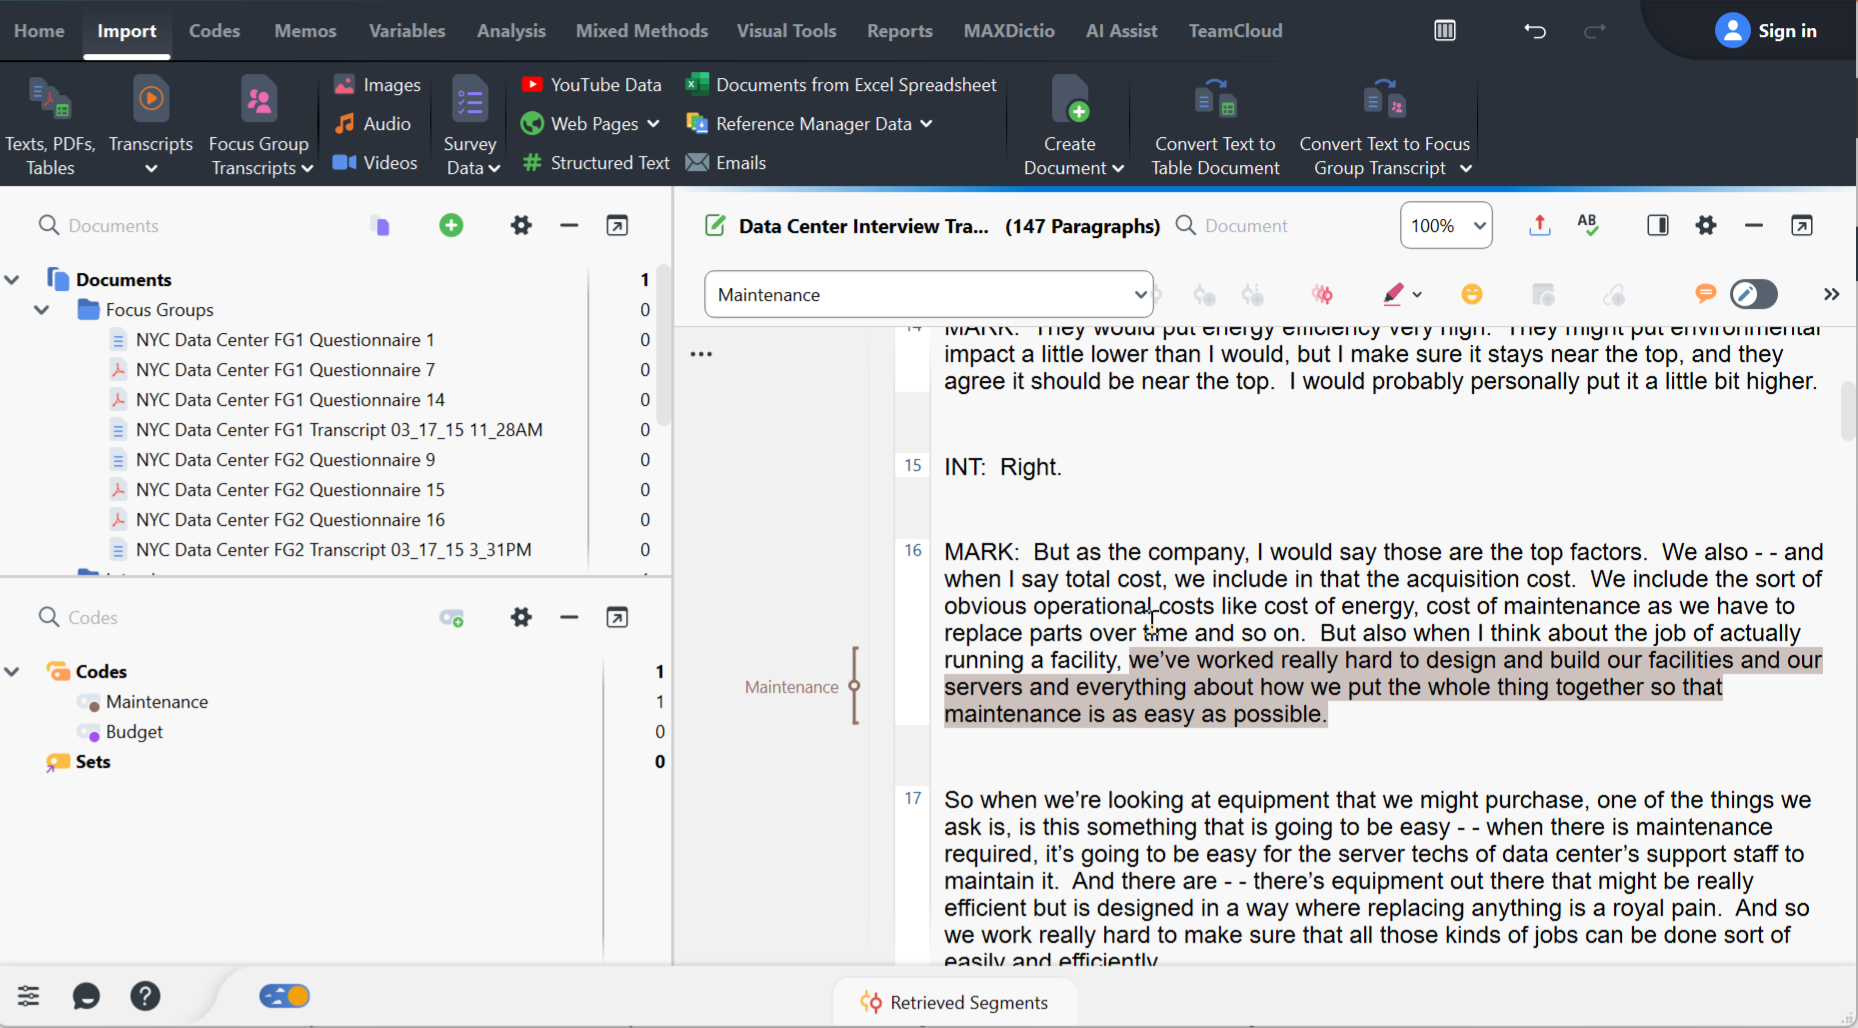
With the file open, you can then read through it and code. Highlight some text you want to code and then drag it to the appropriate code in the Code System panel. You can also do it the other way. You can drag the code on to the highlighted text. You can see a colour-coded coding stripe next to the text you highlighted with the code name, to keep track of what you’ve already coded and how.
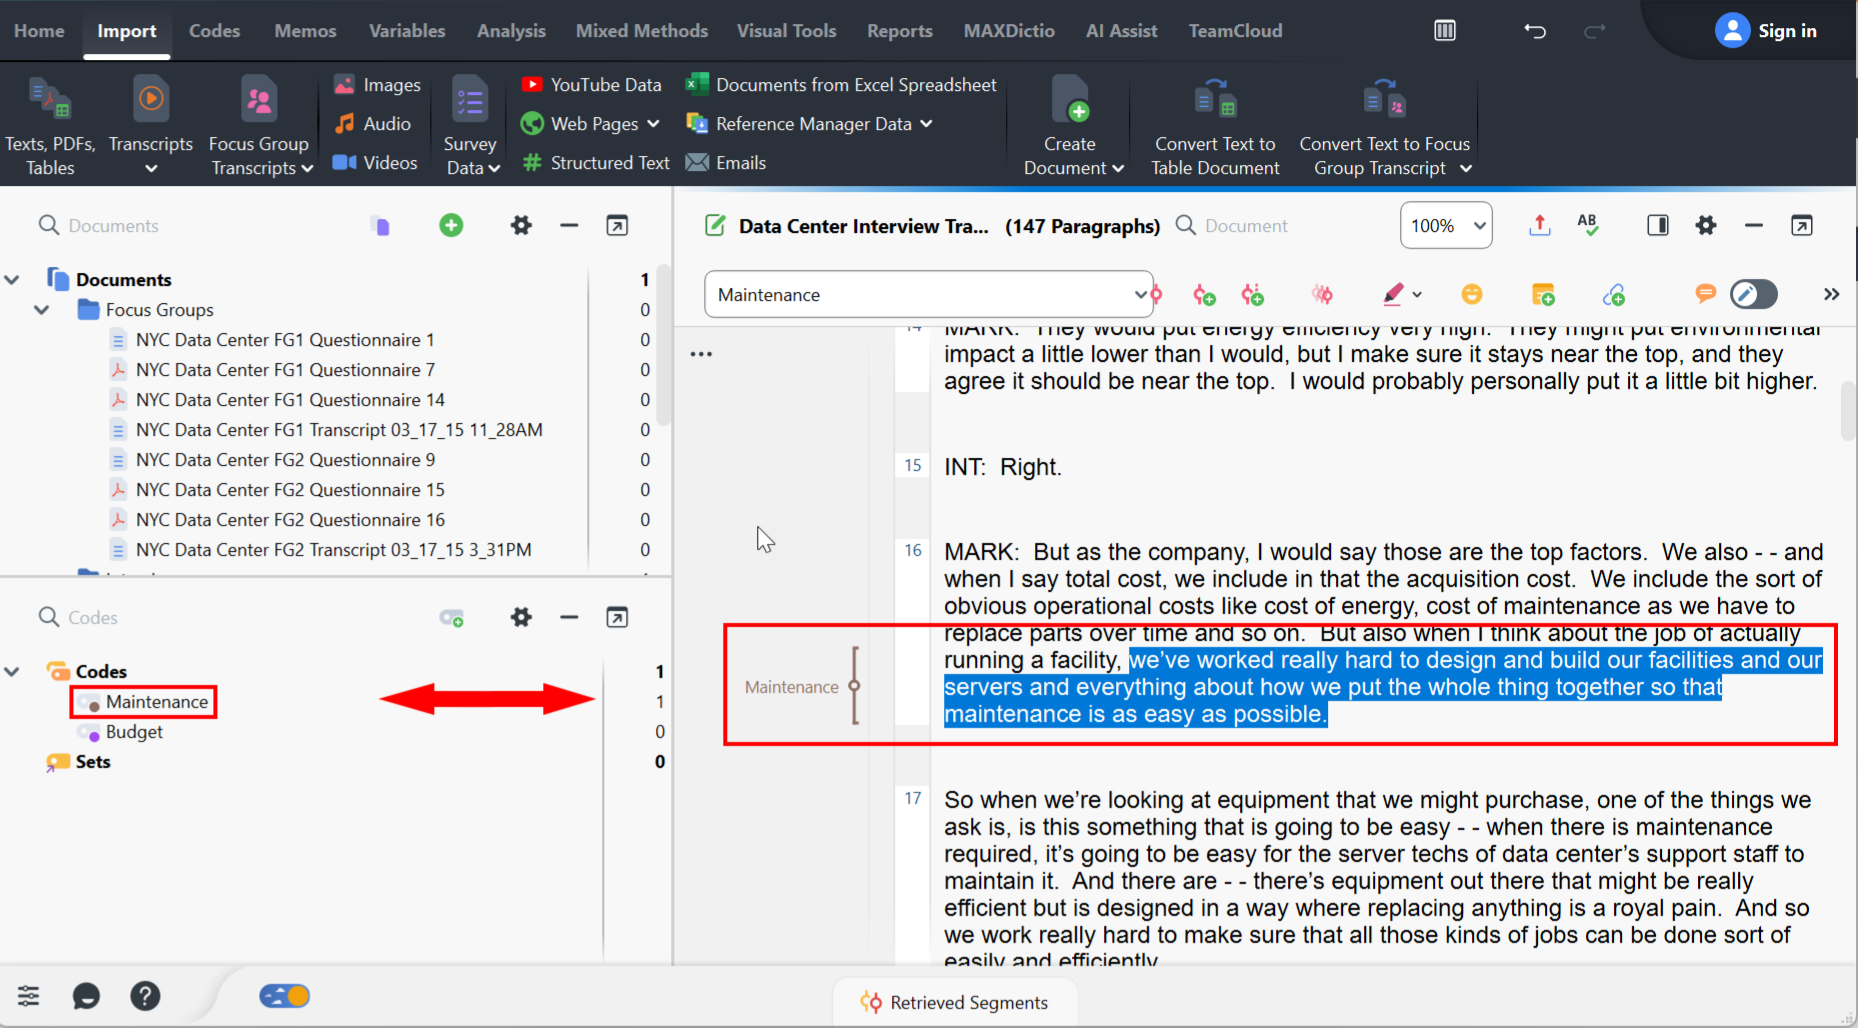
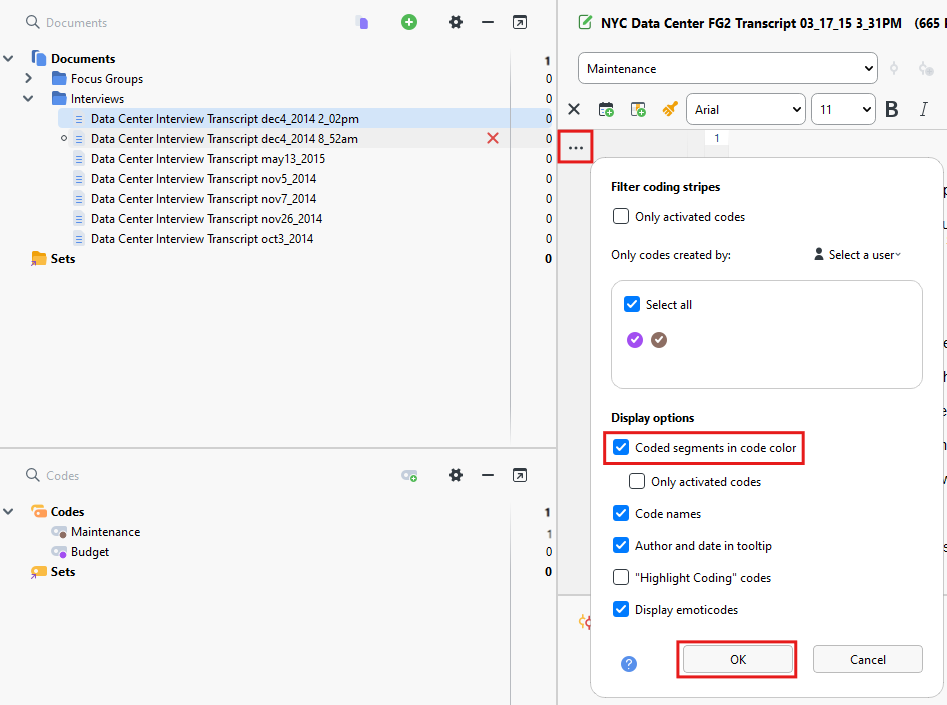
If you want the text to be highlighted with the stripe colour, click on the … icon at the top of the coding stripes area and select “Coded segments in code color.” Click OK.
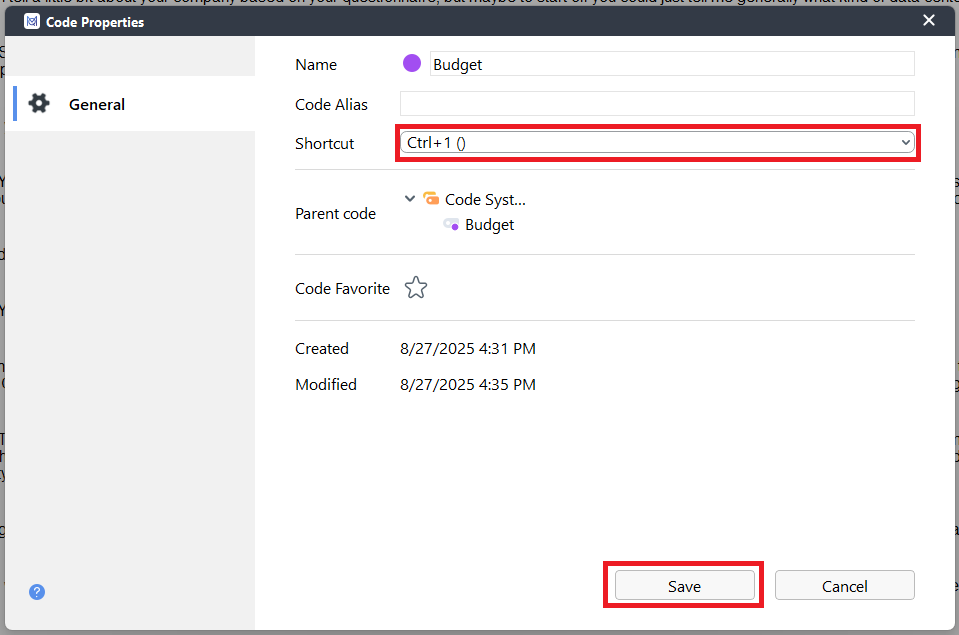
You can also set up keyboard shortcuts. If you right click on the Budget code and select Properties. You’ll see a drop-down to select a keyboard shortcut. Let’s try Ctrl+1. Click on Save. Now highlight some text and hit Ctrl and 1 at the same time to code it to Budget.
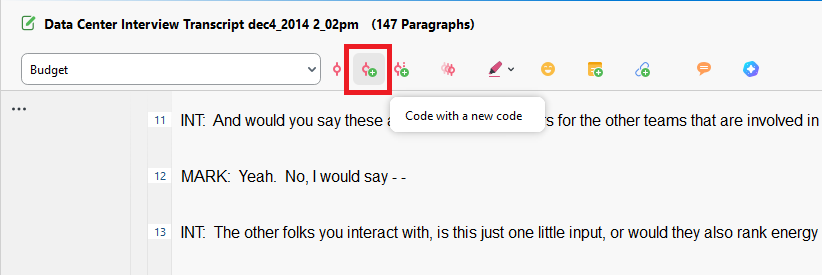
So far we have been coding using our pre-made codes. However, sometimes, something unexpected might come up that you want to create a new code to code it or you might be following an inductive approach to coding. To do this, highlight the text on teamwork at paragraph 7, and then select the icon at the top to Code with a new code (looks like a red circle with a green plus sign, second from left).
.
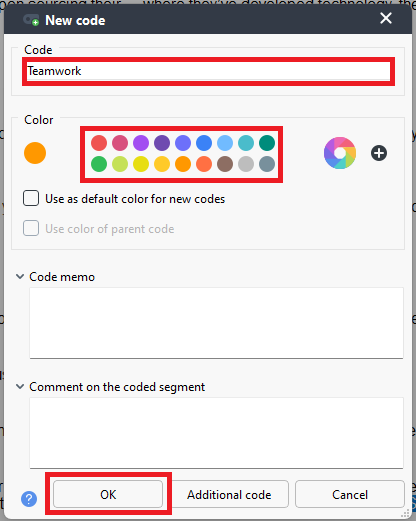
Here you can give it a name, for example, “Teamwork,” pick a colour (let’s say orange in this case), and select OK.
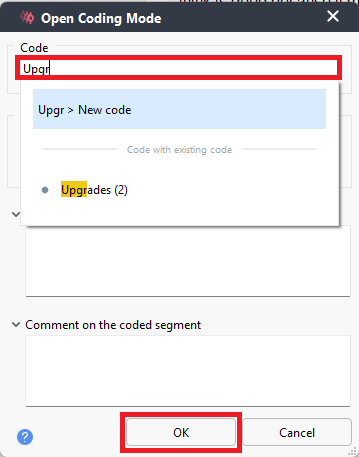
If you’re going to be creating a lot of new codes, you can go to Open Coding Mode so that anytime you highlight something, it immediately prompts you to create a new code. Click on the icon that looks 3 red circles overlapping, 4 from the left. Try it out by adding a code called Upgrades and use blue grey for its colour.
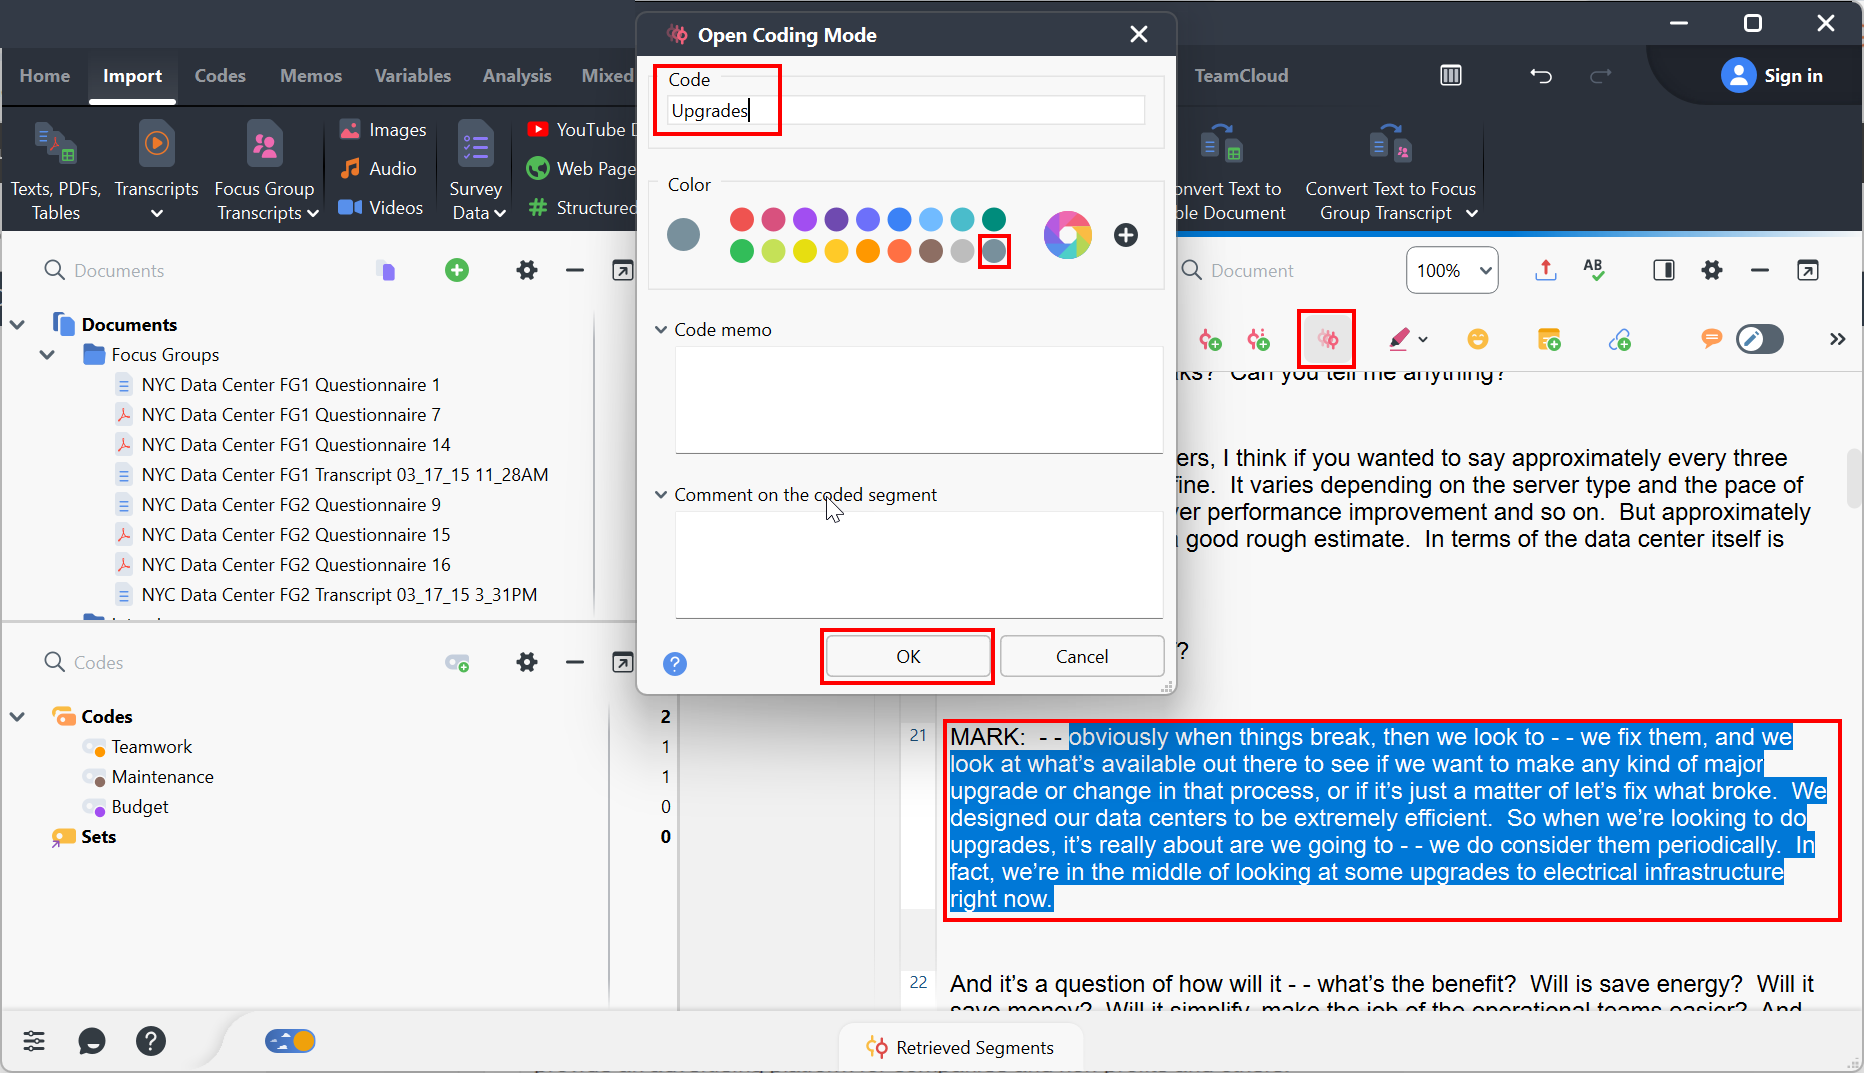
If you start typing a code name that matches a code you already have, it’ll prompt you to use that code instead to help you avoid duplication. Try that by selecting some text and typing in the name of a code you have already.
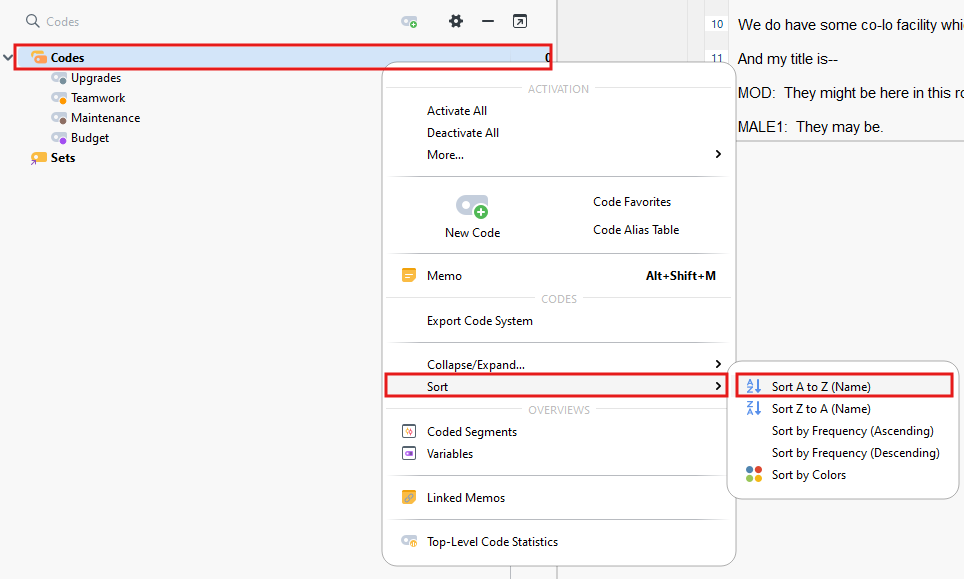
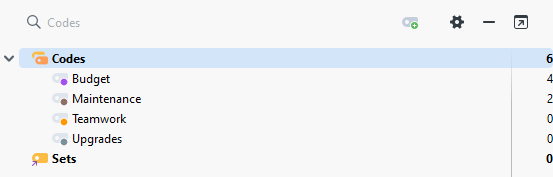
- With your code list starting to grow, you might want to sort it, so you can find codes easily. You can right click on the Codes folder and select Sort. You’ll see you have a few options to choose from. For now, let’s select A to Z.
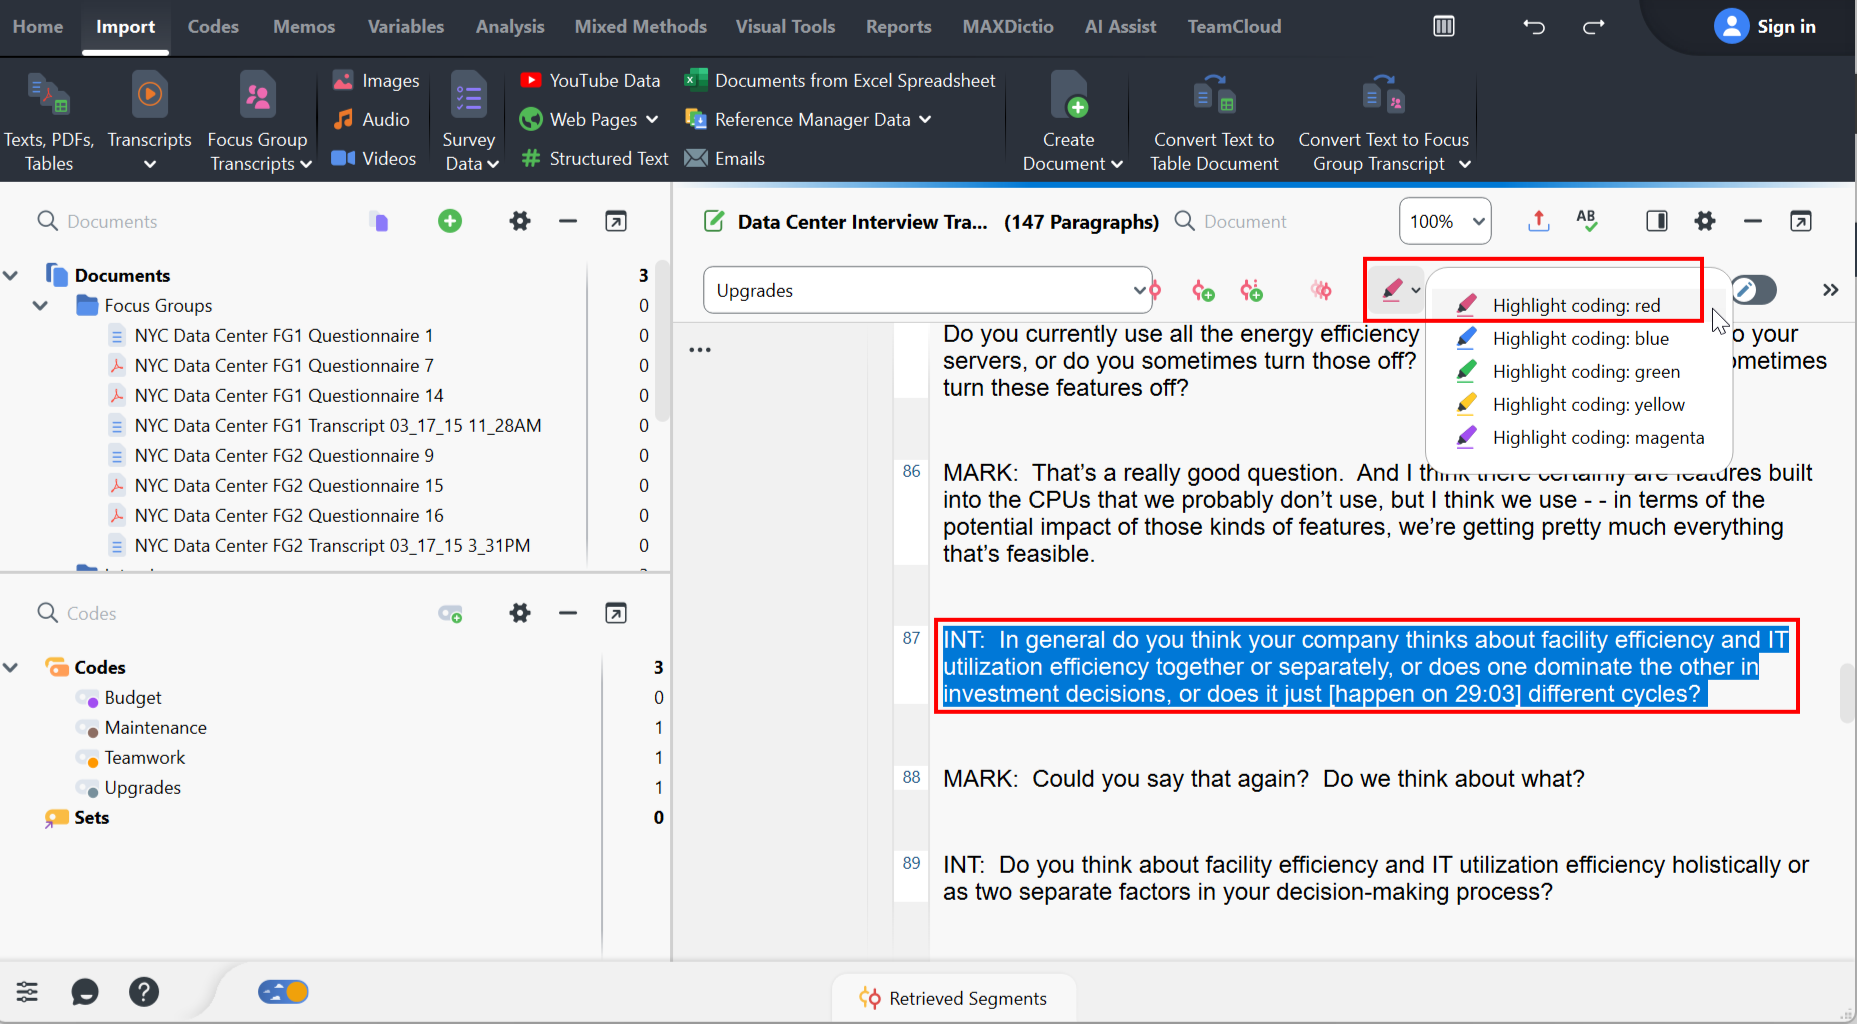
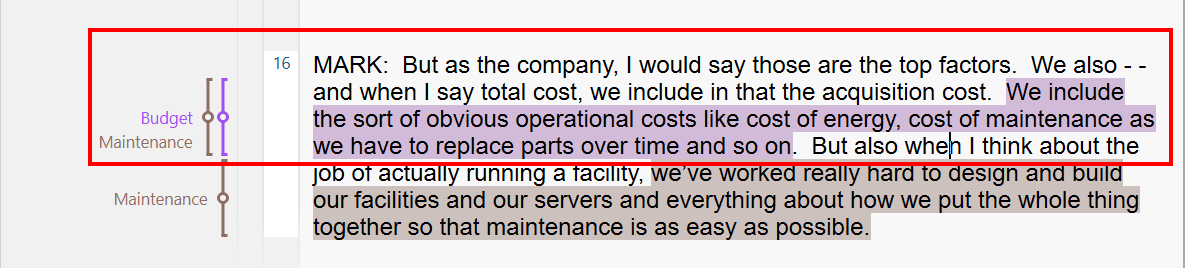
Let’s toggle off the open coding now and look at another way to code, especially if you’re more visual or used to coding the manual way with print paper and highlighters. You can use the highlighting tool. First highlight some text. Then click on the red highlighter icon at the top, select Highlight coding: red. Perhaps we can use red to highlight errors we notice in the transcript that we need to check later. This creates a code called red, but we can slow click on it twice to rename it to “RED – Errors to investigate”.

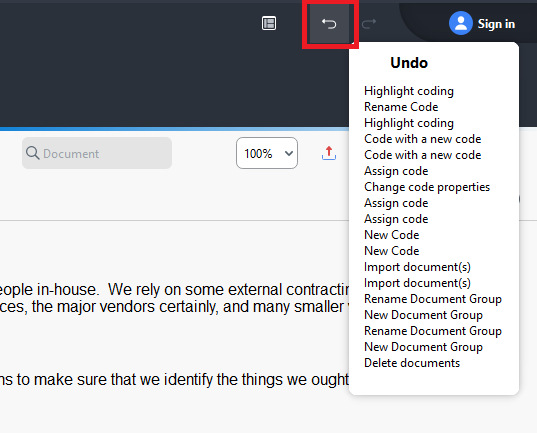
Try highlighting something else in red. Now note that if you make a mistake, you can use the undo and redo buttons at the top right or use the normal key commands, of Ctrl + Z to undo, Ctrl + Y to redo. If you hover over the undo icon it gives you a list of the actions you’ve done, in order, so you know if you hit undo, the item at the top of list will be undone.
You can also code the same segment of text with multiple codes. This is often a powerful way to mark up a document for later analysis. Give it a try!
- So far we have been coding Word documents, but let’s look at the PDFs we imported as well.
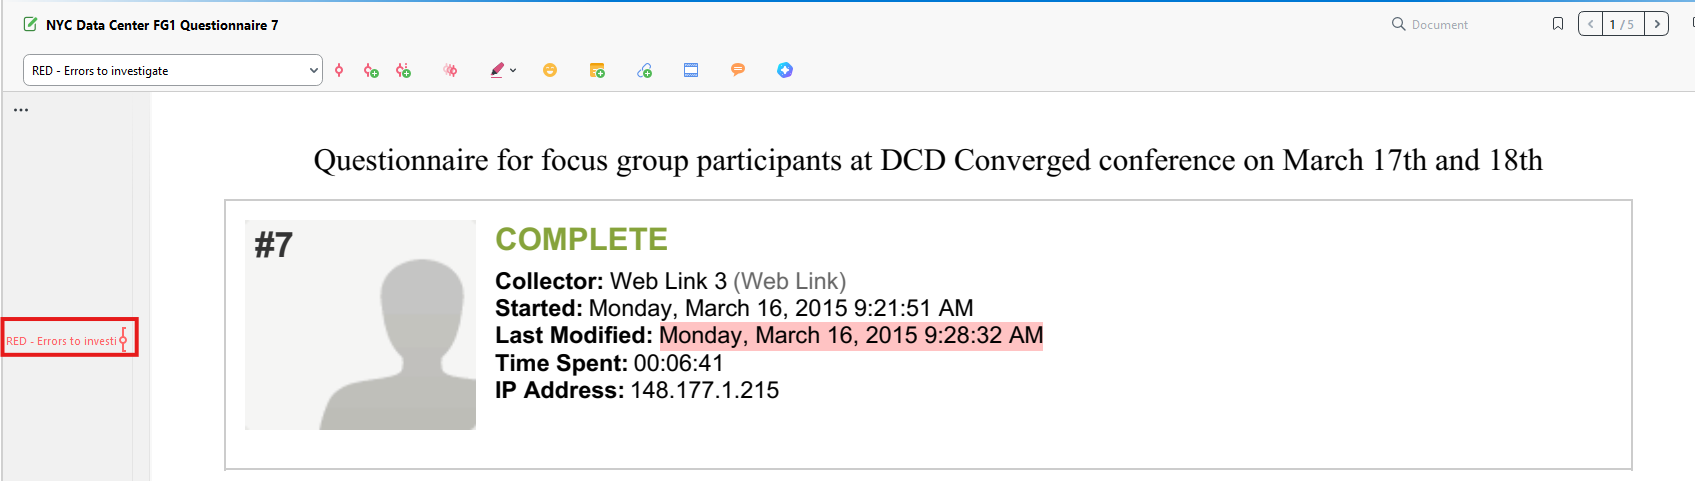
Go to the Focus Groups document group and open up “NYC Data Center FG1 Questionnaire 7” by double clicking on it. This PDF file has been OCR’ed, meaning you can select text and code it as we have done before. Try it!
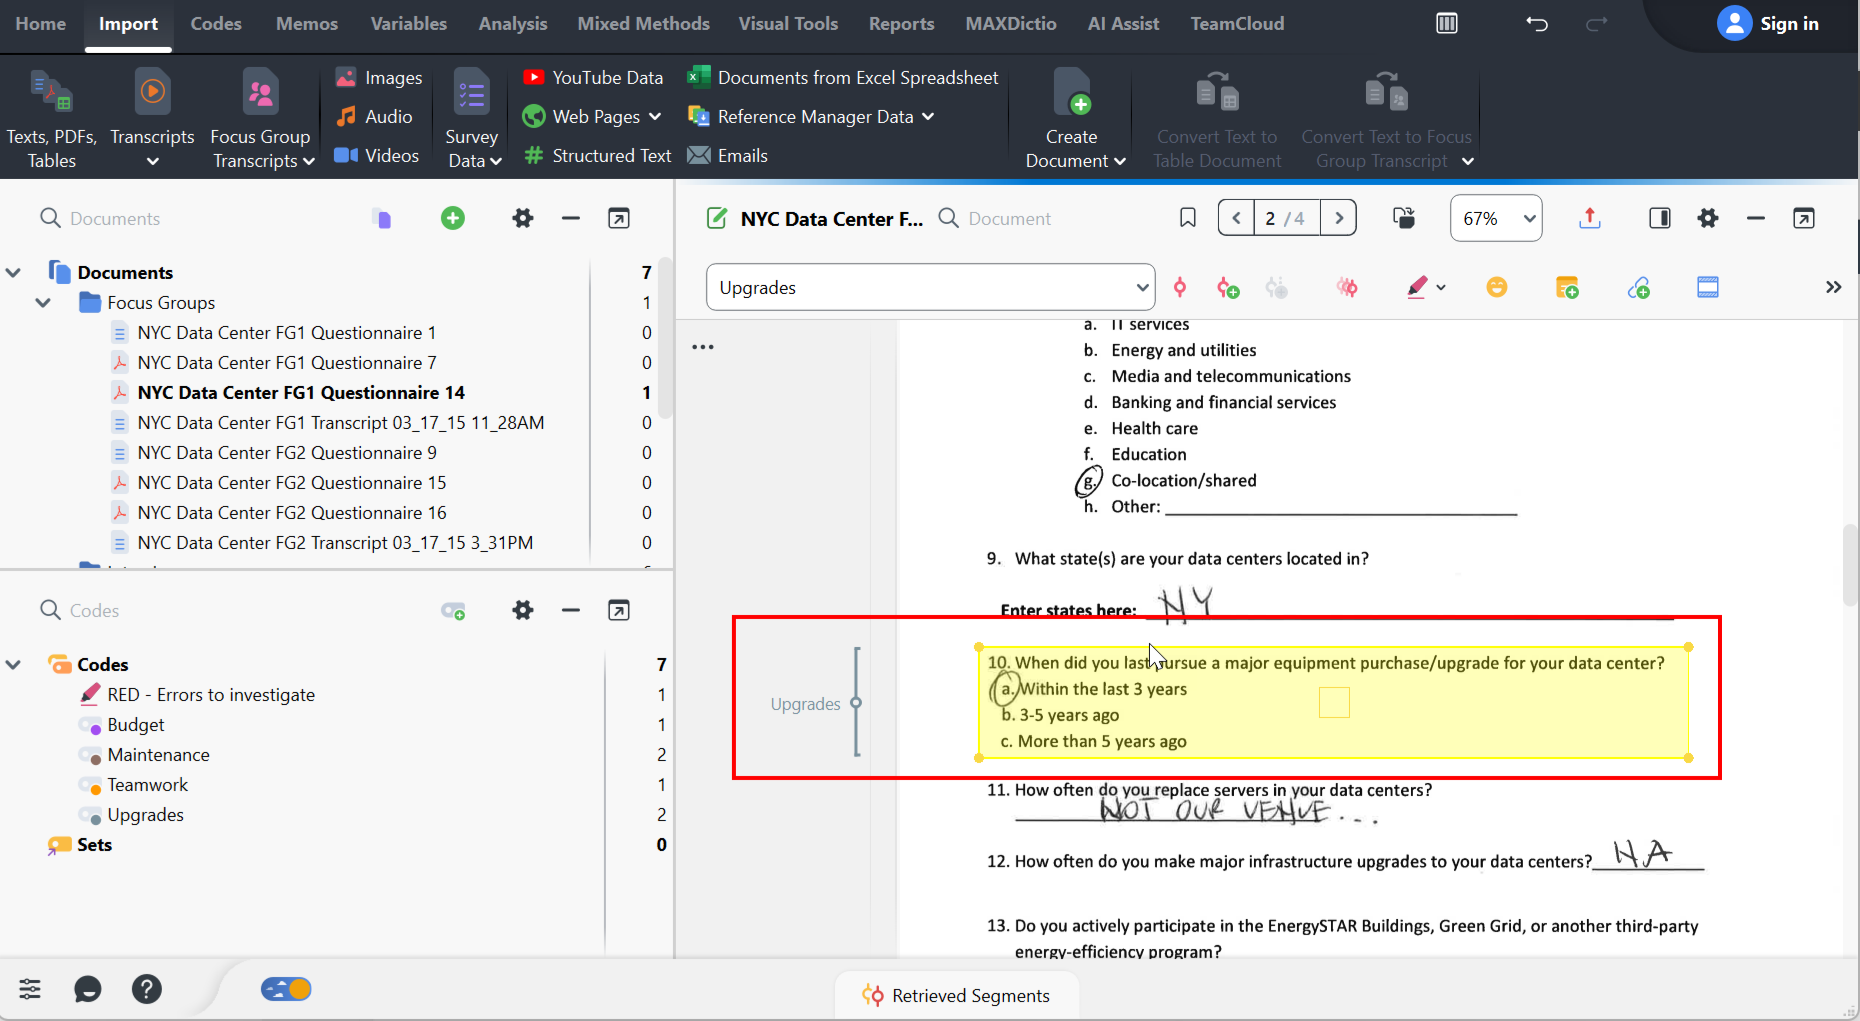
Now open up “NYC Data Center FG1 Questionnaire 14.” This PDF file has not been OCR’ed, meaning you can’t select the text and code it as we have done before. Instead MAXQDA treats this more like an image. You could instead draw a box to select part of the PDF (especially helpful if you want to highlight a table or image in a PDF). You will then be able to code this part as normal by then dragging it to a particular code. This way of drawing a box around something is also how you would code an image in MAXQDA. Generally, though, it is better to make sure that any PDFs you import into MAXQDA are OCR’ed for ease of coding. (Note: If OCR’ing PDFs is new to you, this guide might help.)
Technique: Qualitative Data Analysis | Tools: MAXQDA