Extracting the geographic features you need from a larger dataset in ArcGIS Pro
You may have noticed that many GIS datasets contain information about a geographic extent that is larger than your area of interest.
Example: This Statistics Canada layer (downloaded from this page), displays all census dissemination areas within Canada. Suppose you only need to work with (for example) Nova Scotia’s dissemination areas. This tutorial will demonstrate how to extract just the features you need, saving them to new files that you can then use to map and analyze your data.
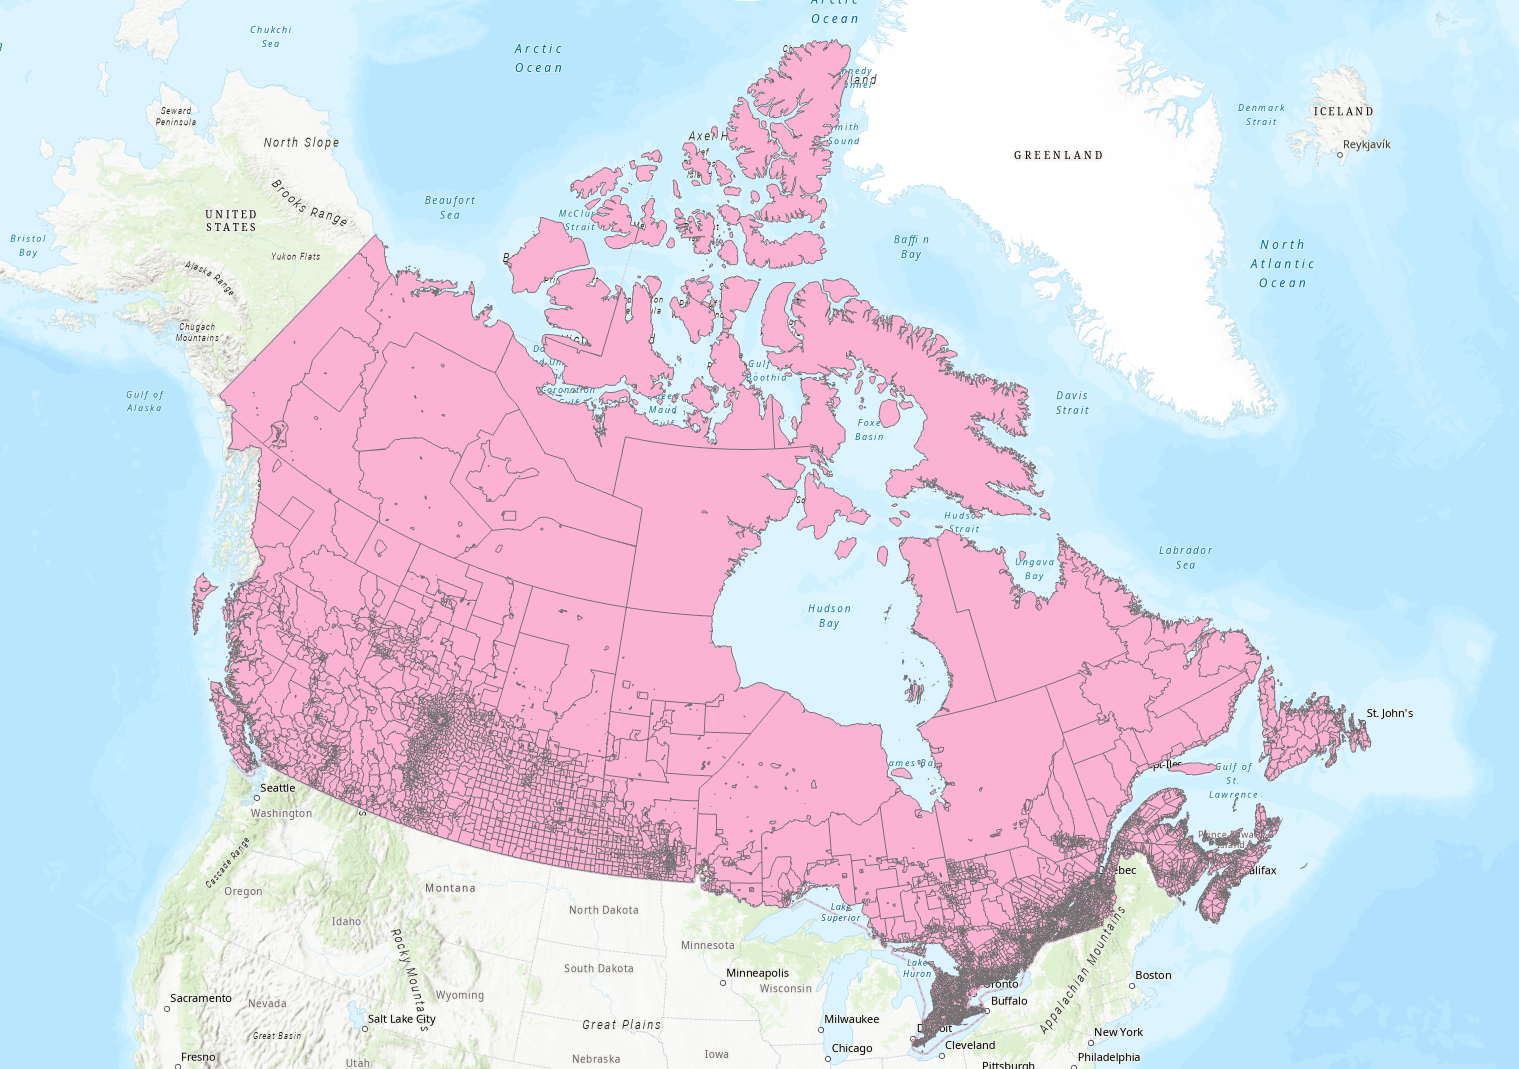
Selecting a subset by attributes
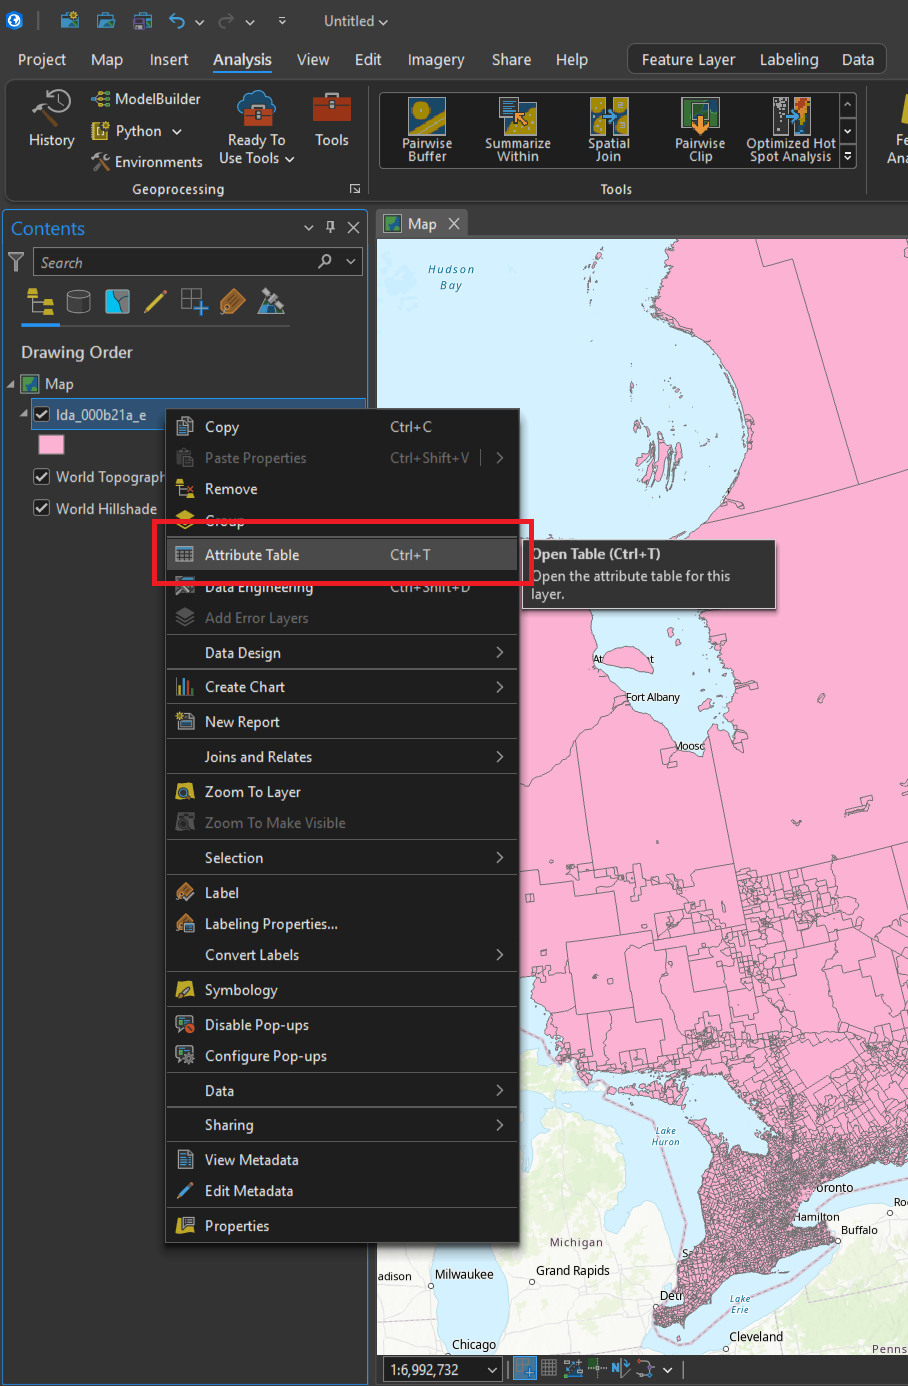
• Open the layer’s attribute table by right-clicking on it in the Contents pane and choosing Attribute table.
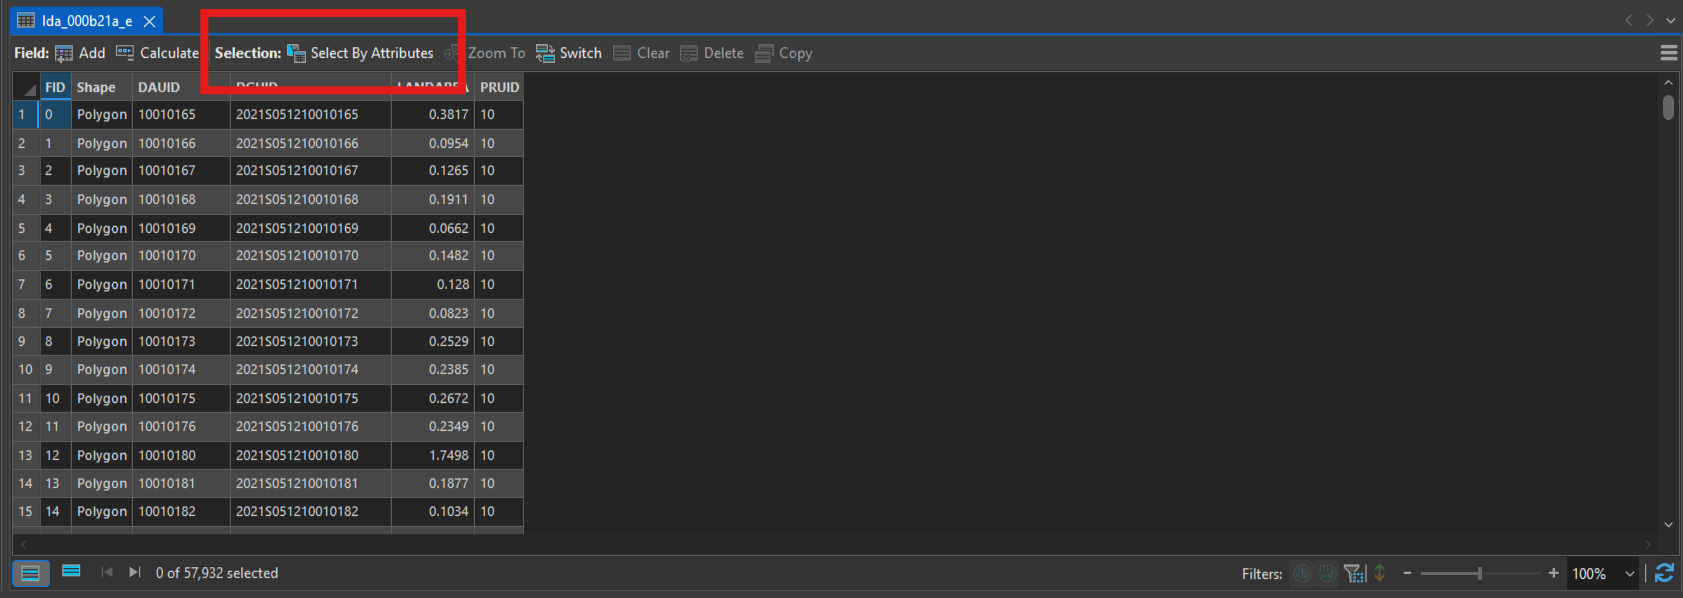
• Click Select by attributes
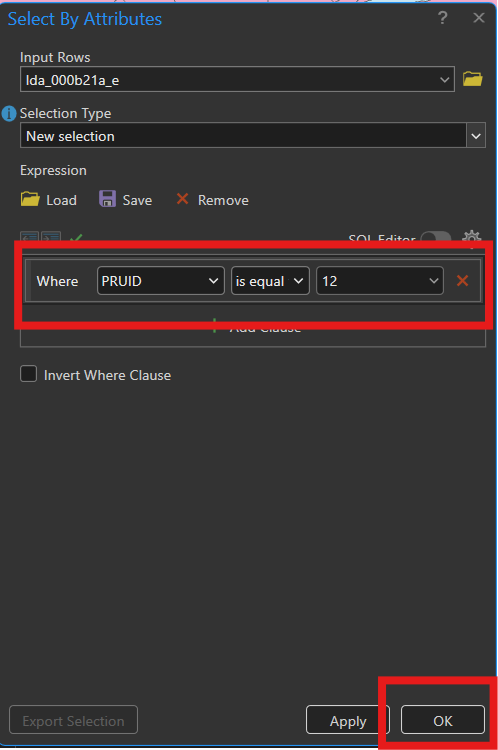
• Query the relevant features. Click OK. The features will be selected. In this example, features have been queried according to a categorical value (PRUID 12 means Nova Scotia in this dataset). You might also try querying features by size - for example, maybe you’re only interested in polygons above or below a particular area threshold, or lines within a certain distance range.
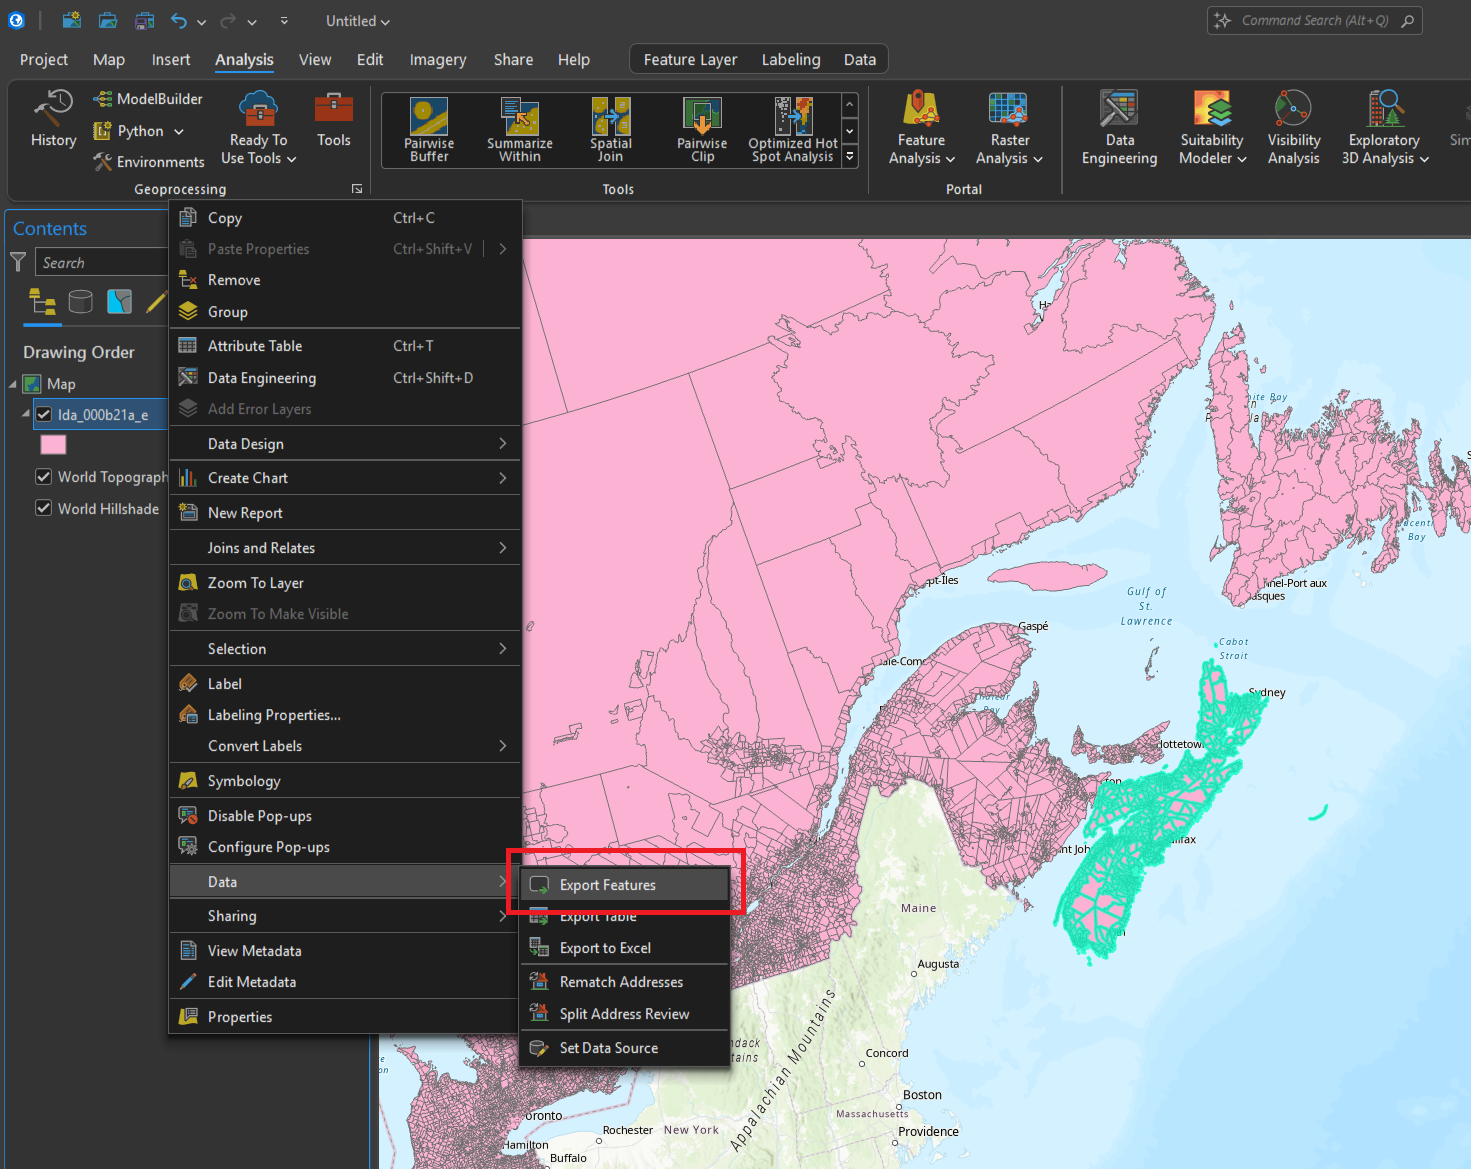
• Right-click the layer name in the Contents pane. Choose Data -> Export features.
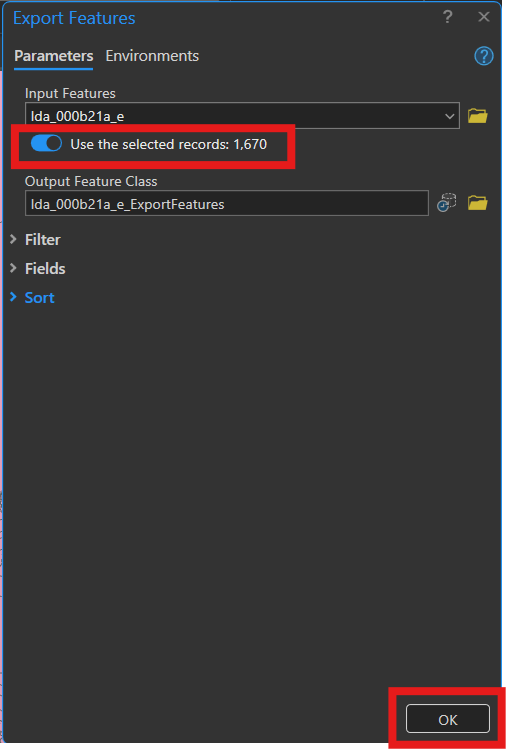
• Make sure that the Use the selected records option is toggled on, and click OK.
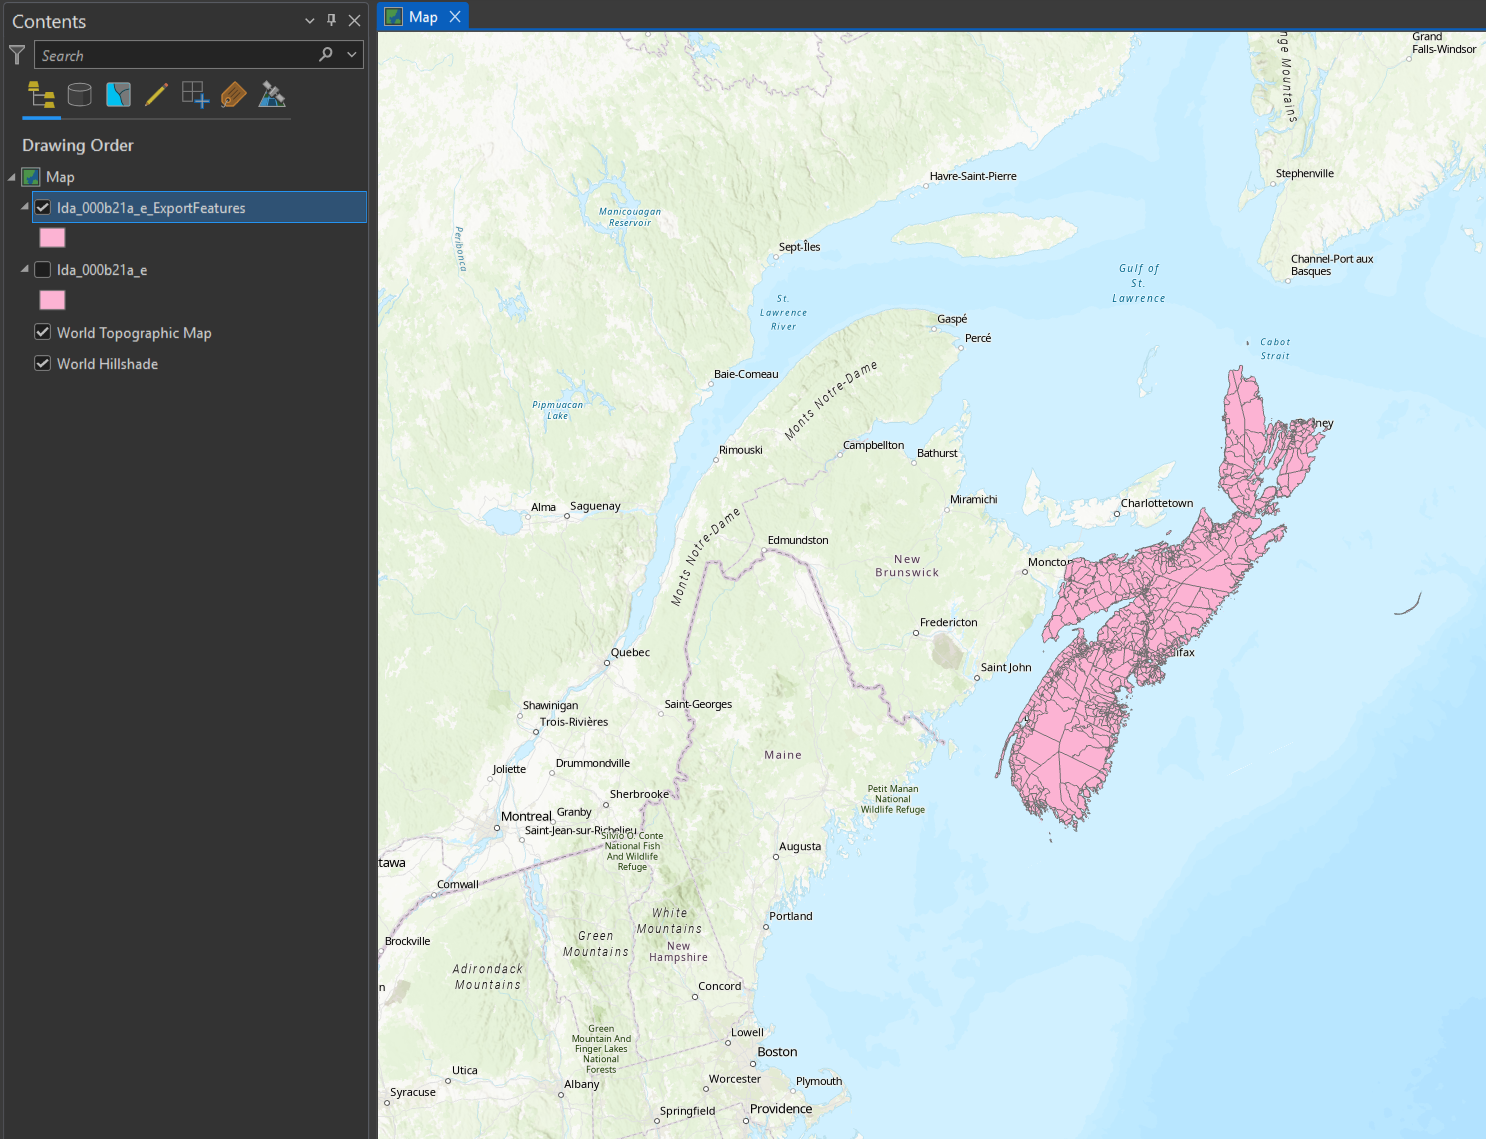
• This will result in a new layer containing only the previously selected features. It can now be added to ArcGIS Online.
Selecting data interactively from the Attribute Table or the map
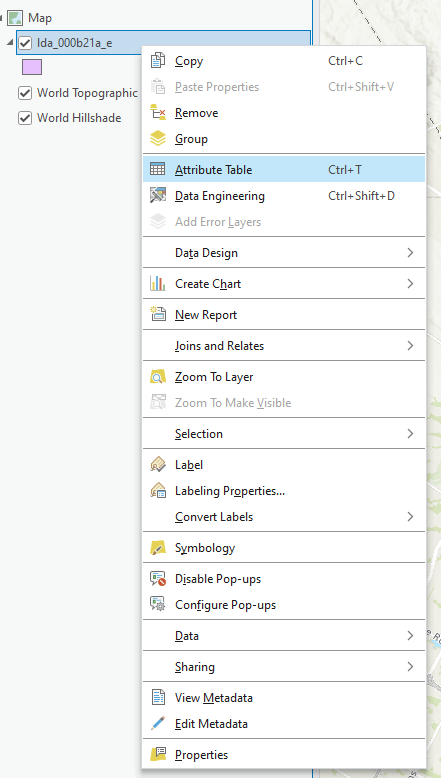
• Right-click on the name of the dataset in the Table of Contents, and select Attribute Table.
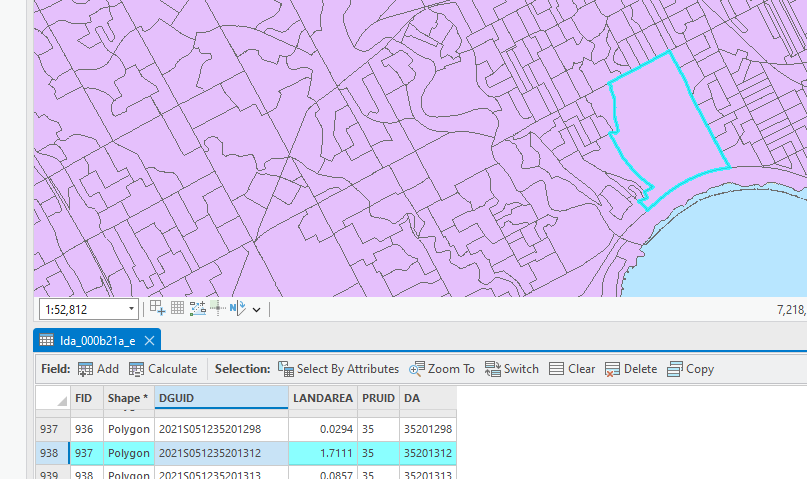
• Click in the grey box to the left of your feature of interest (High Park, Toronto, in this example). The row will be highlighted in blue. (If you were looking to select multiple, holding down the Ctrl key will allow you to select more than one at once.) The outline of the dissemination area will also be highlighted in blue.
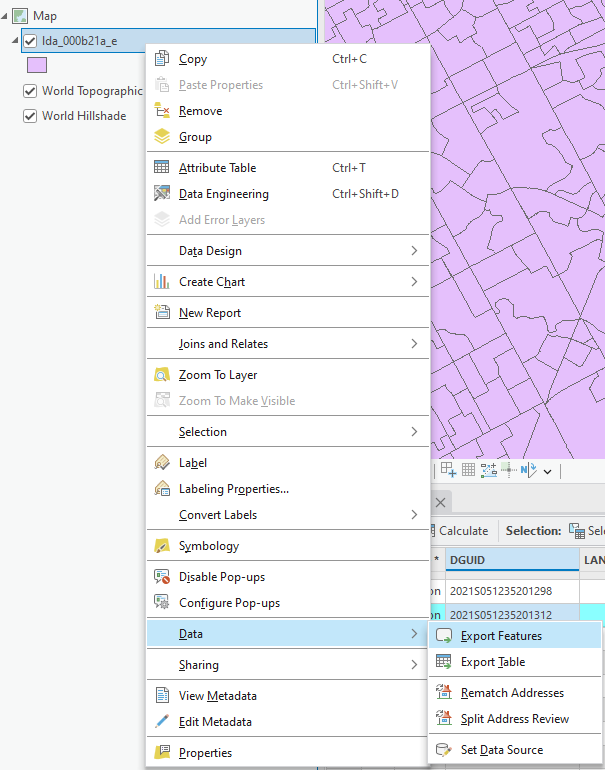
• Right-click on the name of the layer in the Table of Contents, select Data, then Export Features…
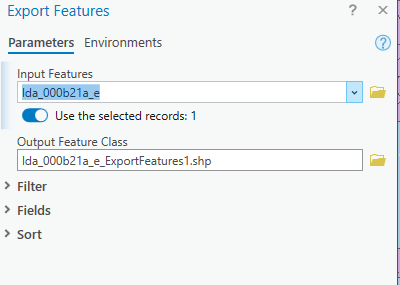
• In the Export Features window that appears, the parameters are already selected (because we selected them in the previous step). Confirm that they are as wanted, if you wish to rename the exports output, do so now in the Output Feature Class text bar. Remember to keep the file extension as ‘.shp’. Press OK to complete the export process.
The exported layer will appear on top (higher in the draw order). You can disable or remove the old layer if wanted.
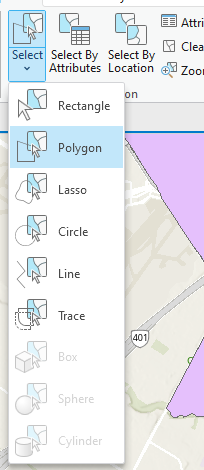
• Alternatively, you can use the different Select tools instead of selecting rows from the attribute table to interactively select features from the map.
Technique: Extracting data| Tools: ArcGIS Pro | Data Format: Vector