This tutorial will guide you through the setup on your local machine for editing just the docs sites for our MDLutoronto project.
Prerequisite
Accounts
- GitHub account and to be added to the learning object repository under MDLutoronto GitHub Organization
- See the Manage Student Access to MDLutoronto GitHub Repository guide for instructions on how to add students to the repository.
Software
- Ruby (install the 3.4.6-1 (x64) version, i.e. Ruby+Devkit 3.4.6-1 (x64))
- Git (install the Windows version)
- VS Code
- Recommended VS Code extensions to install:
- GitLens: for visually using git within VS Code
- Path Autocomplete: for auto-completing file paths when editing markdown files
- Code Spell Checker: for spell checking when editing markdown files
- Recommended VS Code extensions to install:
Configuration
Installing software
A recommended order of installation would be:
- VS Code
- Git
- Ruby
Vs code
For VS Code, you can just keep the default installation options.
Once installed, you may install the recommended extensions listed above via the Extensions view in VS Code (Ctrl+Shift+X), by searching for the extension name and clicking on the Install button.
Or you may install them by visiting the extension links above and clicking on the Install button there. The button will redirect you to VS Code and prompt you to install the extension.
Git
For Git, during the installation, make sure to select the following options when prompted:
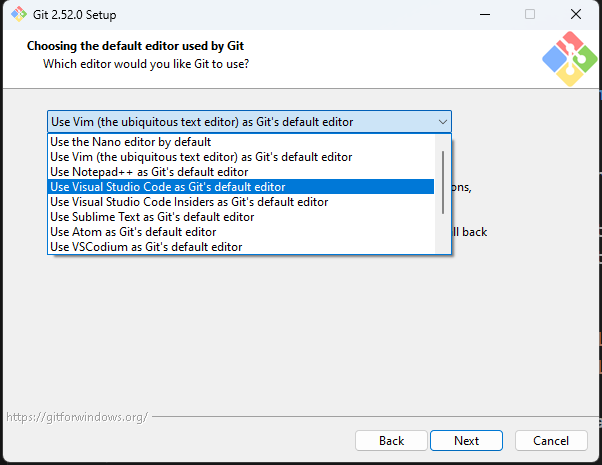
When prompted to select the default editor used by Git, select Use Visual Studio Code as Git’s default editor
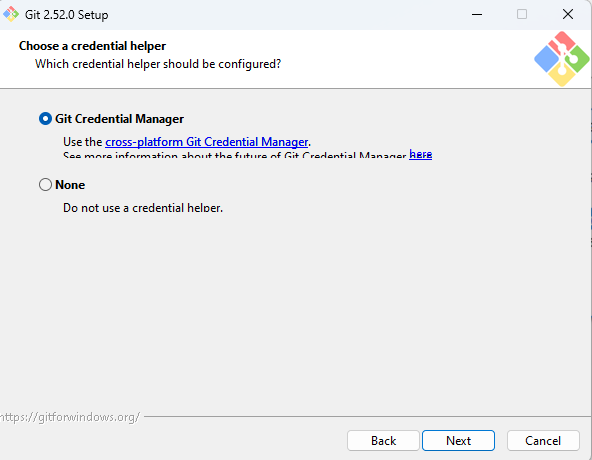
Make sure the Git Credential Manager option is selected to enable Git credential manager for managing GitHub credentials
Once you have installed Git, follow the steps below for configuring Git credential manager and setting up git user.name and user.email.
Connect to GitHub using Git credential manager
Open a (Windows) PowerShell Terminal

Type the following command to make the Git credential manager to manage your GitHub credentials
git config --global credential.helper manageIt’s normal no output will be shown in the terminal after running this command.
Type the following command to login to your GitHub account
git credential-manager github login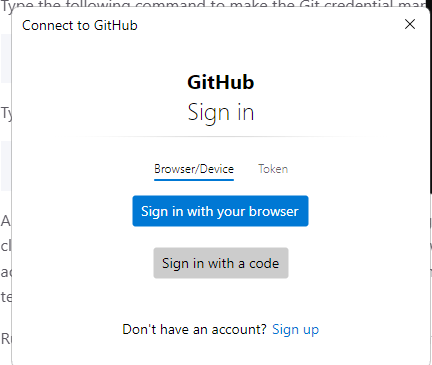
A window (outside the terminal) will pop up and prompt you to login to your GitHub account. Click on the
Sign in with your browserbutton. After logging in, you may close the web browser window and return to the PowerShell terminal.Run the following command to verify your GitHub authentication
git credential-manager github listYou should see your GitHub username printed in the terminal output
Setting up git user.name and user.email
Note that the
user.nameanduser.emailinput will be visible publicly. If you have any concerns, consider using the email relay address for commit provided by GitHub.You can retrieve that email address the under Settings > Emails, after turning on the
Keep my email addresses privateoption

Input the following to set your git user name and email. The email should be the same as the one on your GitHub account (or the email relay address provided by GitHub)
User name can be any name you want to show up on your commits:
git config --global user.name "Your Name"User email should be the email address associated with your GitHub account (or the email relay address provided by GitHub):
git config --global user.email "Your Email"Check your settings with the following command:
git config --listLook at the
user.emailanduser.namerow, like the following:... user.name=Your Name user.email=Your Email ...
Ruby
For Ruby, during the installation, default options should be fine.
However, at the end of the installation, make sure to check uncheck the Run 'ridk install' to set up MSYS2 and development toolchain option before clicking on the Finish button. 
Next steps
New guide
See the Create a new guide page for instructions on how to create a new Just-the-Docs guide.
Existing guide
See the Edit a guide page for instructions on how to work with an existing Just-the-Docs guide.