Importing Alternative Sources in NVivo 15 for Mac
NVivo can handle many types of files, such as text, audio, videos, images, etc. You would import these from the Data menu, by choosing the appropriate option. However, this tutorial will show you a common source of data that you might want to code in NVivo that is a bit more complicated to import.
Survey Data
A common data type that you might want to use NVivo to analyze is survey data. NVivo can import survey data in directly if you have your survey data stored in a spreadsheet, where each row is a survey respondent’s answers and each column is a question.
Note: This activity assumes you are familiar with case classifications and cases in NVivo. If case classifications and cases in NVivo is new to you, you can learn more in our Introduction to NVivo 15 tutorial!
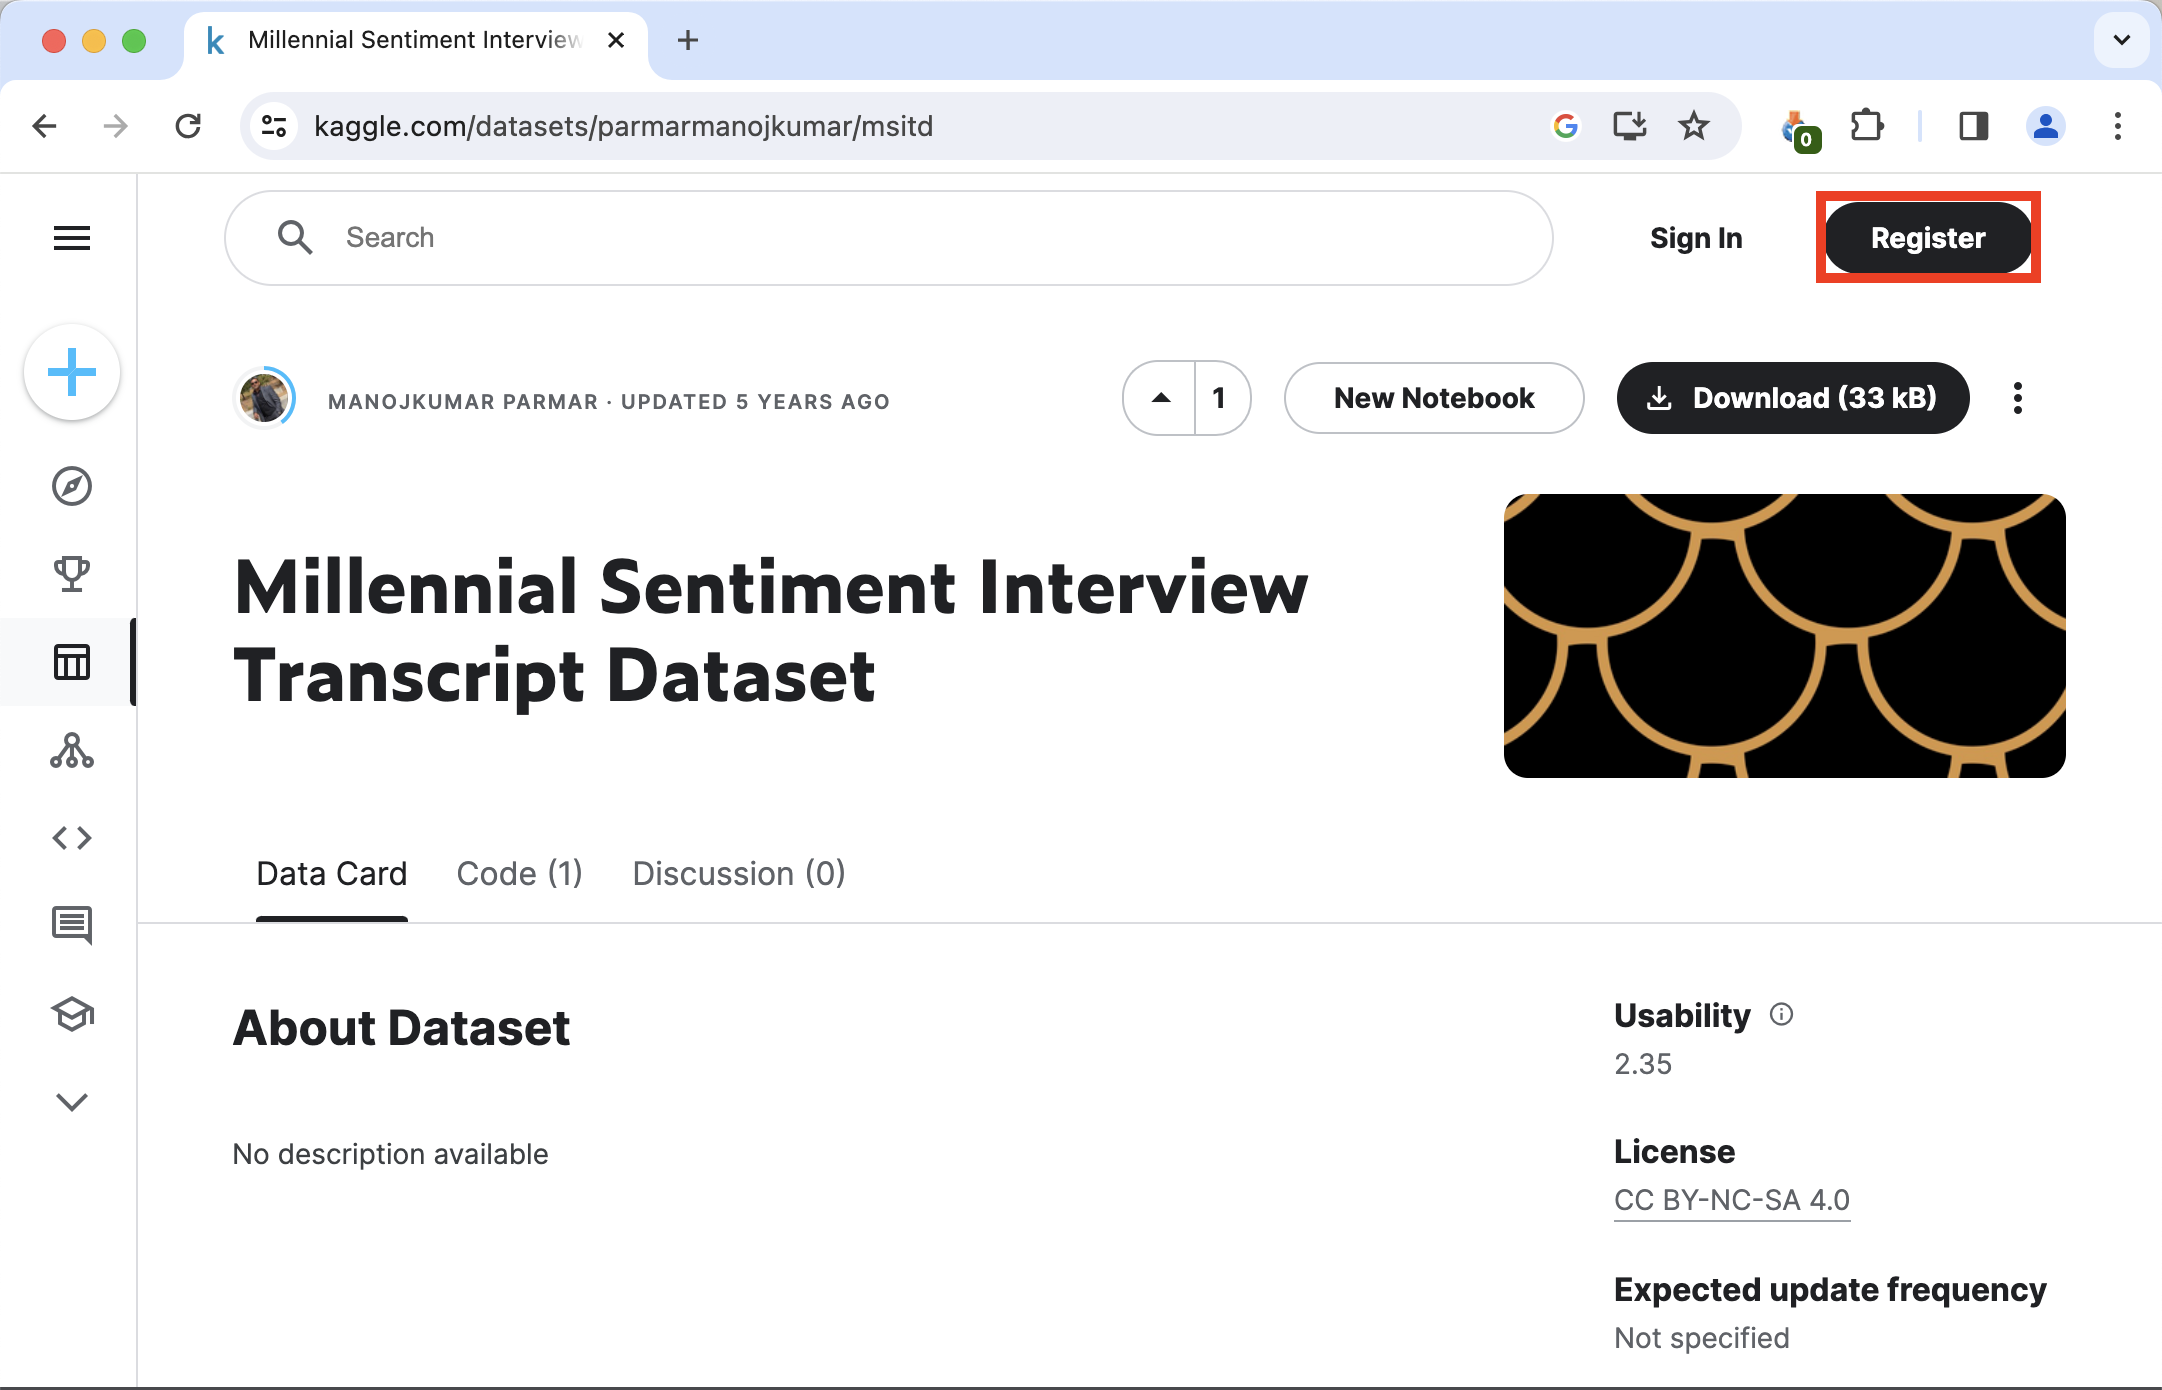
To start, let’s download a small sample of survey data called the Millennial Sentiment Interview Transcript Dataset. This data set is hosted on Kaggle, which is an public data platform. To download this data you’ll first have to register for a free account (or sign in if you already have one). Click Register at the top right of the website.
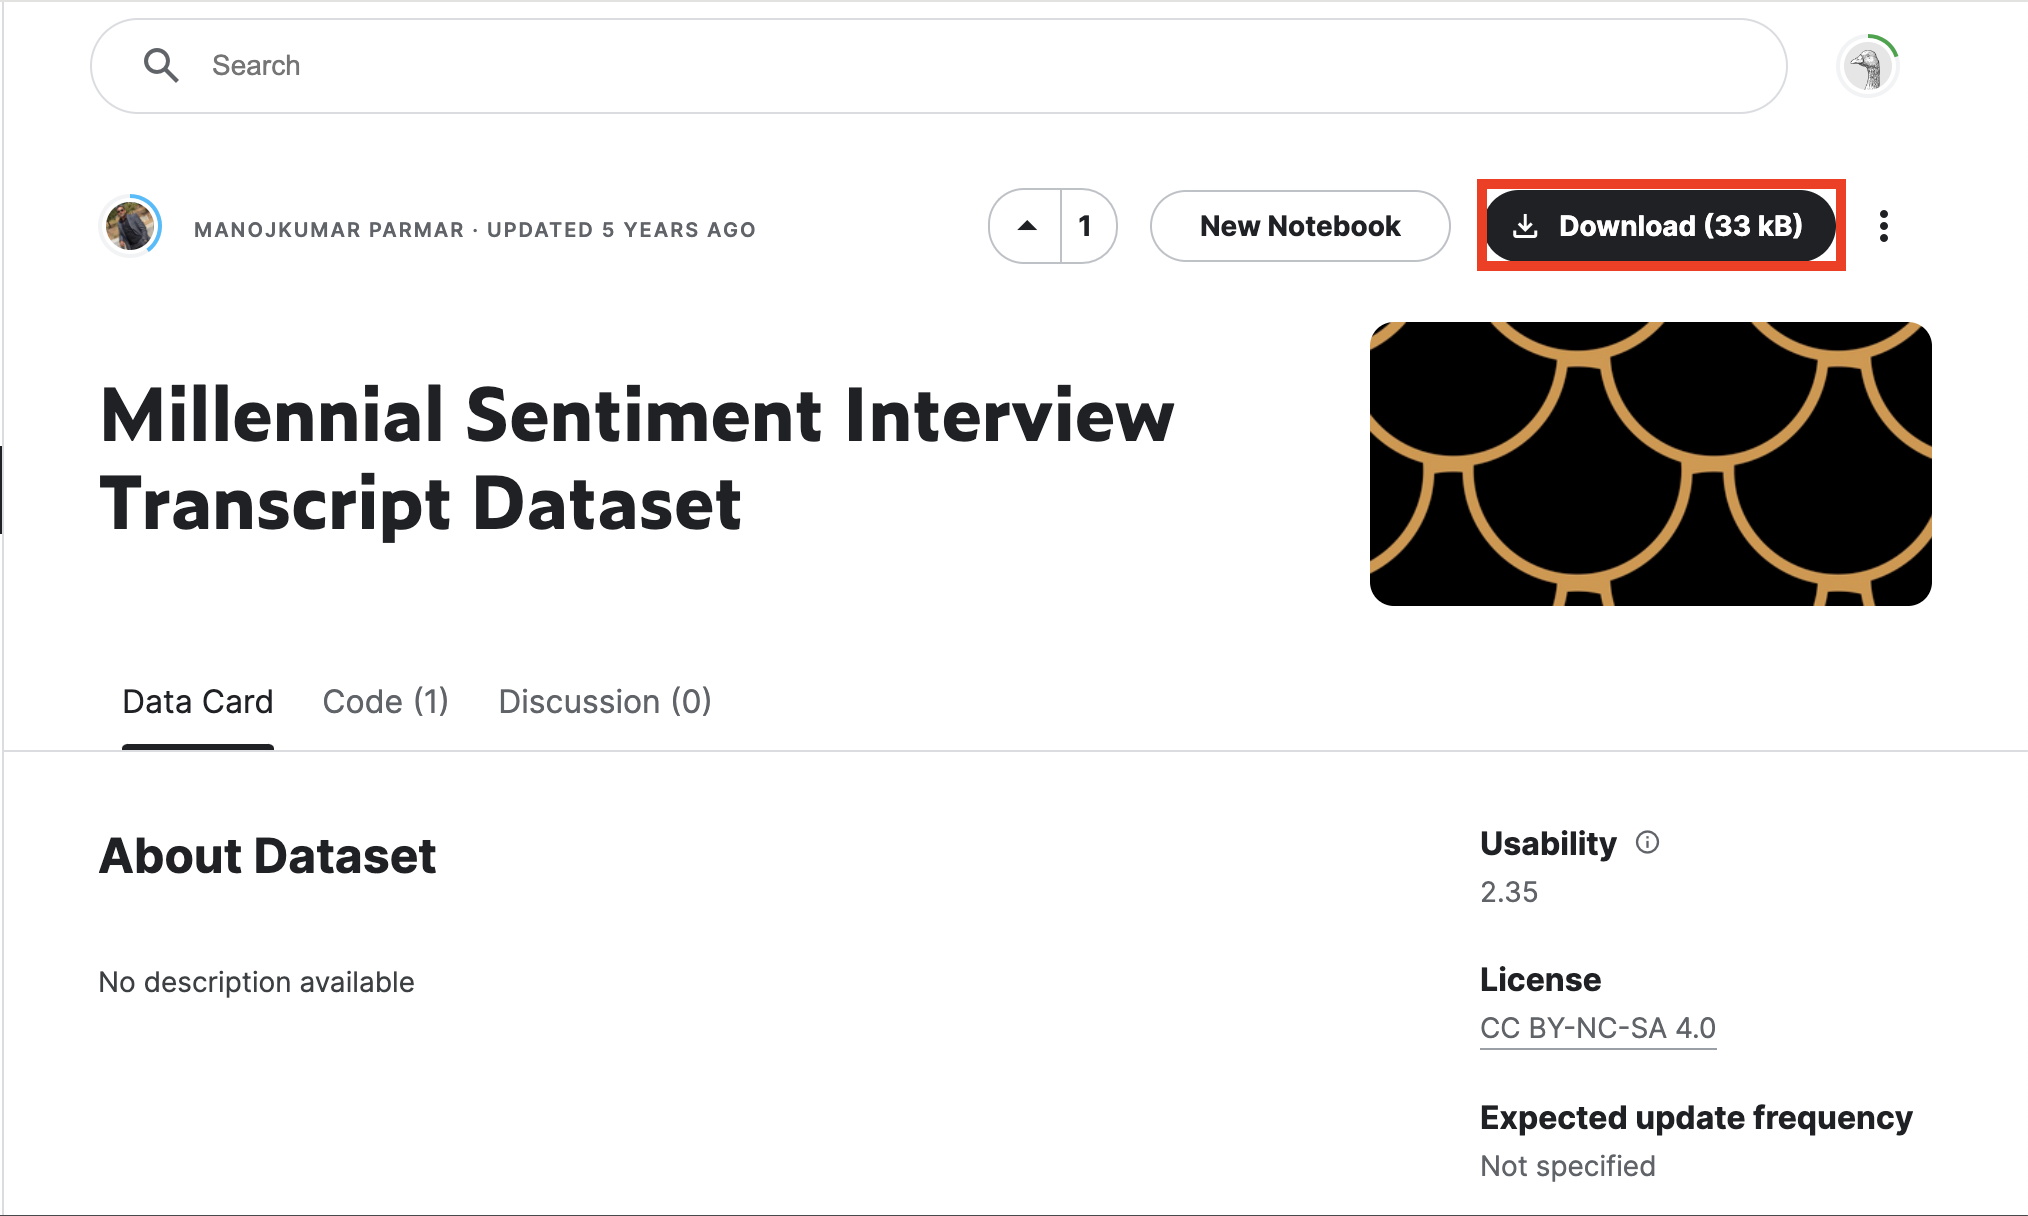
After you’ve signed in, click Download and save it somewhere you can find it, such as the Desktop.
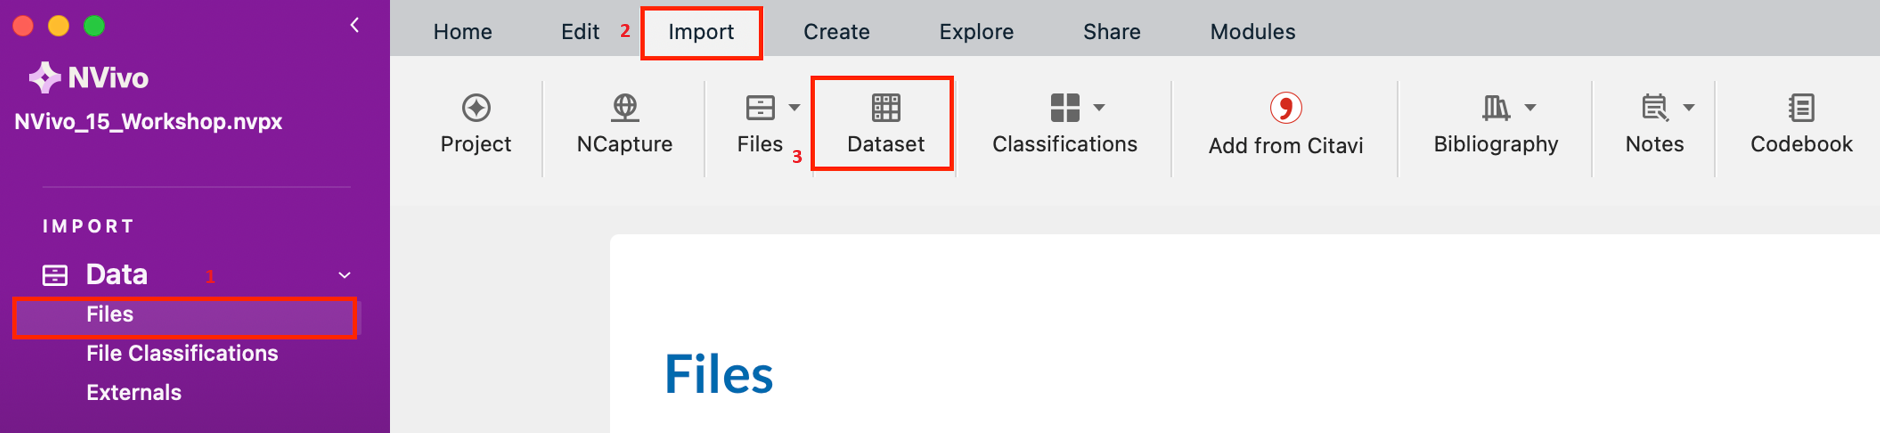
Go to NVivo. Create a new project file or open up an existing project file that you want to import this into. From the left menu, under Data, click on the Files folder. Then under the Import tab, select Dataset.
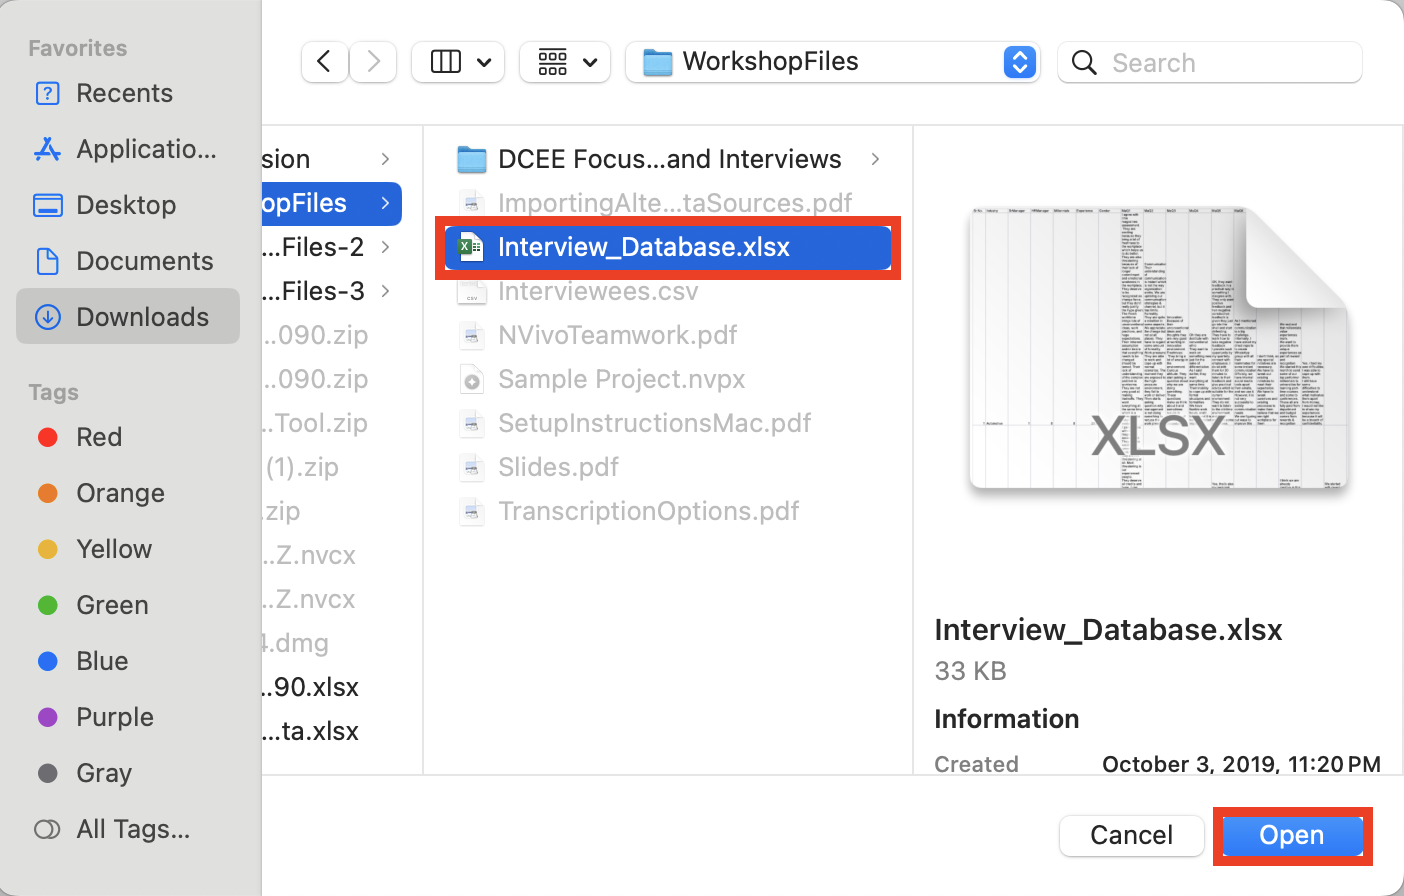
Browse to the folder where the Millennial Sentiment Interview Transcript Dataset (file Interview_Database.xlsx) was saved. Select the file, and then click on Open.
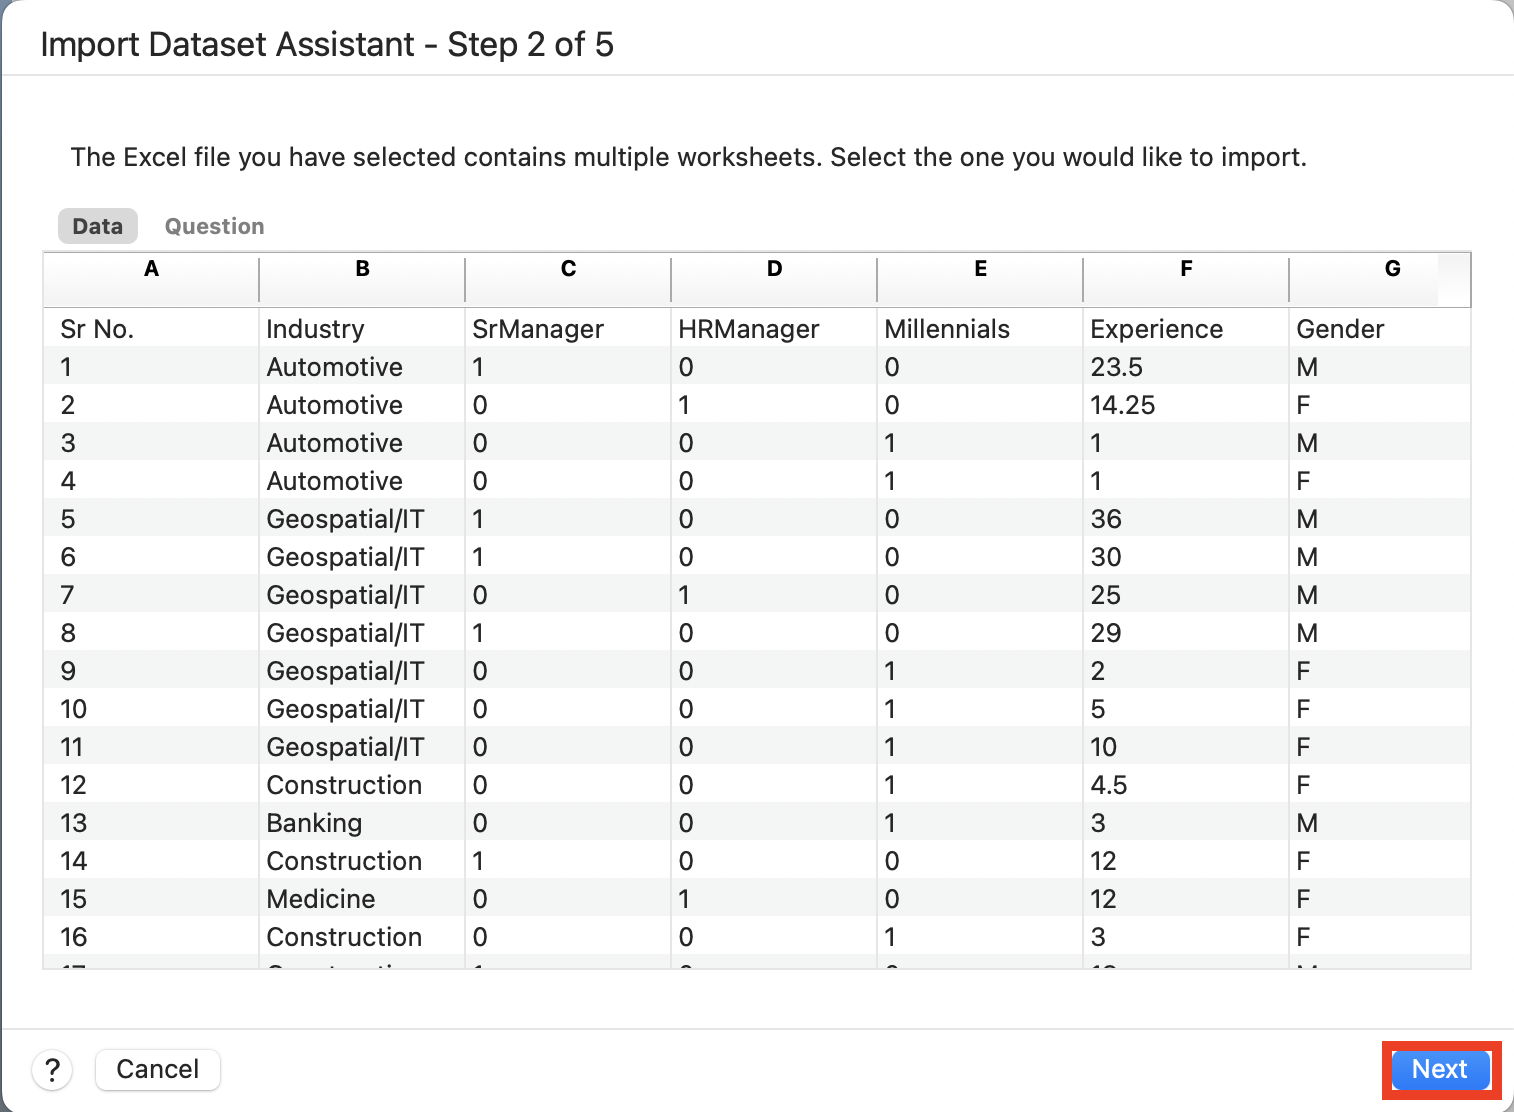
NVivo’s Dataset Import Wizard will open up to help you import your data. First as there are two sheets in the Excel file, it is asking which one to use. The default “Data” sheet is fine. It will also present you with a preview of the data. Click on Next.
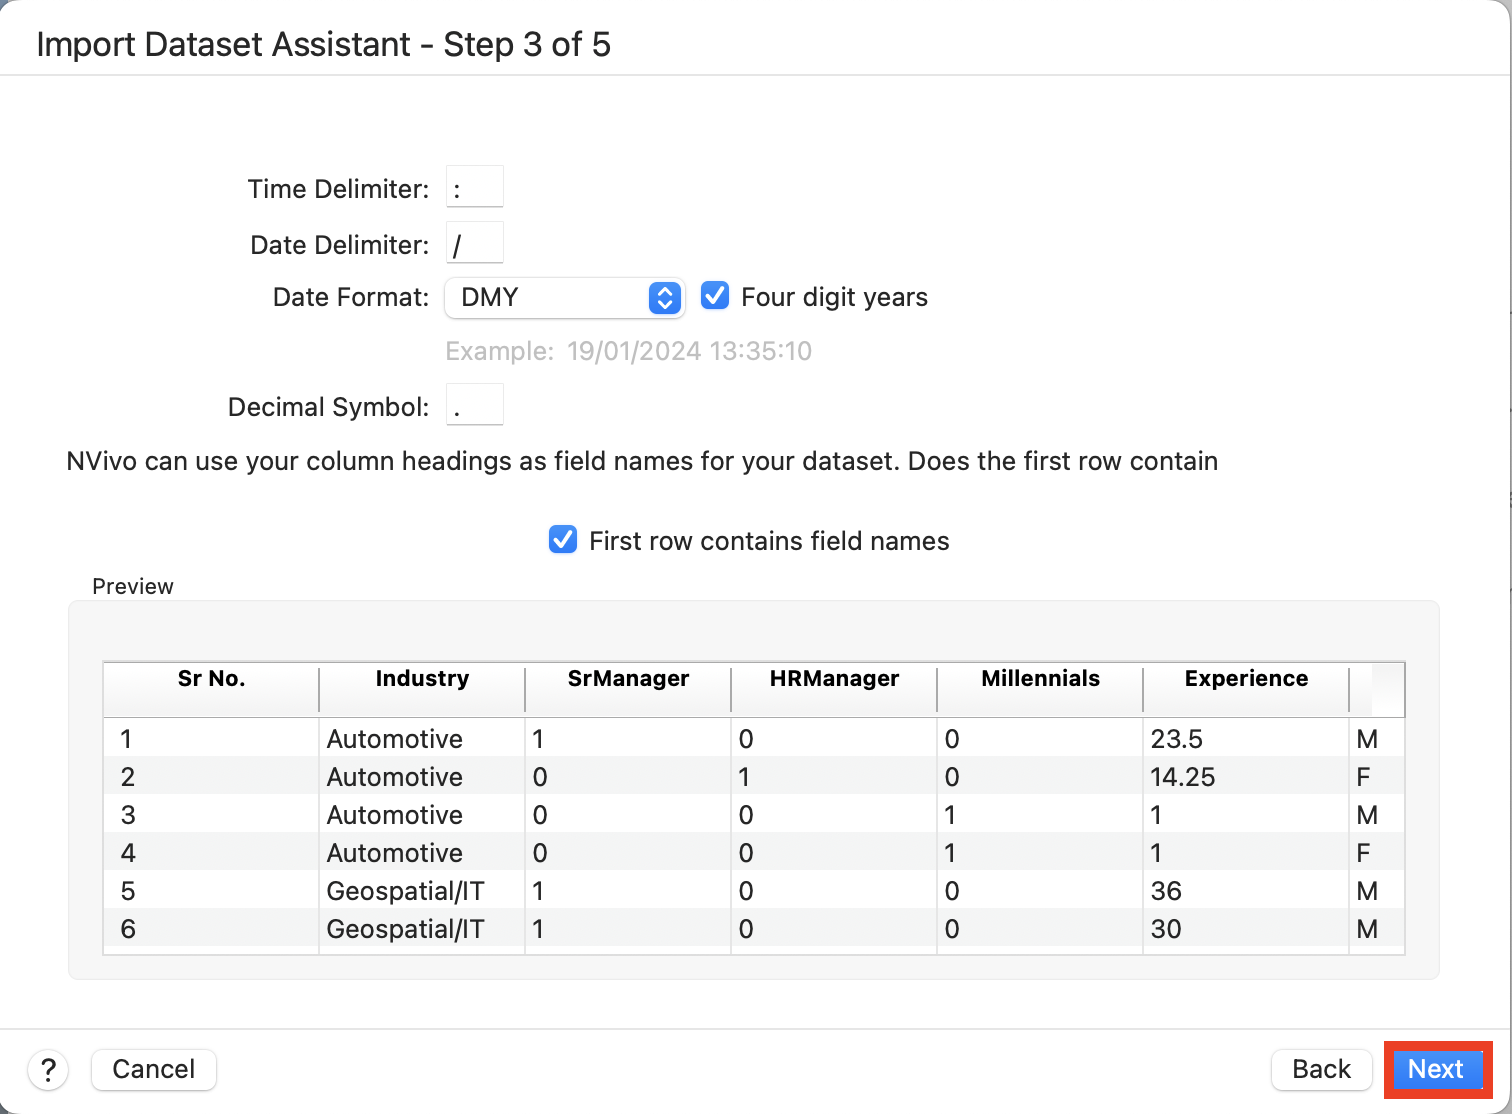
Next it checks the data format. Our first row is our column headers, so we can keep the default. We don’t have any dates in our survey, so again we can keep the default, but if you are working with dates, then take a look at this option. Click on Next.
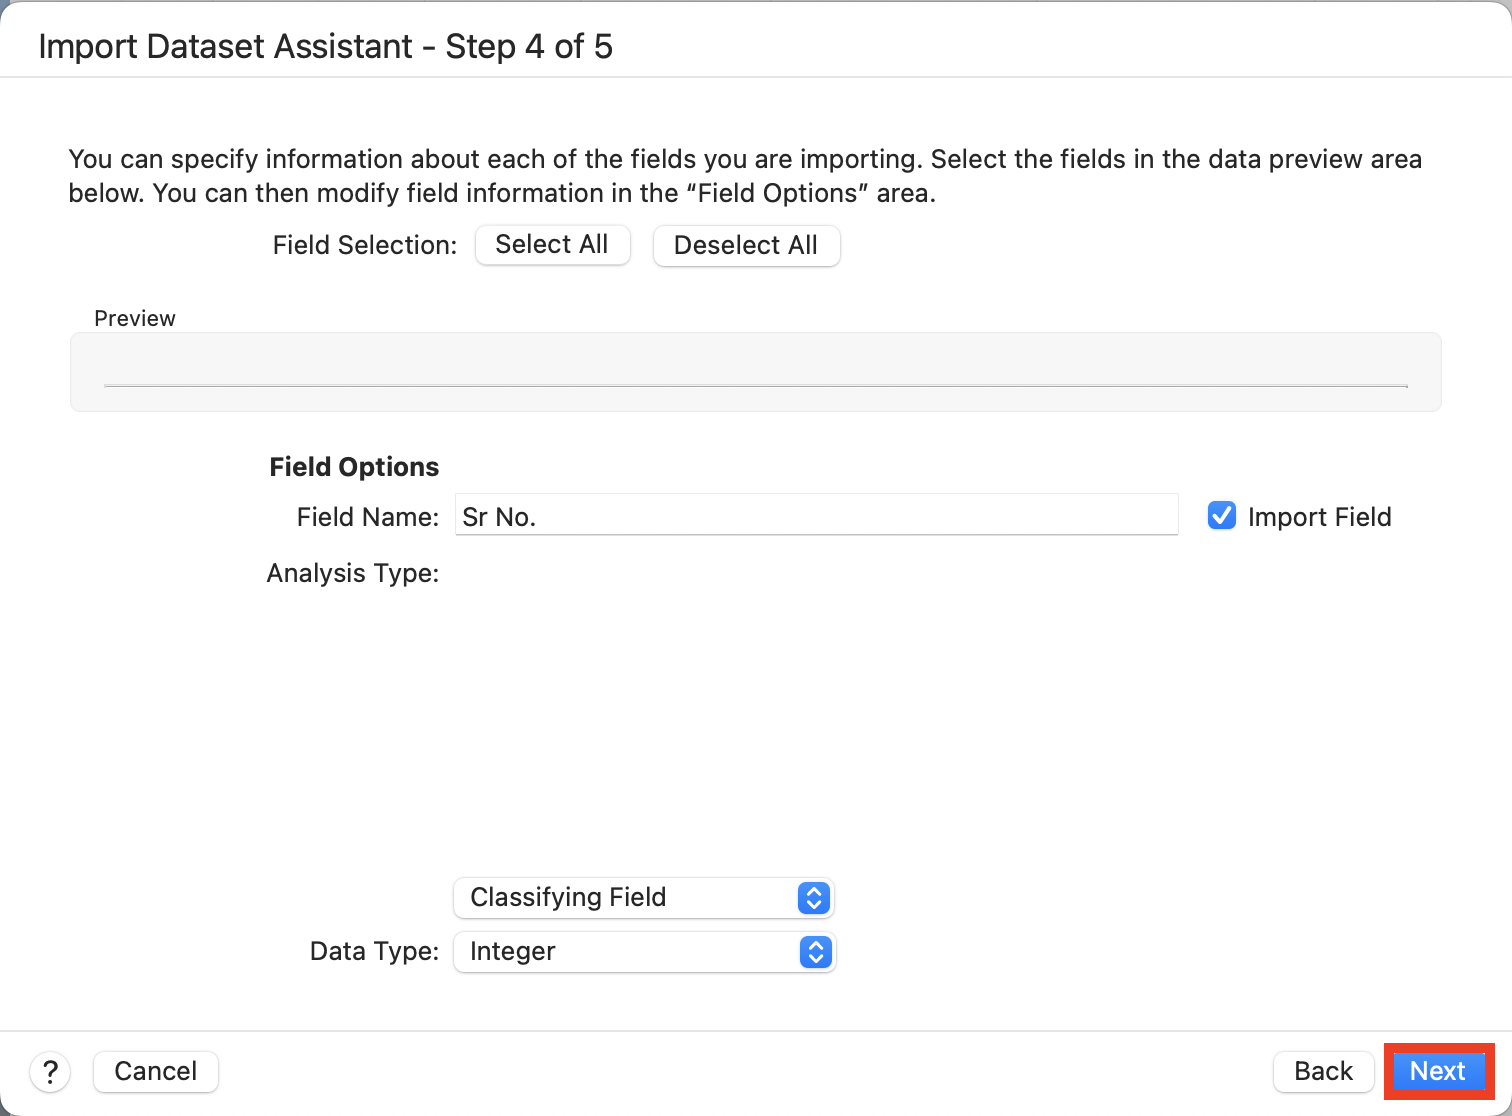
This screen presents you with how NVivo has interpreted the different columns in the dataset – that some have codable content, for example. Keep the defaults on the next screen and click on Next.
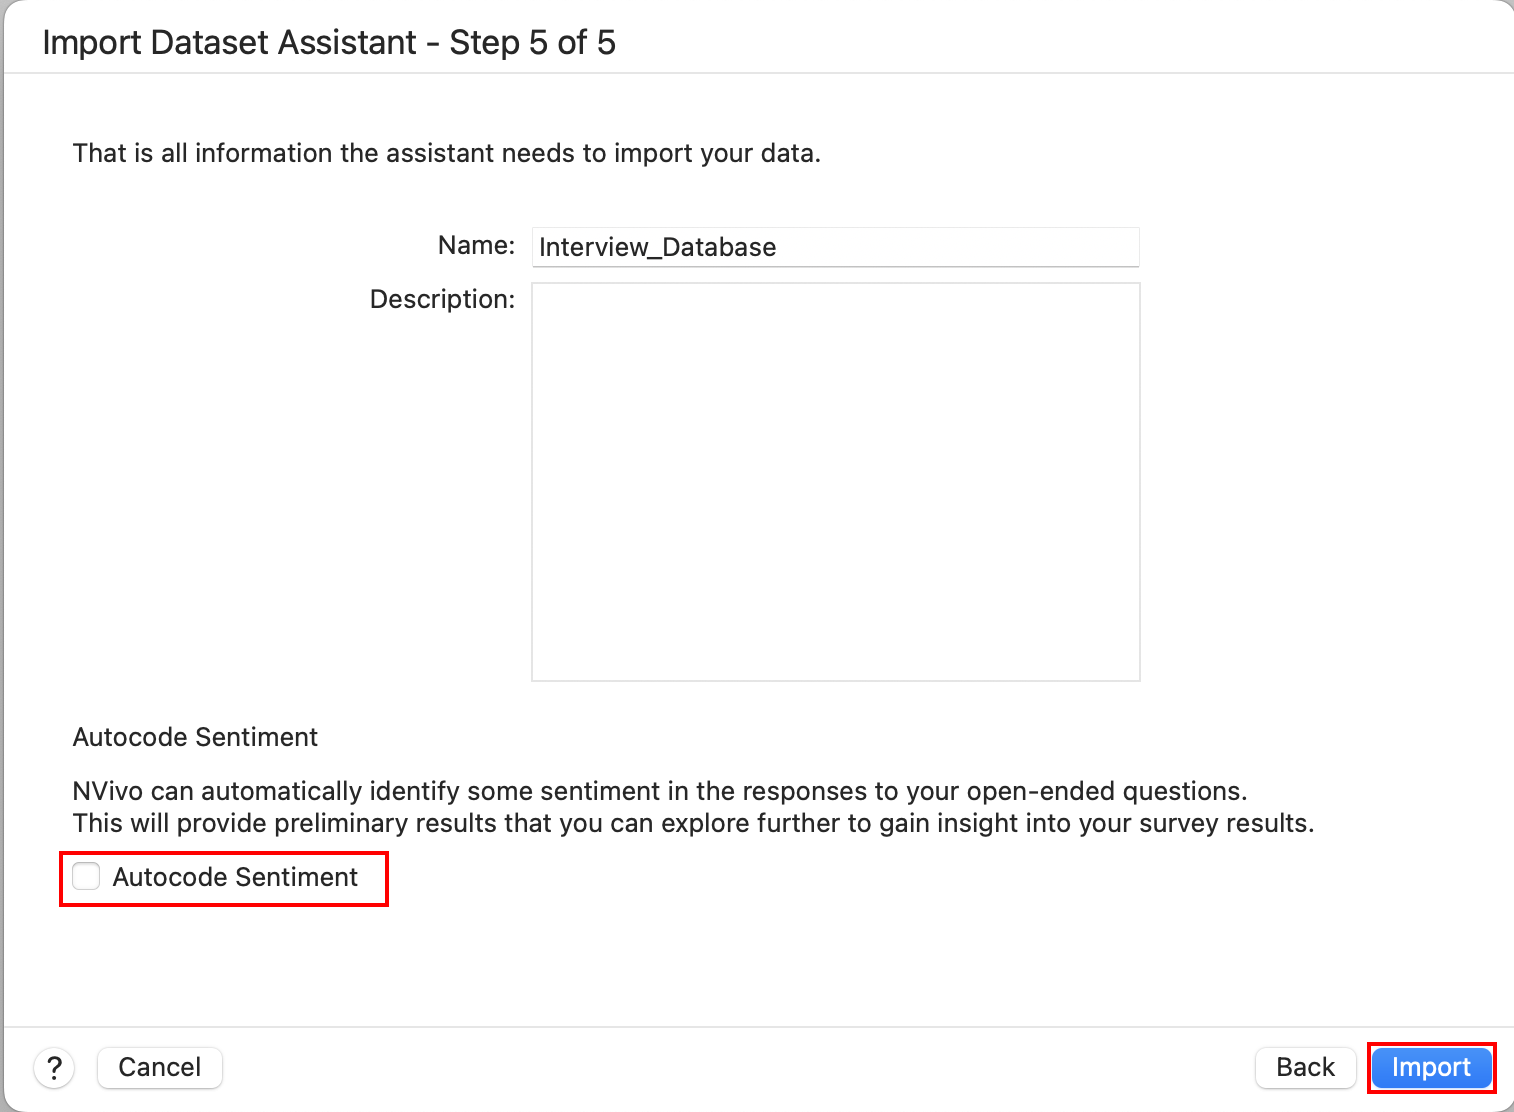
The next screen provides you an option to autocode responses by sentiment (i.e., positive or negative). Sentiment can be useful, especially if you have a huge amount of survey responses and won’t be manually coding all the answers, but want to get a sense of the content. For example, a survey question might be – did you like a particular product, and then NVivo can code for sentiment to see if generally people liked it or didn’t like it.
Note: In order to use this autocode sentiment feature, you need to sign up for a MyLumivero Portal account. Launch the MyLumivero Portal, select Sign up now, and follow the instructions to create an account. You then will need to log into the portal with this account first, before selecting autocode sentiment in the survey import wizard. When you first start up NVivo, log in by selecting File->Log In. Keep in mind, though, that the University of Toronto has not reviewed these accounts for privacy concerns. You sign up for an account at your own risk.
In our case, let’s uncheck this option for now. Then click Import to complete importing in our data.
NVivo will open up the data when finished, as a spreadsheet display.

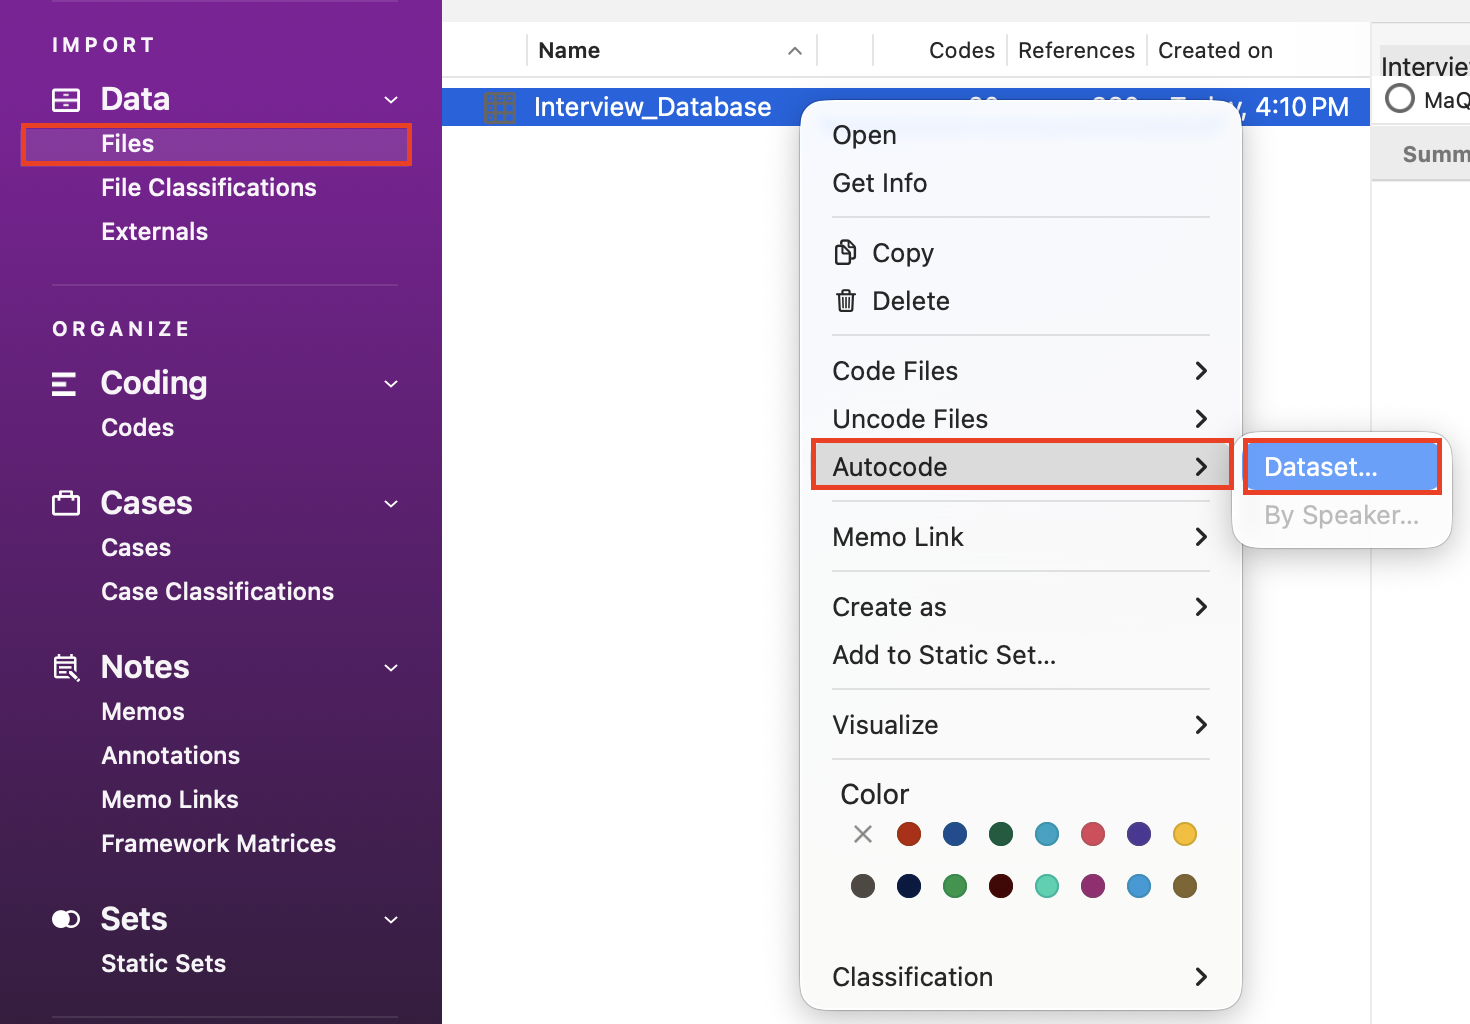
Next we can create codes for each open-ended question automatically. Then it’ll group all the responses to a particular question together in a code. To do so, hold down the Control key and click on the newly imported dataset in the list of files. Select Autocode and then Dataset…

Using the Autocode Dataset Assistant, select Code to codes for selected columns. Then click on Next.

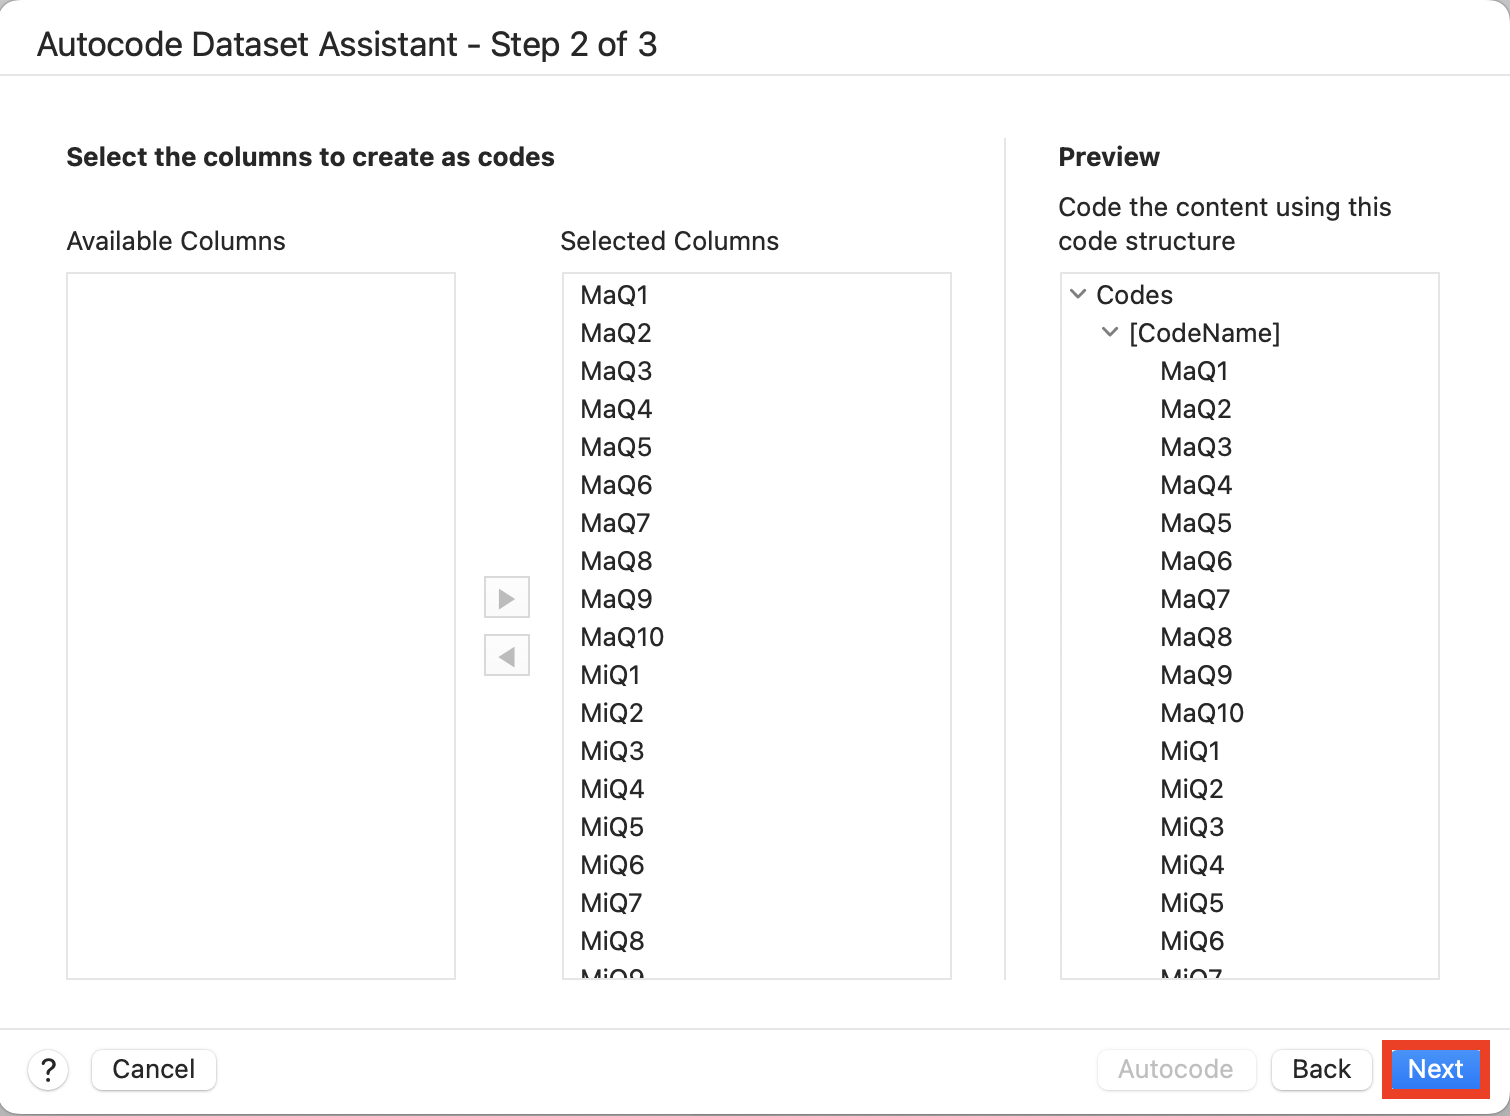
NVivo auto detects the columns that are open-ended and lists them in Selected Columns. We can keep the defaults and select Next.
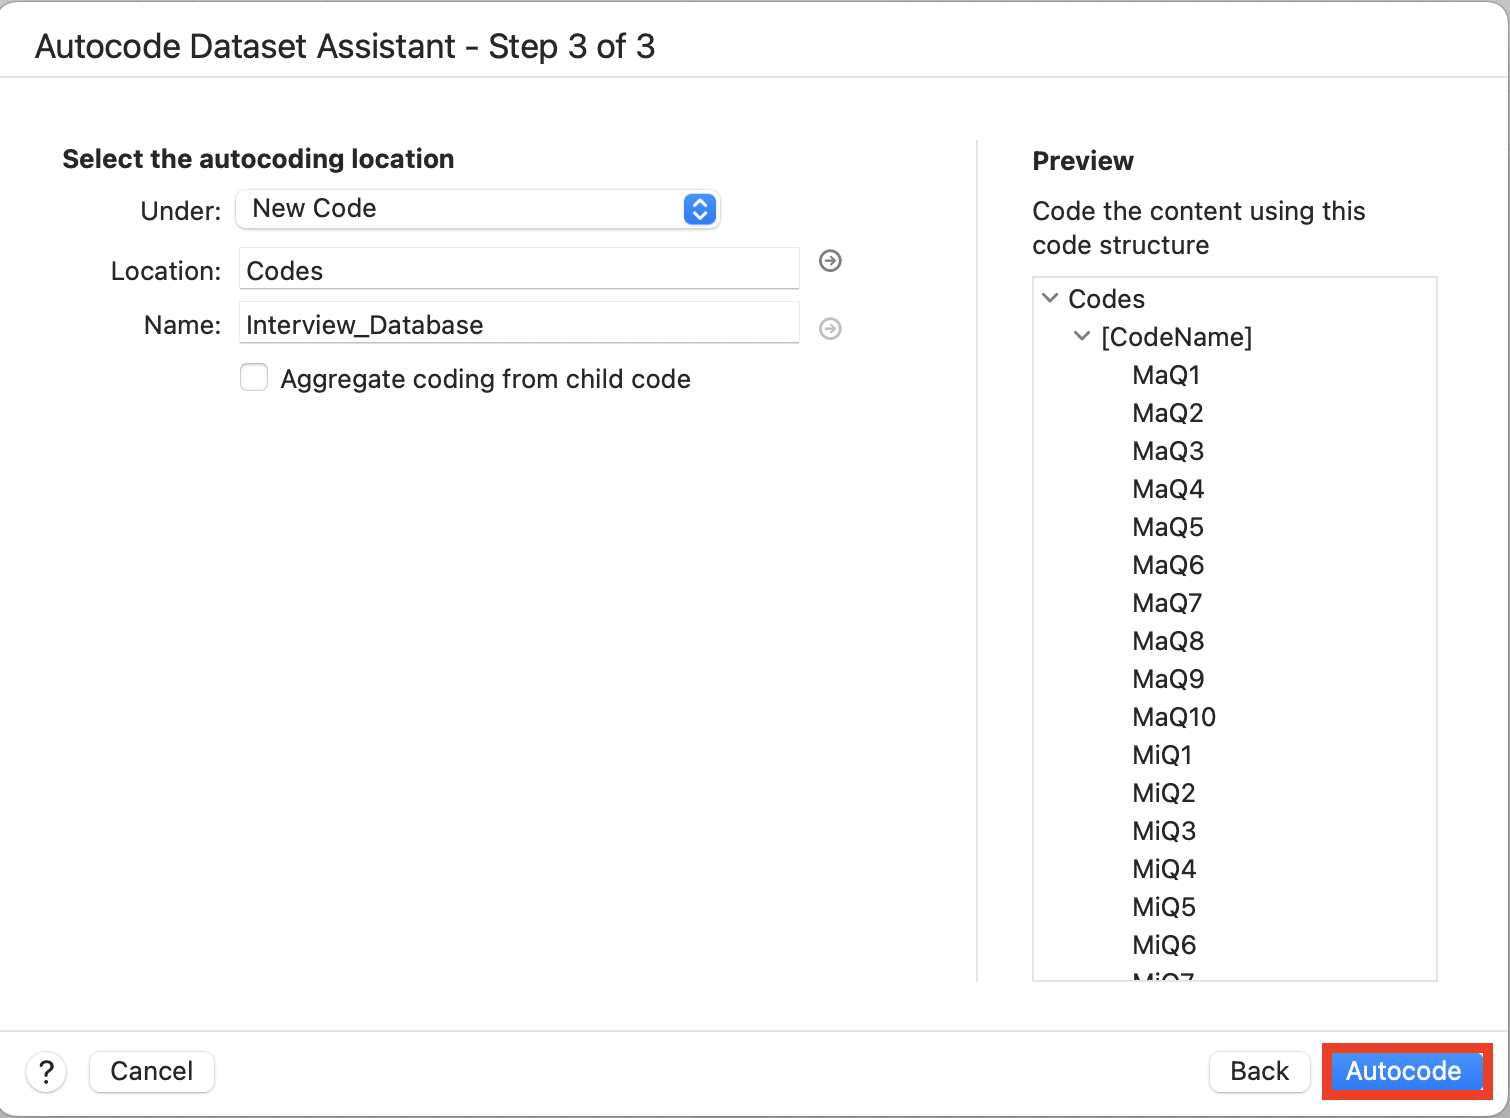
It asks if we want to put these new codes under a parent code or create a new parent code based on the name of the dataset. We can keep the defaults and select Autocode.
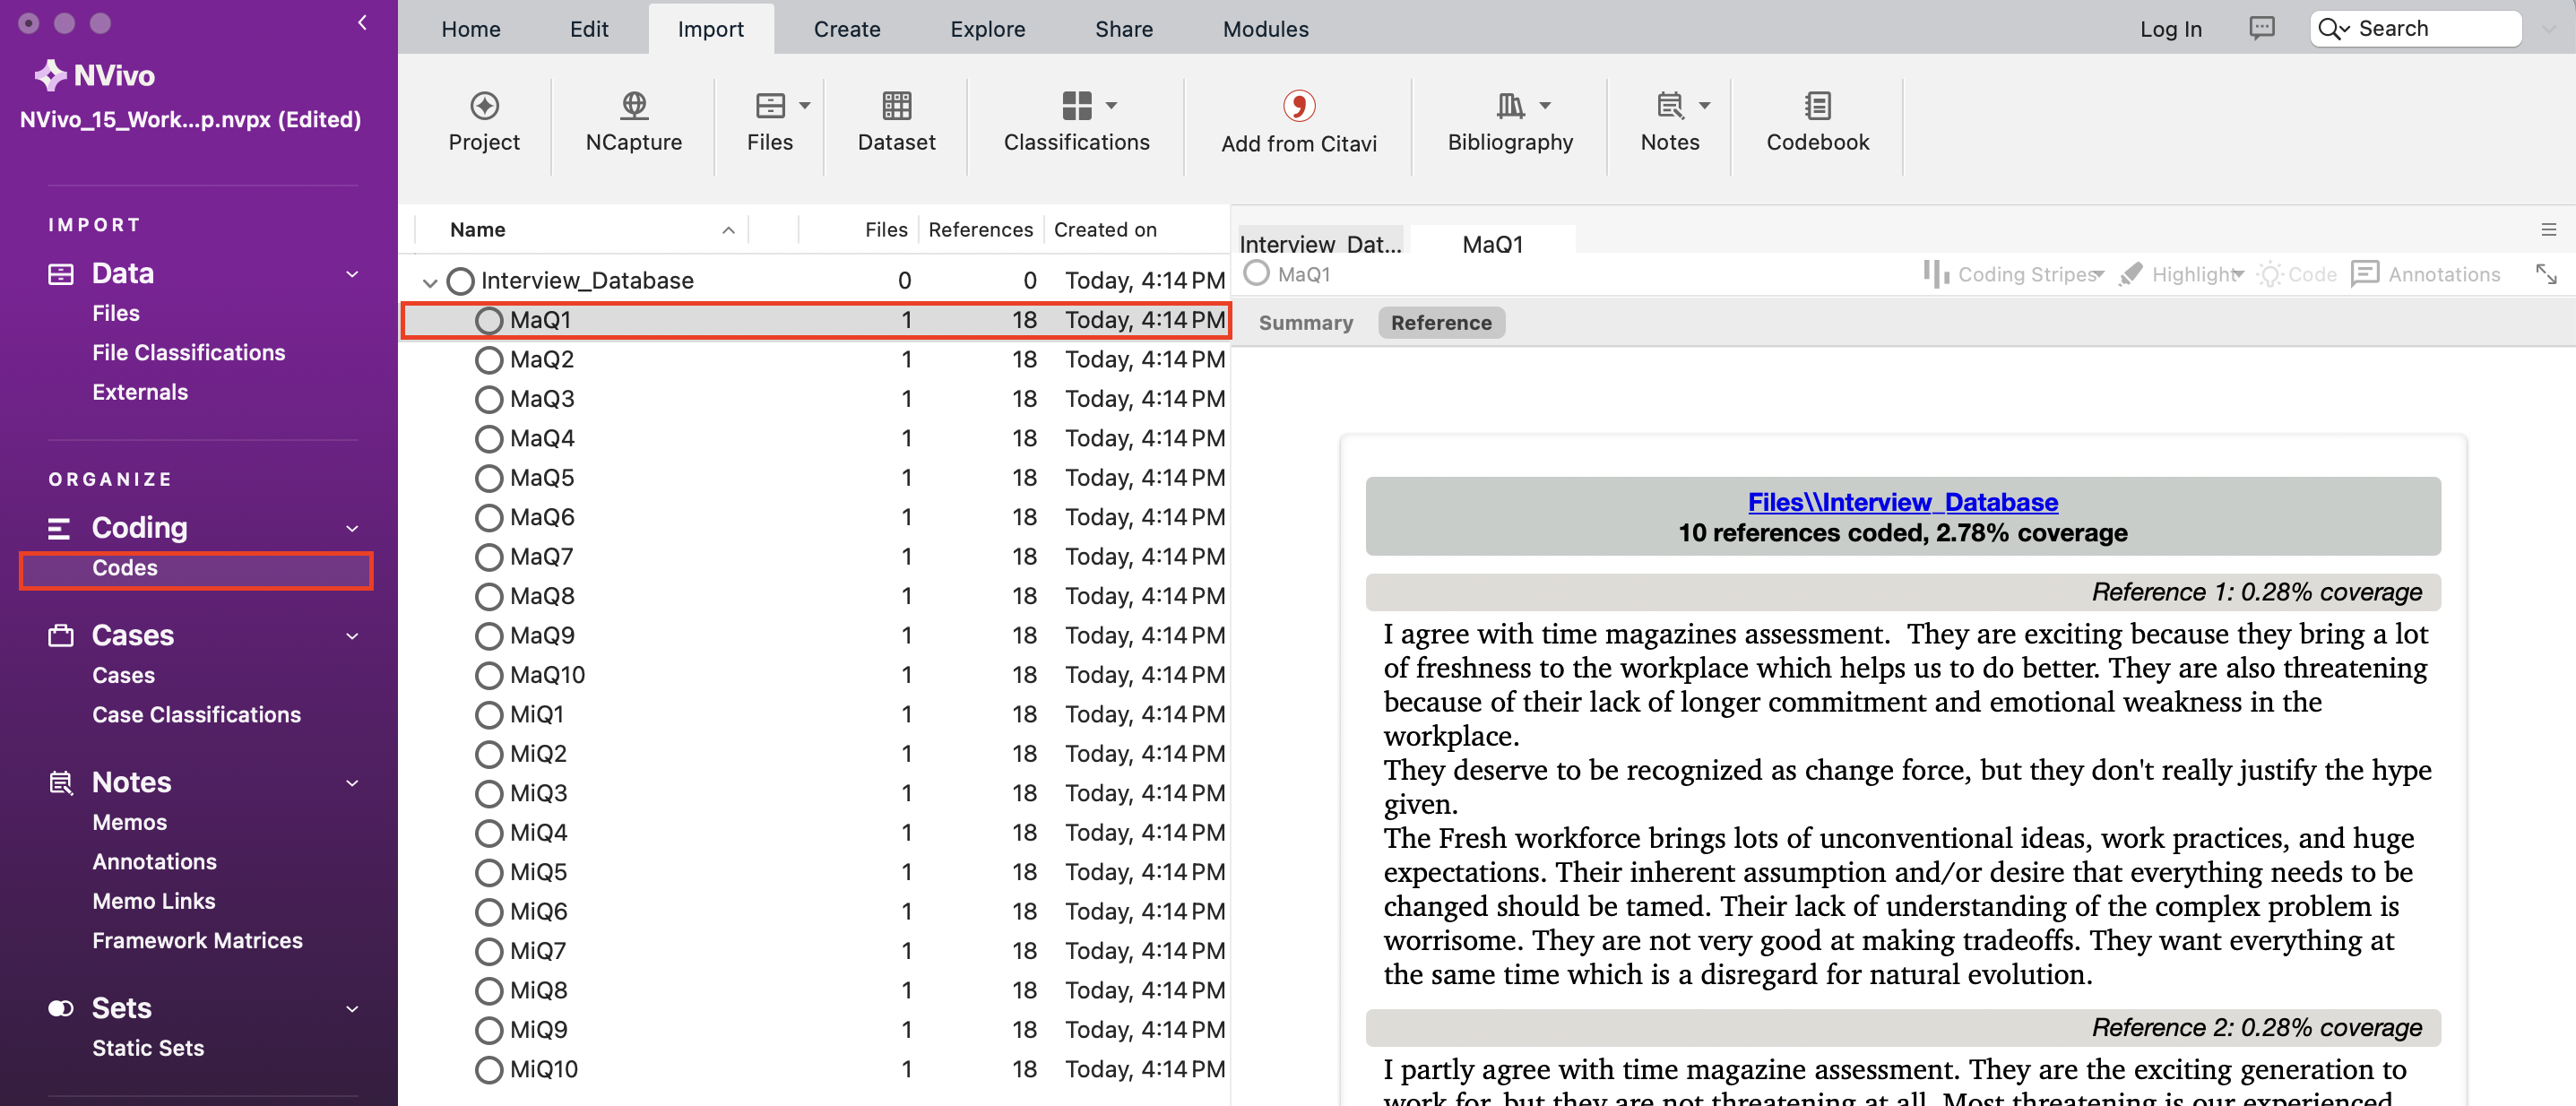
Once completed, from the left menu, you can click on Codes and expand the Interview_Database code to see all the auto generated codes. Double click on one to see all the answers to that particular question in the survey.
We can also use NVivo to auto create cases, one case for each survey respondent. To do so, from the left menu, go back to the Files folder. Hold down the Control key and click on the newly imported dataset once again. Select Autocode and then Dataset…
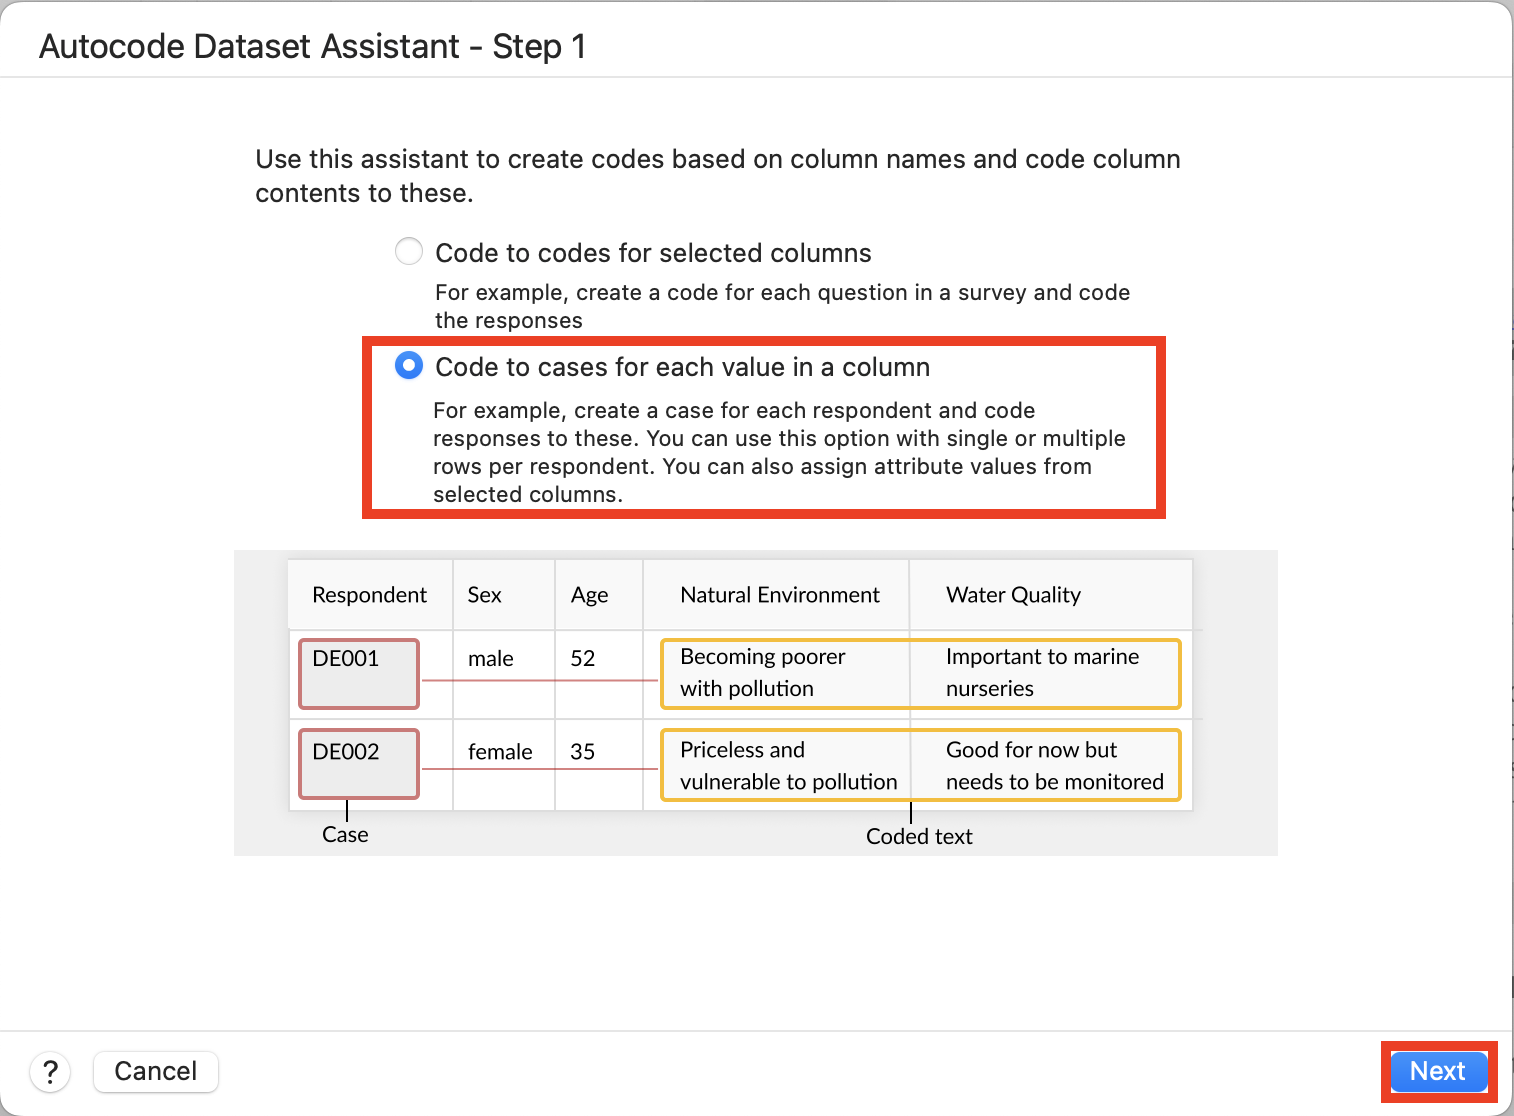
This time, select Code to cases for each value in a column and then select Next.
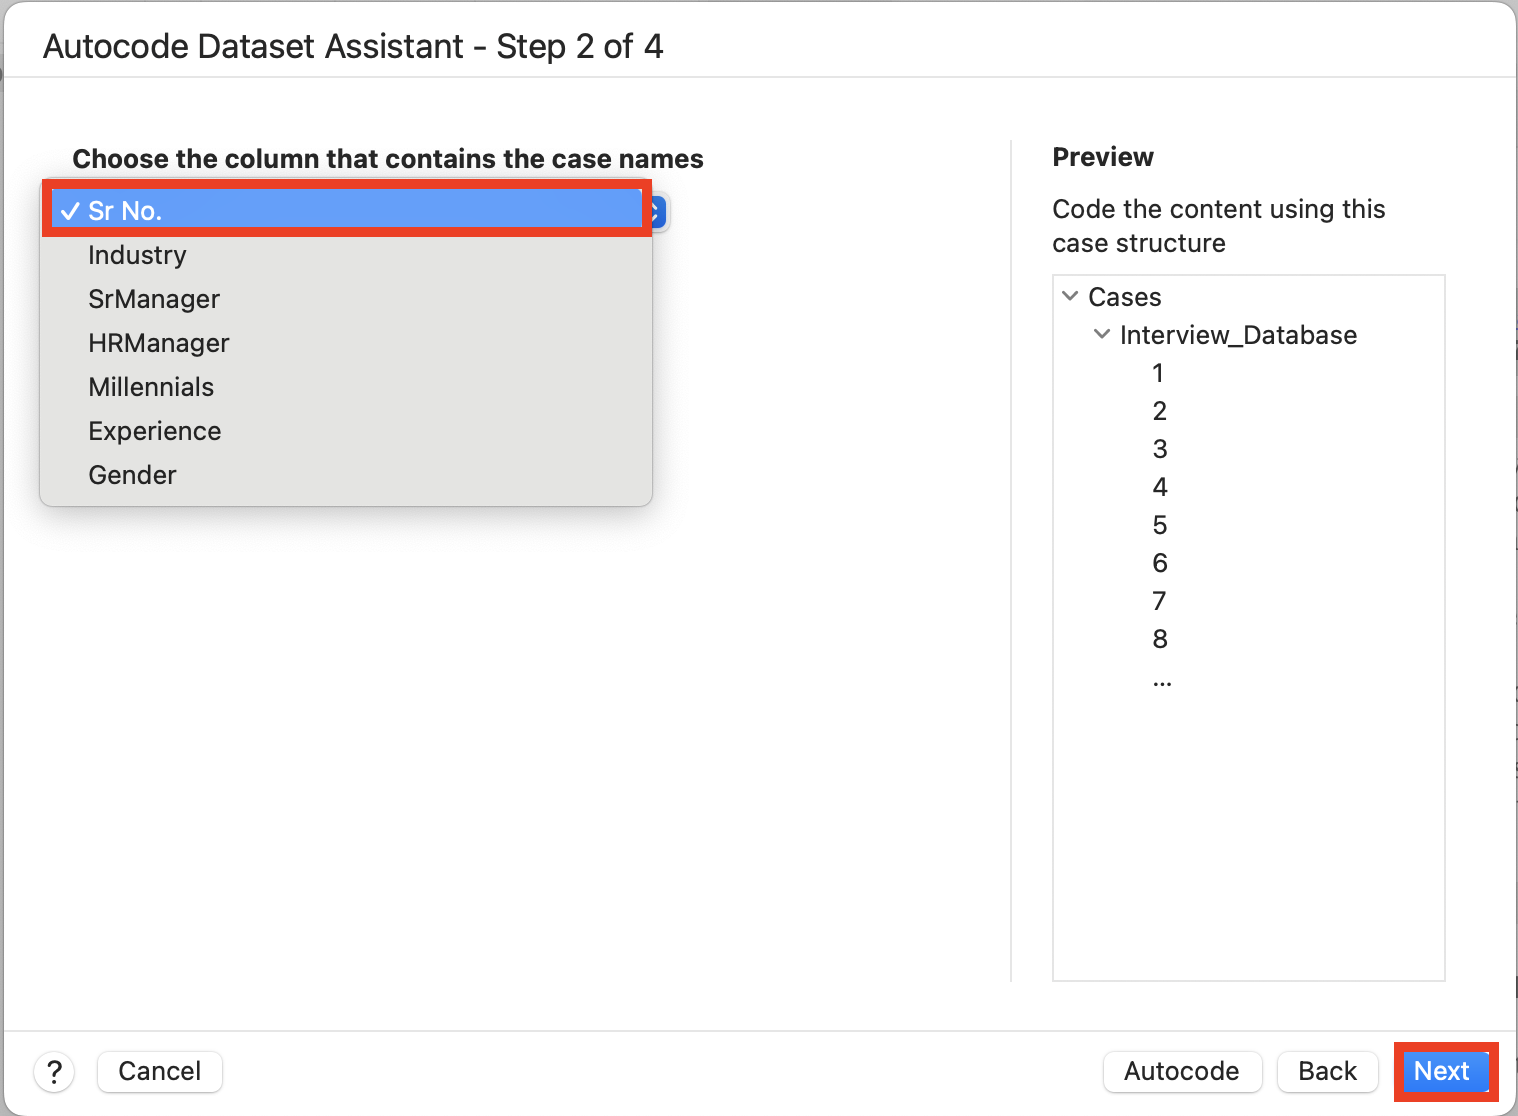
For Choose the column that contains the case names, select Sr No. to select the ID numbers we can use to identify survey respondents. Then select Next.
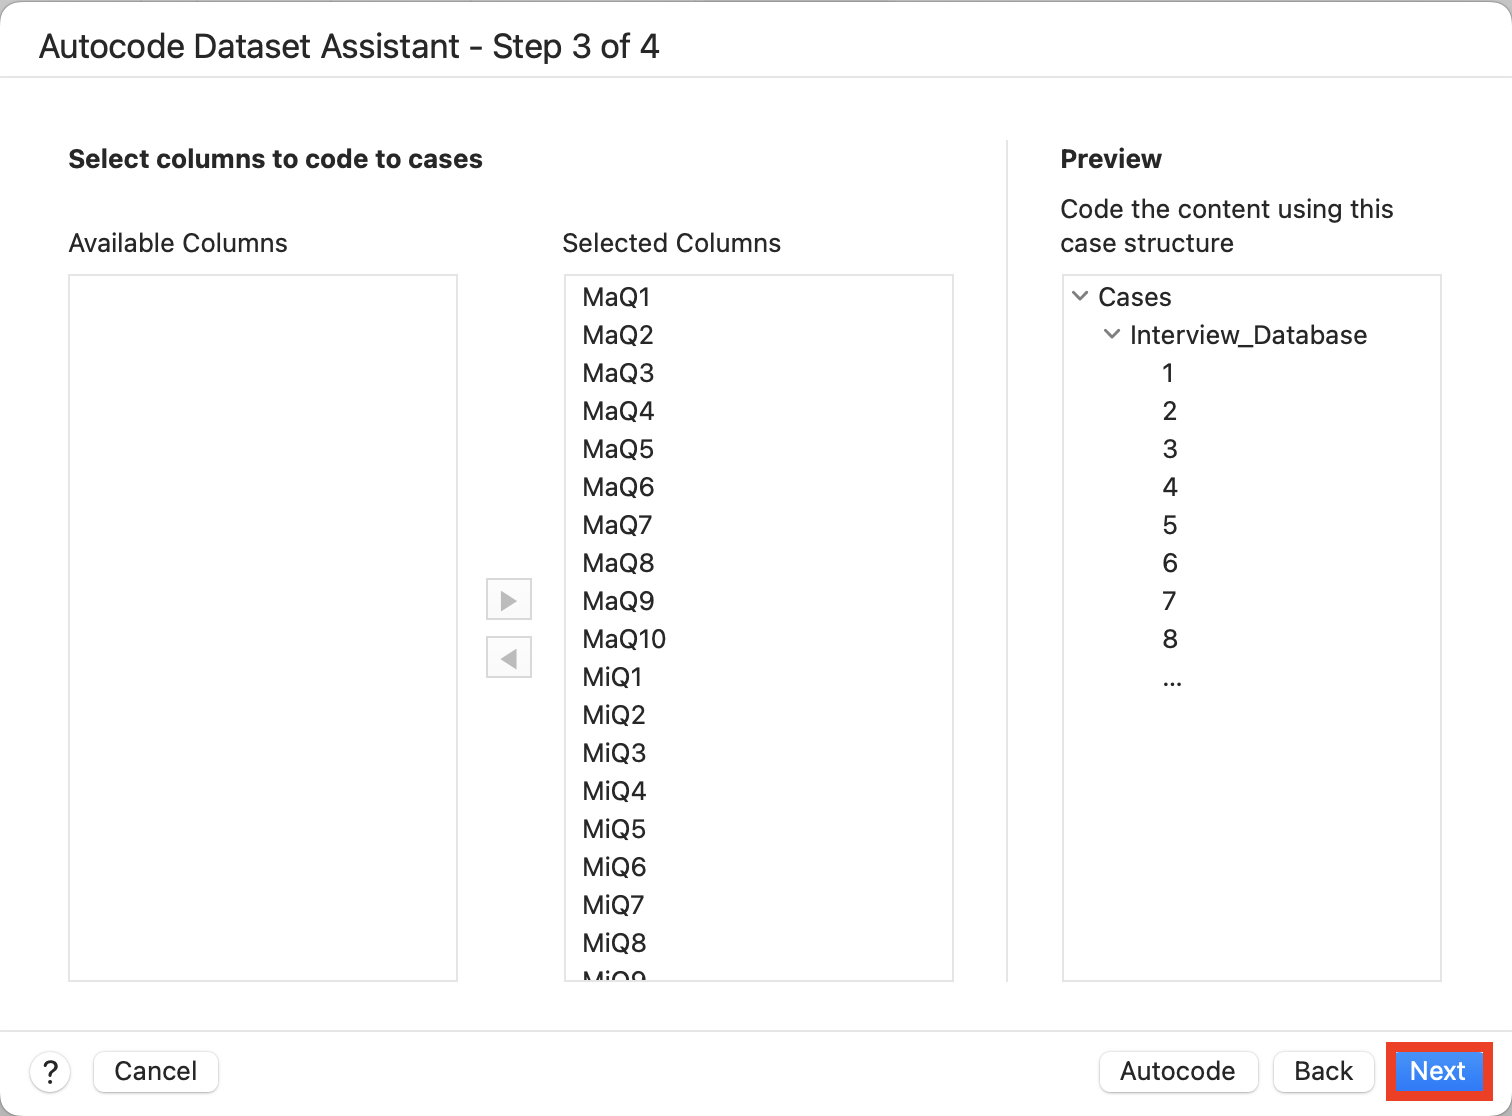
Next it will suggest coding all the open-ended responses by these newly created cases. We can keep the defaults, so select Next.
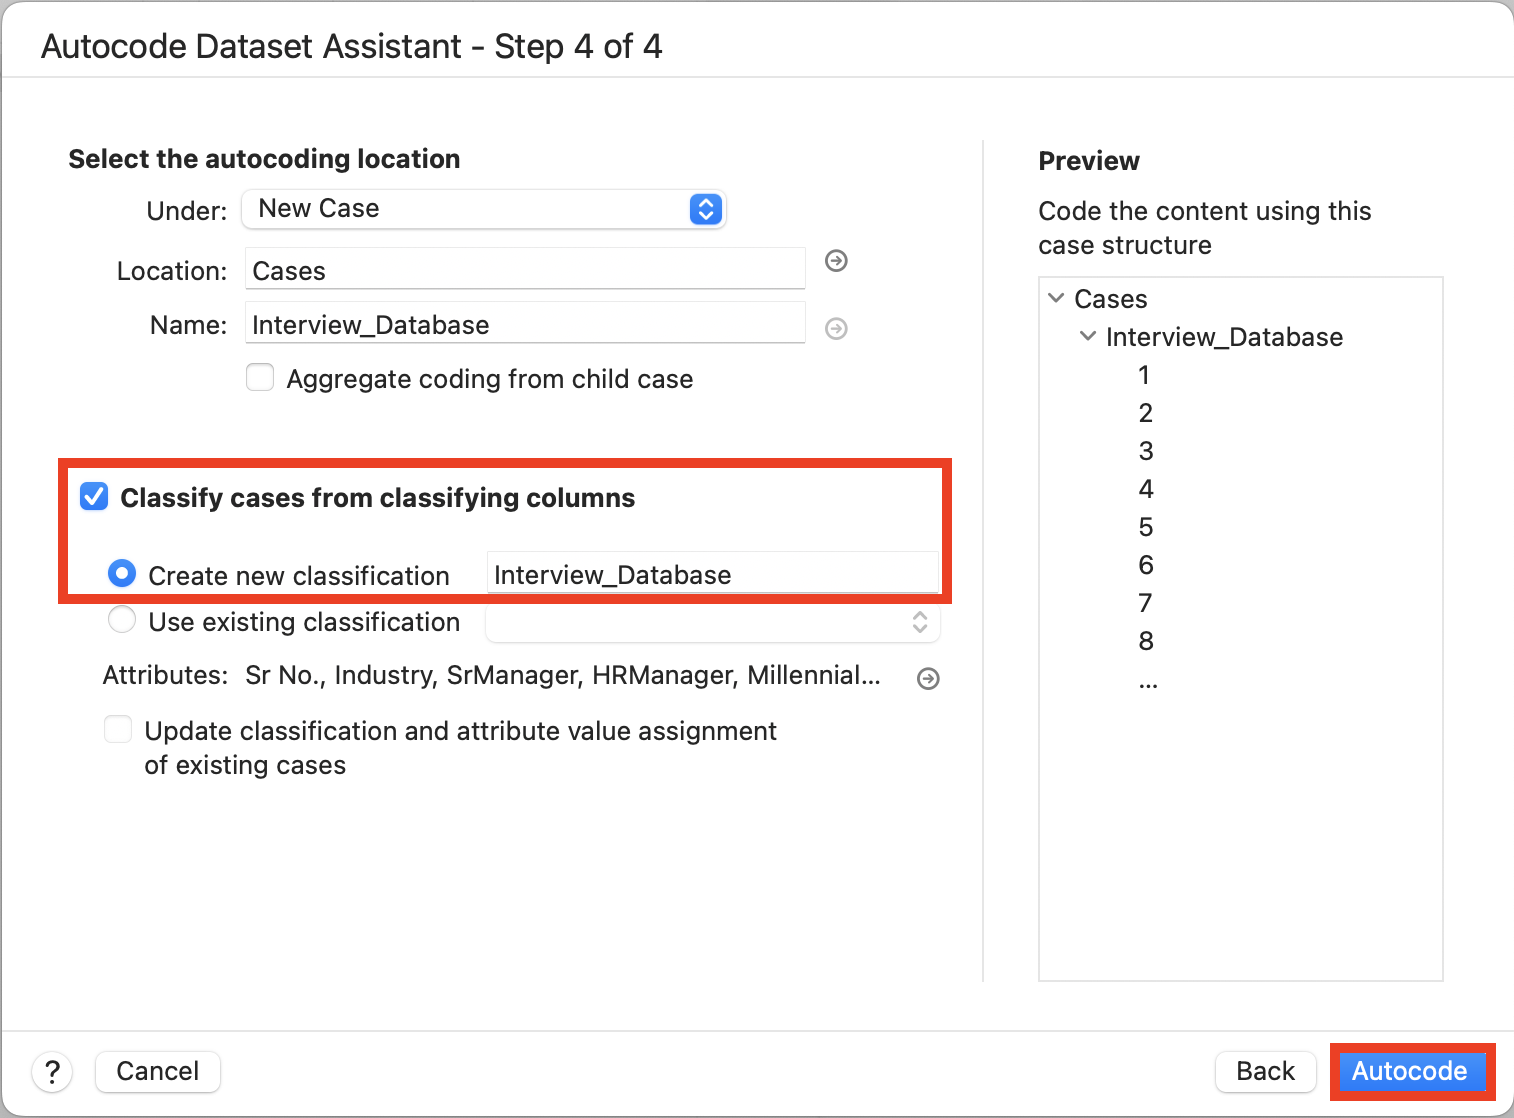
Select Classify cases from classifying columns. The defaults below this will create a new case classification using the closed-ended variables in your dataset as attributes, such as Industry, etc. Then select Autocode.
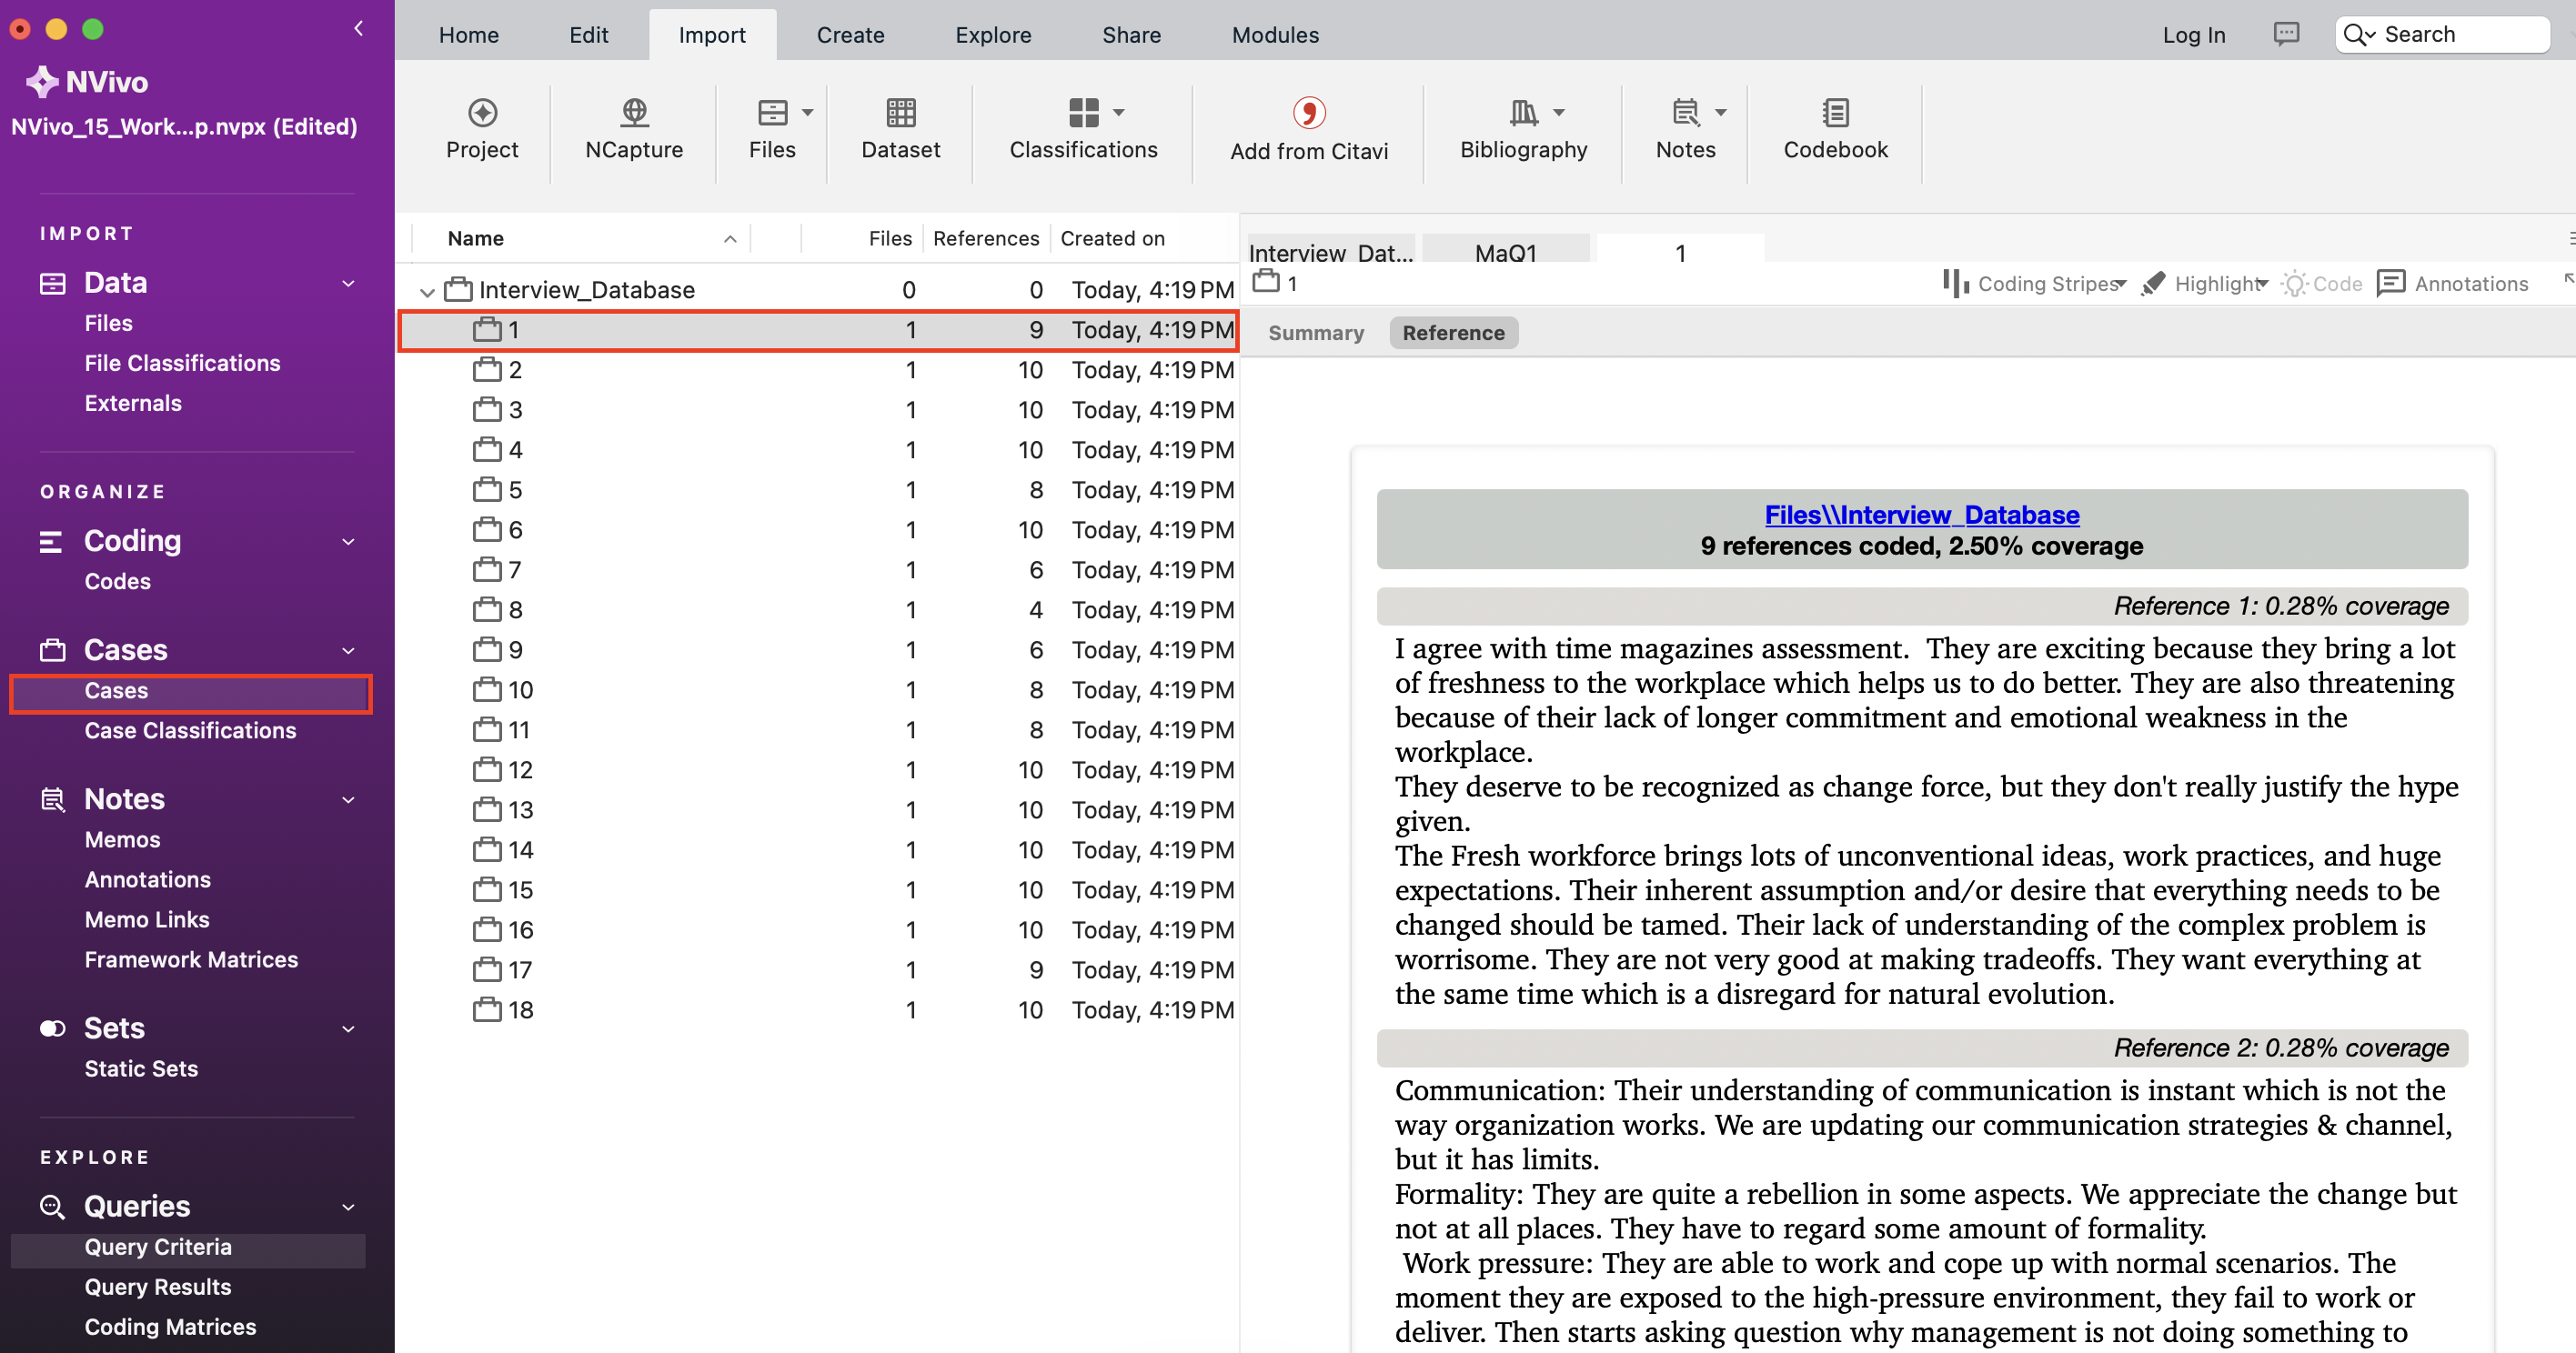
From the left menu, go to Cases, and expand Interview_Database to see a list of all the cases created (one for each survey respondent). Double click on one of them to see all the responses to the survey that respondent provided.
From the left menu, go to Case Classifications, and double click on Interview_Database. Select Classification Sheet just above the data to see a spreadsheet of the attributes for each case.
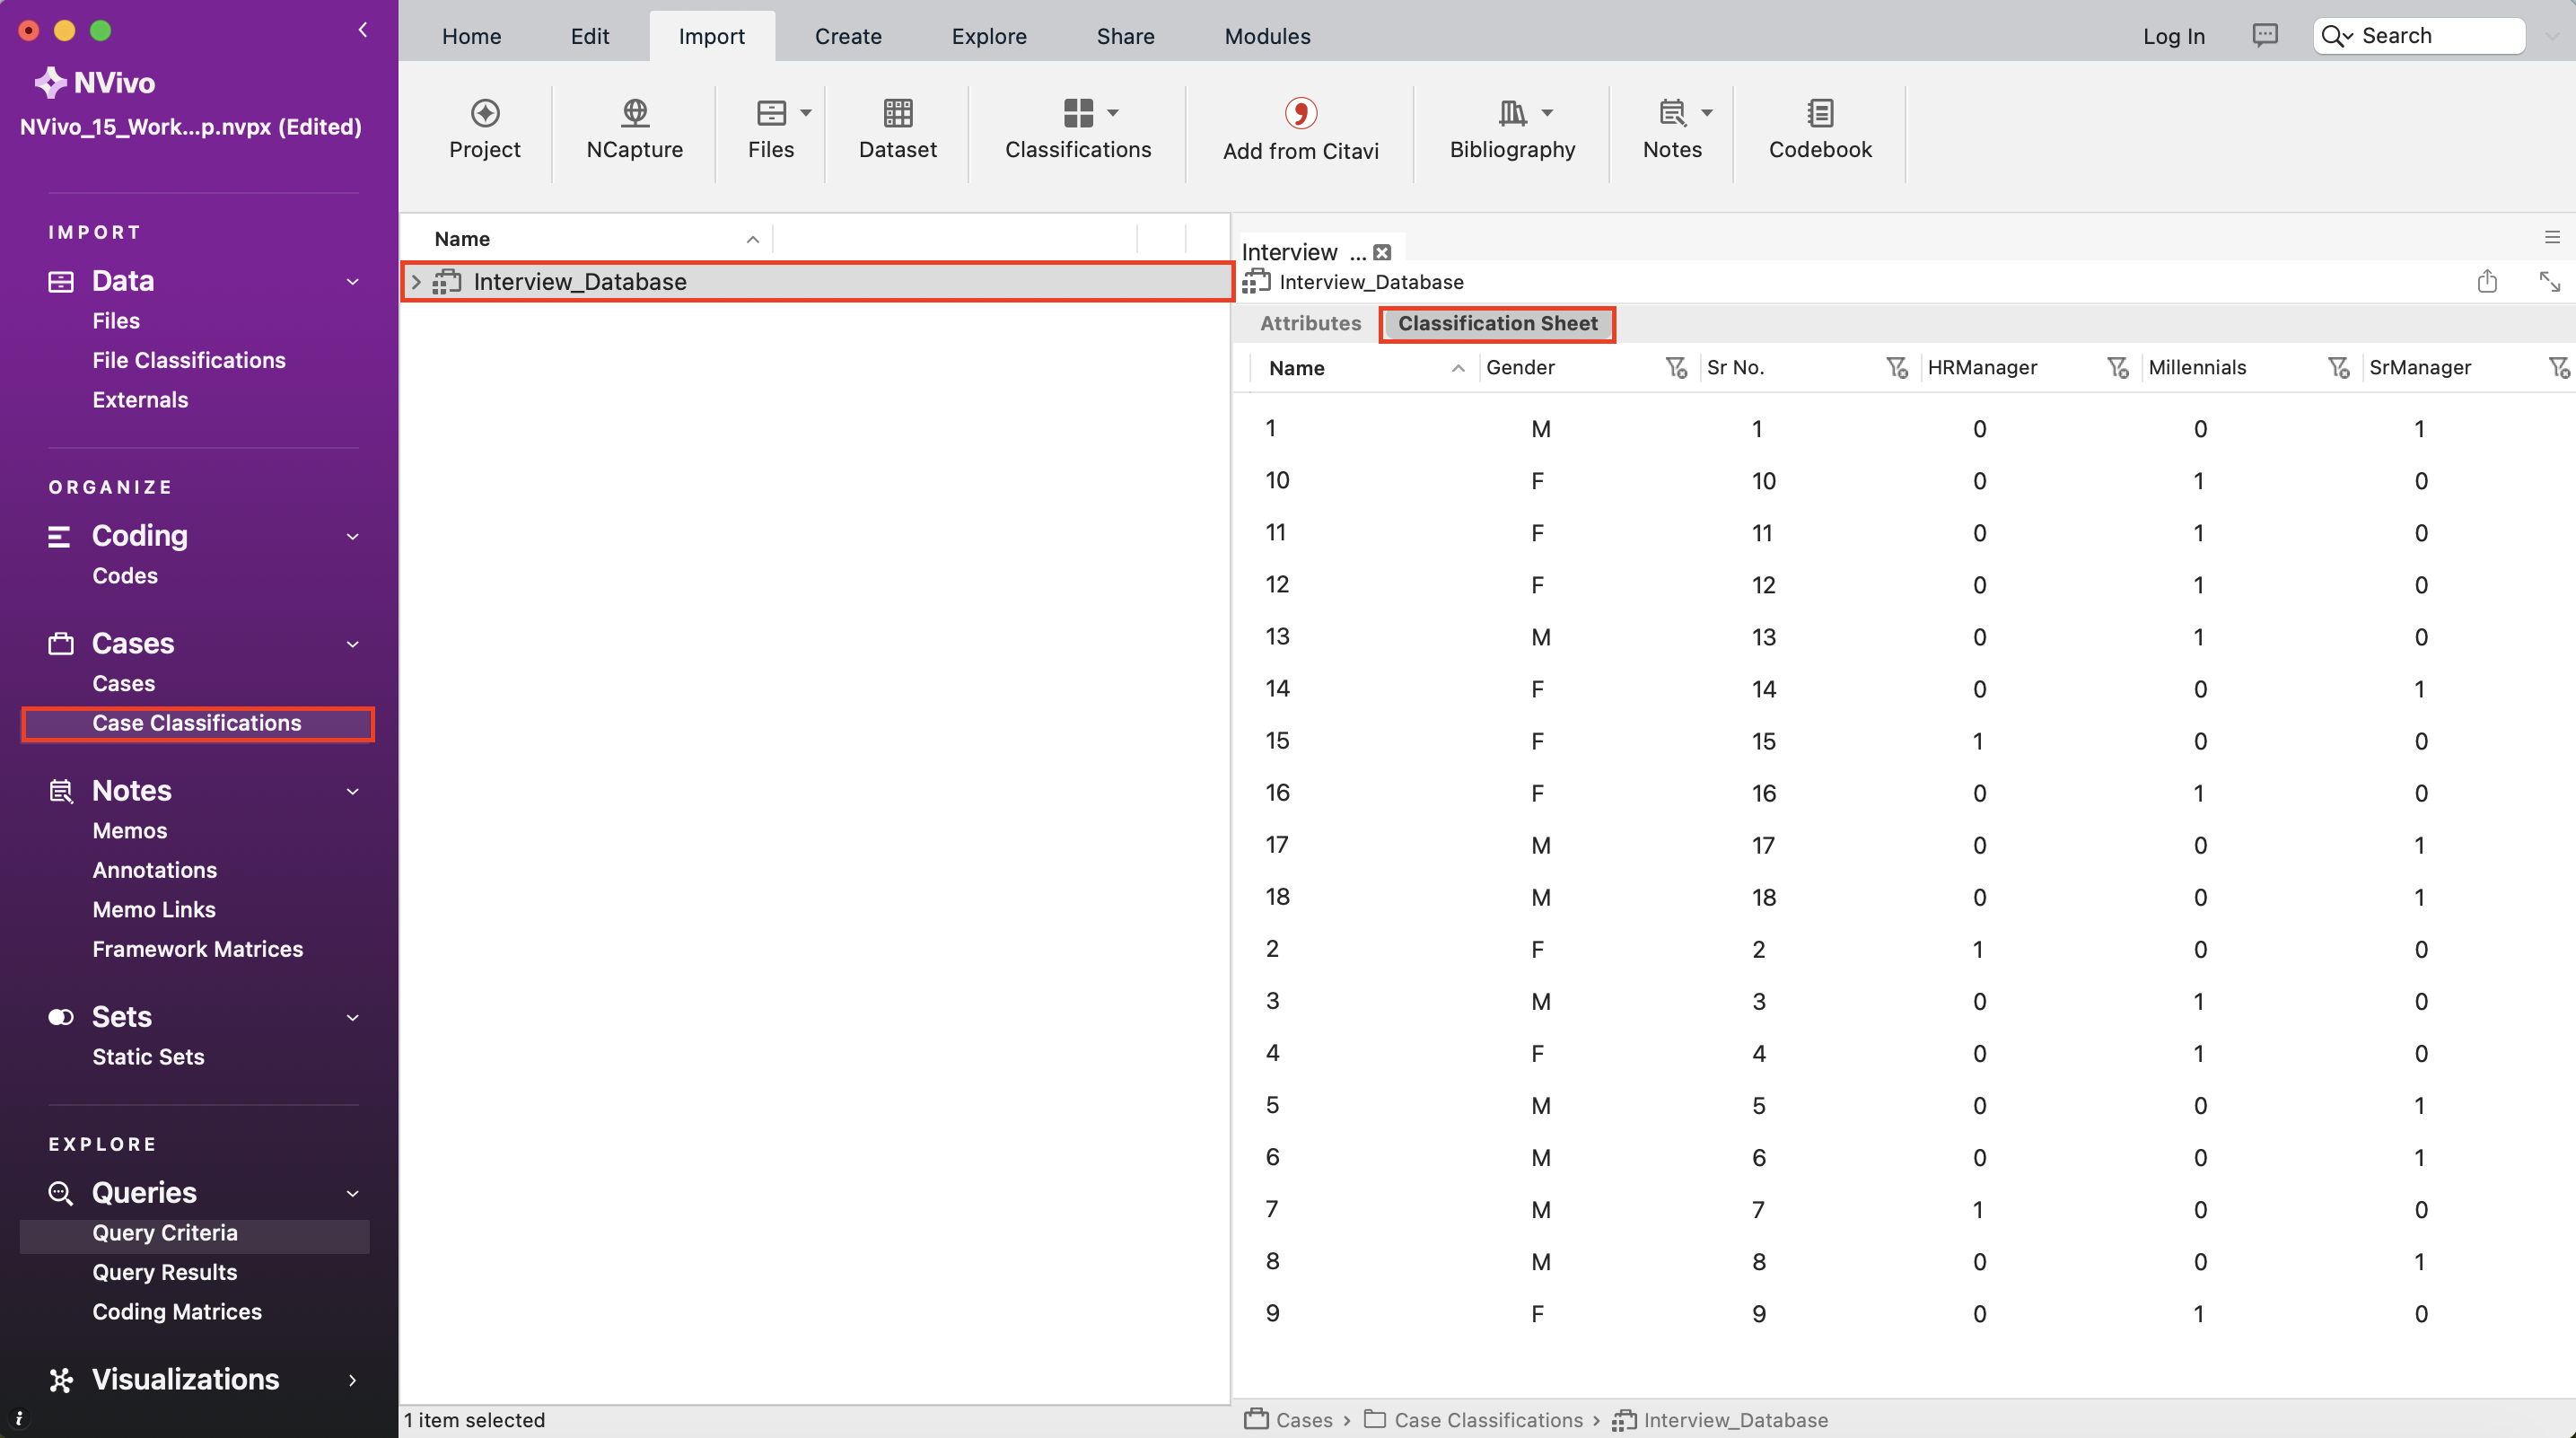
To summarize, when importing the survey dataset, NVivo will help us create a case for the survey respondent. For each closed-ended question that it detects, it will capture that information about the survey respondent as case attributes. It will import each open-ended question as spreadsheet content that can be coded, and automatically code each question’s response with a new code for that question. You can now continue to code the open-ended question responses to further analyze the survey data, or run queries to gain insight into the data.
Resources to Learn More
Visit our Introduction to NVivo 15 for Mac page for more information and tutorials on NVivo 15!
Check out this NVivo help page to explore all the file types you can import into an NVivo project.
Technique: Qualitative Data Analysis | Tools: NVivo