Sample Python Code
Please find below two examples of querying the data using Python, one in Terminal and one via Jupyter Labs. Note that once you’re fully online in either system, the actual coding will be the same.
Running Python code in Terminal
- Once PyArrow is installed, simply type
python3within your virtual enviromment to begin writing code. To run code line by line in order to examine the contents of a sample file within a dataset:- Type
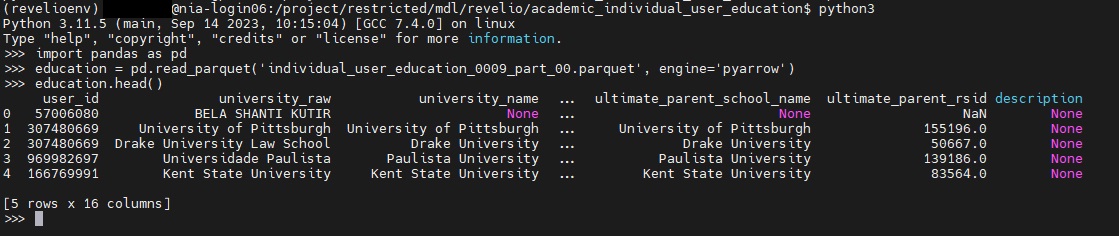
python3to run Python code within your environment - Next type
import pandas as pdto import the pandas module under the shorthand pd - Next type
education = pd.read_parquet('individual_user_education_0009_part_00.parquet', engine='pyarrow'). This is creating a dataframe - panda’s version of a spreadsheet - , and assigning it to a variable called education. This will allow us to visualize, sort and query our data as an object within python. - Next type
education.head(). The .head() function in pandas provides a preview of the first 5 rows of our dataframe.
- You can use Pandas to filter even further, and then export any results to a CSV. For example, let’s say we want to filter for cases where the university_name is equal to “University of Toronto”:
- Create a new dataframe containing only those results:
toronto = education[education['university_name'] == 'University of Toronto'] - Export those results to a csv:
toronto.to_csv('toronto_education.csv')
- Create a new dataframe containing only those results:
- Type
- Sample code for filtering across several different Revelio labs datasets can be found under Running Python code in Open OnDemand below
- For more help on using Pandas to subset your data:
- Pandas is an excellent library with many function that are tailored for working with tabular data files such as the Revelio Labs datasets. More detailed information on Pandas can be found in their documentation.
- For more detailed examples of querying tabular data files in order to subset / extract a smaller selection as a CSV, please see the sample notebook files available for download at the bottom of our Data Axle tutorial.
- Instead of running code line by line, you could also choose to upload a script and run this within the environment. In order to do this on a Windows machine:
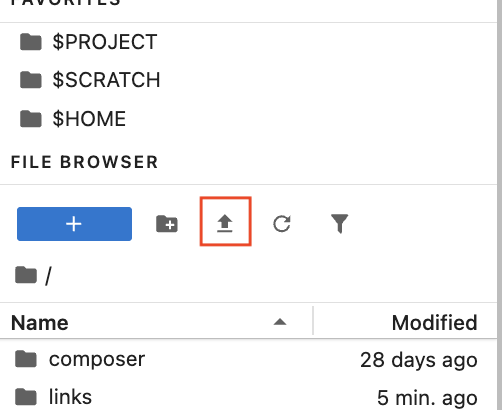
- From the MobaXterm interface, you should see a sidebar to the left of your terminal window. Click on the orange globe icon on the far left to open the file explorer tab. This should now list all the files in your personal directory on the Trillium server
- Click on the upload icon at the top (looks like an arrow pointing up)
- You should be prompted to select the file you want to upload from your local computer. Select the file and then click on OK
- Make sure your python environment is activated, and type
python [nameofyourscript].py
- In order to upload a script on a Mac:
- Open a new Terminal window that is not connected to Niagara (ie. your local directory), and run the following command:
scp /your/local/directory/:[filename and extension] <computecanadausername>@trillium.scinet.utoronto.ca:/home/[firstinitialofyourlastname]/<computecanadausername>/<computecanadausername>.Note: If you are not the Principal Investigator ie. your account was sponsored by another user, you’ll need to substitute that person’s username in place of the first, as well as their first initial in [firstinitialofyourlastname]. In this case: `scp /your/local/directory/:[filename and extension] @trillium.scinet.utoronto.ca:/home/[firstinitialofyoursponsorslastname]/ / ` - For example:
scp /Users/user/Documents/SciNet/myfirstpythonscript.py doej@trillium.scinet.utoronto.ca:/home/d/doej/doej - For example, for a sponsored account (smithp sponsored by doej):
scp /Users/user/Documents/SciNet/myfirstpythonscript.py smithp@trillium.scinet.utoronto.ca:/home/d/doej/smithp - If prompted, enter your SSH key passphrase
- For example:
- Once your script has been uploaded, connect to trillium, activate your python environment, and type
python [nameofyourscript].py
- Open a new Terminal window that is not connected to Niagara (ie. your local directory), and run the following command:
Running Python code in Jupyter Labs
- Once in your Jupyter Lab notebook with pyarrow installed (using either option in the Accessing the Environment via Open OnDemand section above), type
import pandas as pdto import the pandas library, andimport pyarrowto import pyarrow - You can use the same code as above to examine individual files, for example
education = pd.read_parquet('individual_user_education_0009_part_00.parquet', engine='pyarrow') You may often, however, want to merge and filter across different datasets. For example, let’s say we want to merge position and education data, to view the most recent job data for people with a degree in Computer Science. To do this, we would want to look at both the academic_individual_user_education data, and the academic_individual_position data. Please click here to download a sample script with notes, as a getting started guide to similar queries. The script can be uploaded to your JupyterLab by clicking on the “upload file” button from your home directory
- This script:
- Reads in both files as pandas dataframes.
- Filters the education data for cases where the value of the “field_raw” column is equal to “Computer Science”
- Filters the position data to keep only the most recent position associated with each user_id. This is done by converting that field to datetime format, dropping null values, sorting by newest, and then dropping duplicate user_ids
- Merges the datasets on user_id, keeping all columns
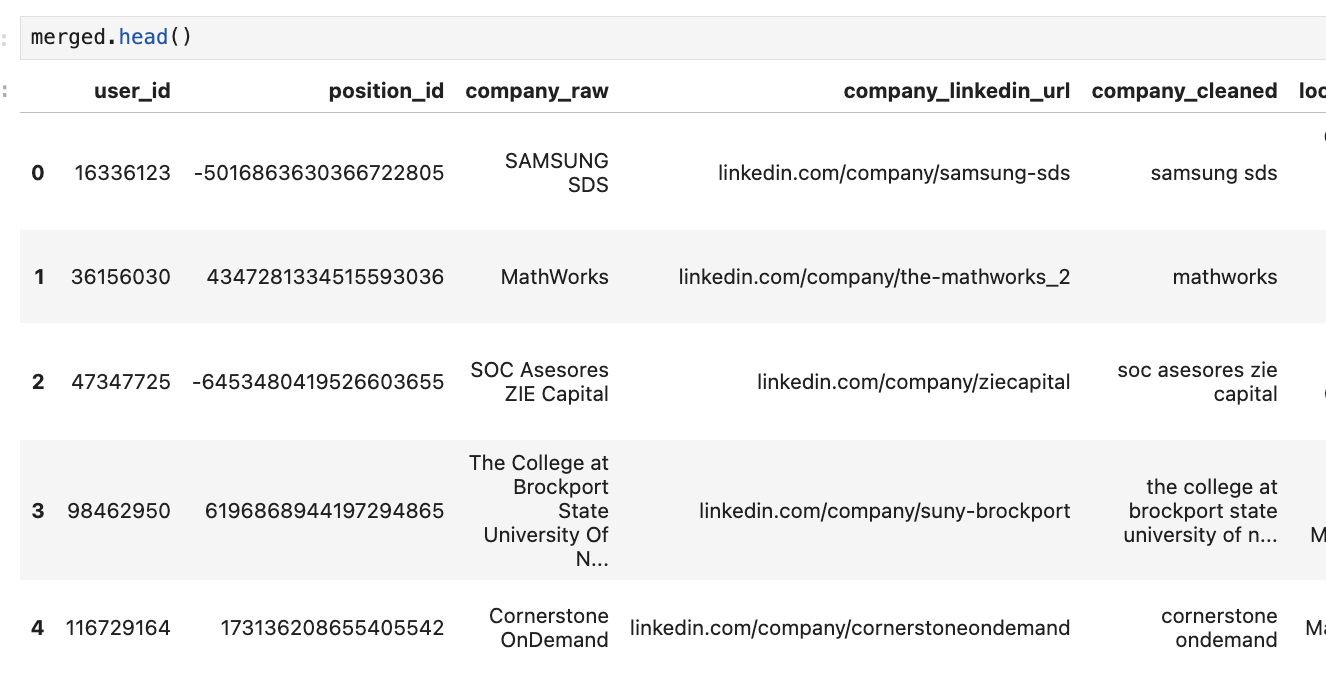
You can then query your results by using
merged.head()to preview the first few rows of data
- Note if not all columns are displayed, try using
pd.set_option('display.max_columns', None)to force python to display all columns by default
- Note if not all columns are displayed, try using
Technique: Quantitative Data Analysis