Use GeoJSON for simple visualization
Hosted feature layers are a special file format that supports ArcGIS Online’s editing functionality, analysis tools, and attachments. If you only need to visualize your data, consider using GeoJSON (a lightweight spatial data format often used on the Web) instead.
You can export data in GeoJSON format from ArcGIS Pro. Alternatively, if your data is already in ArcGIS Online, you can create a GeoJSON export and then delete your original hosted feature layer.
Creating a GeoJSON file in ArcGIS Pro
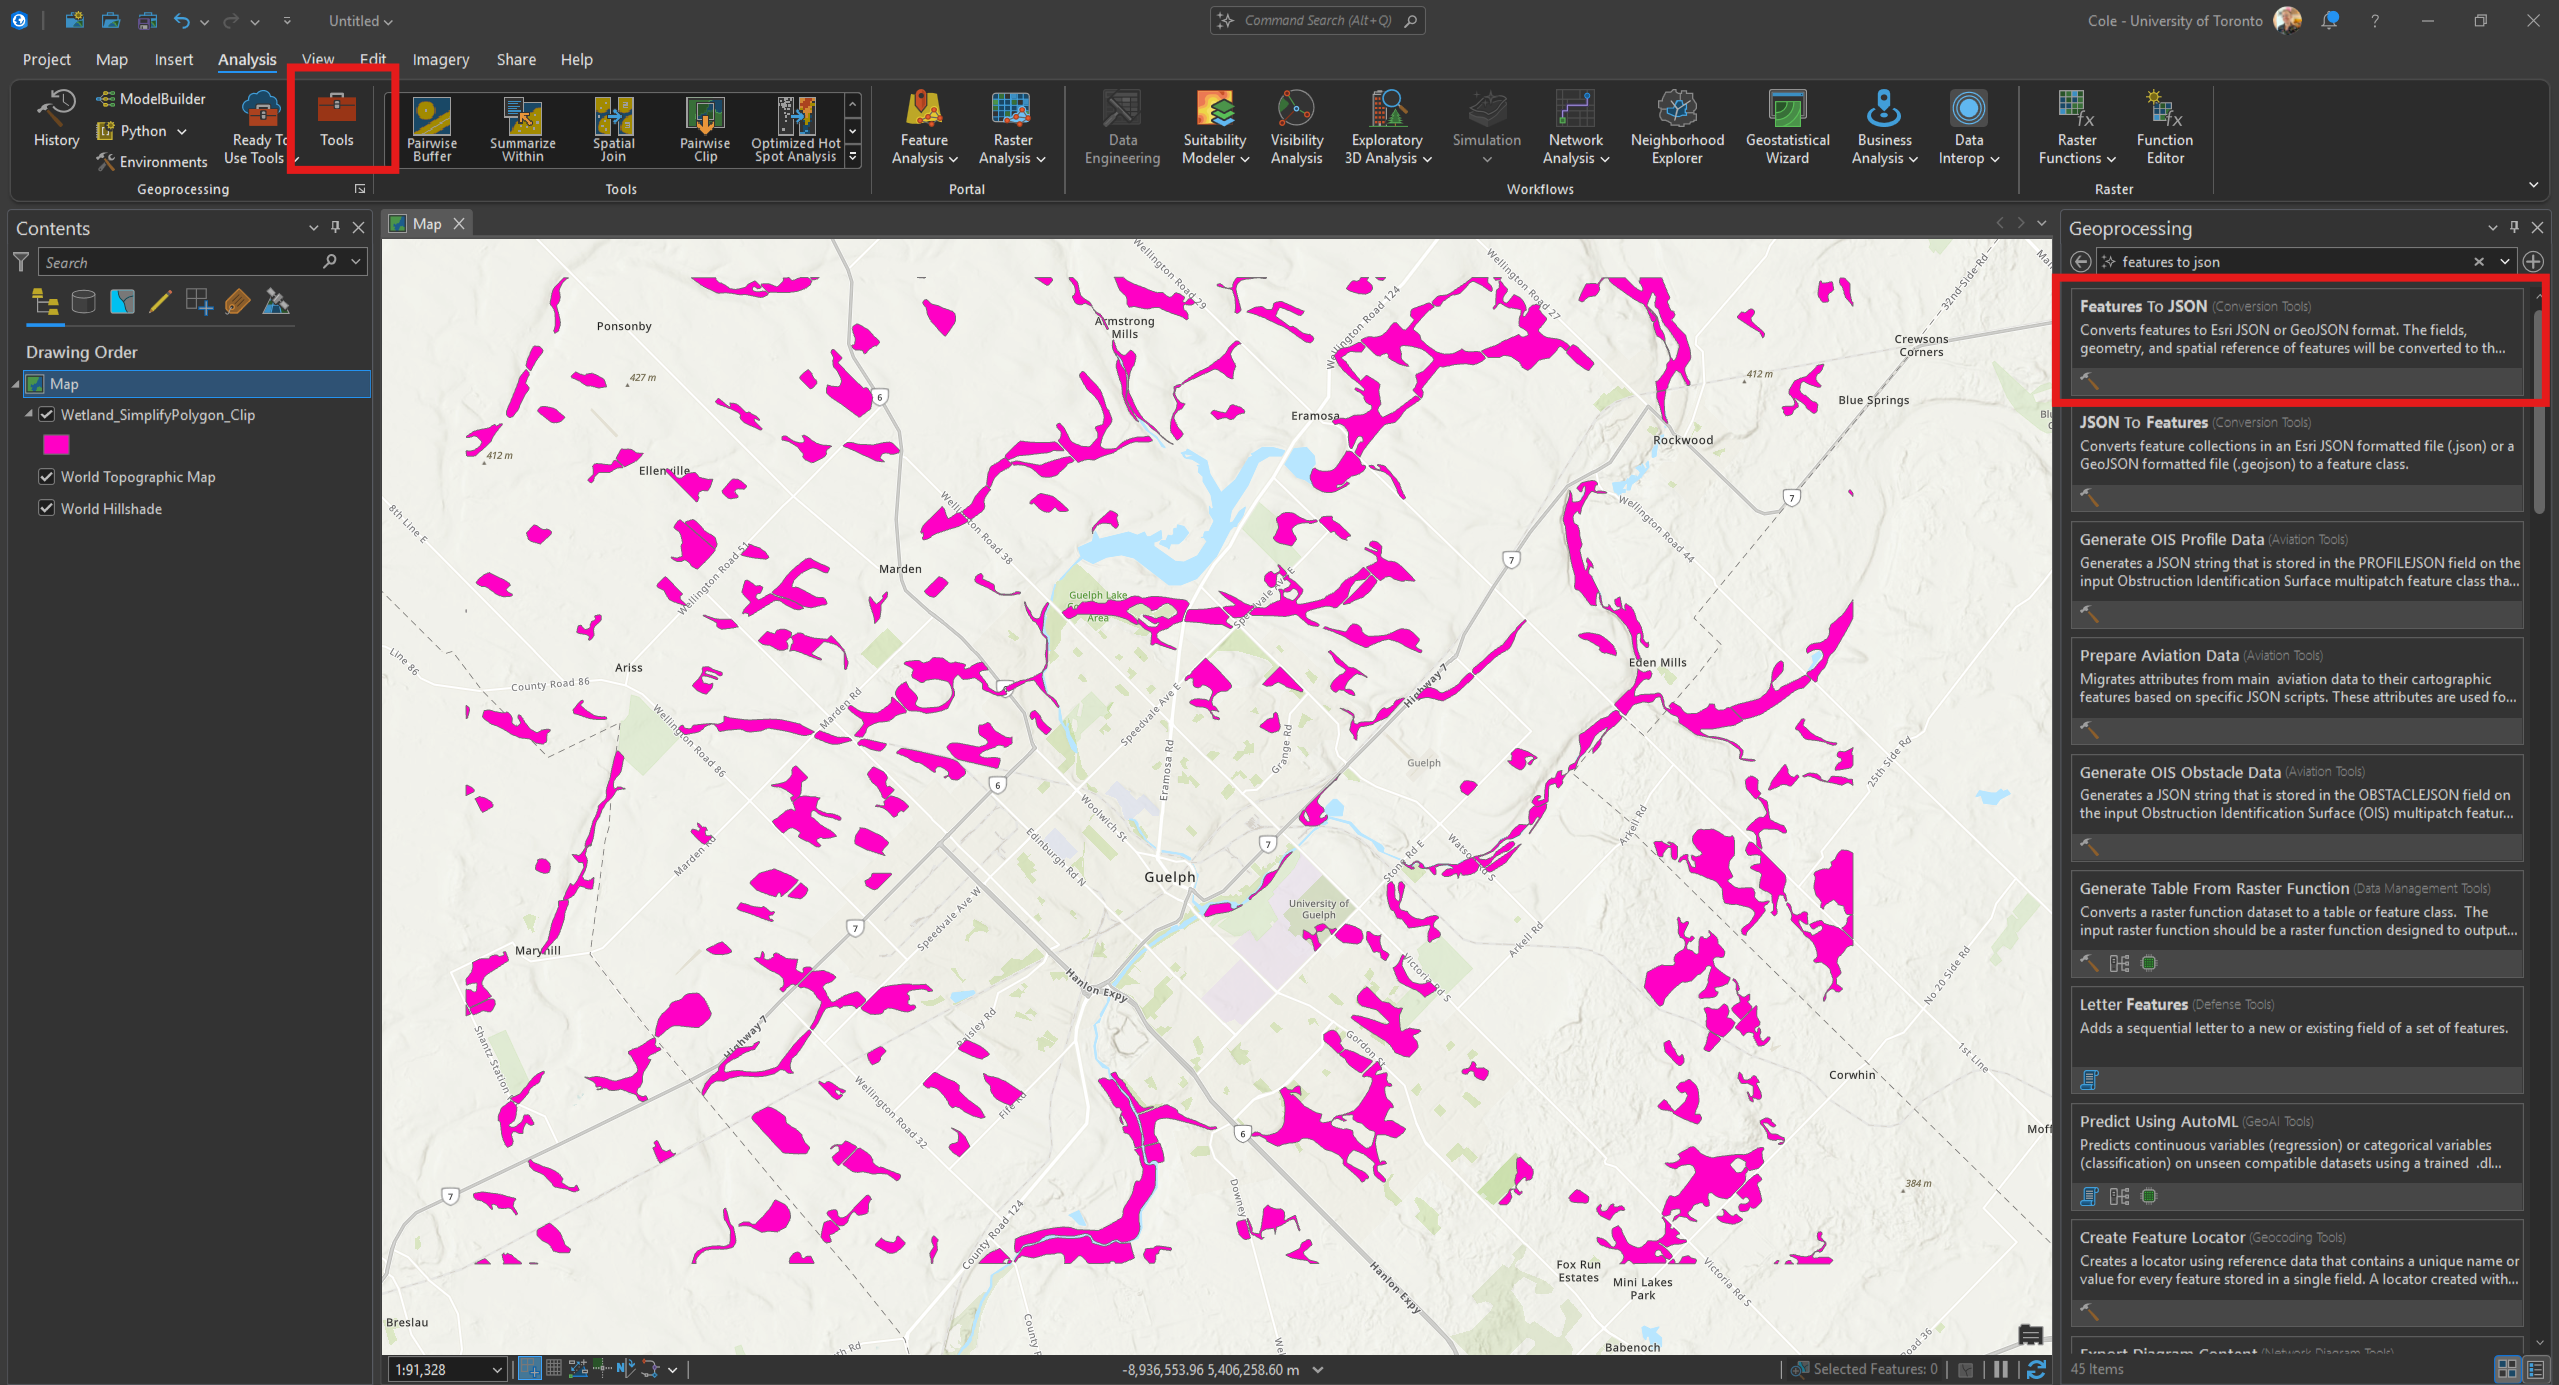
• Load your data layer into ArcGIS Pro. Search for Features to JSON in the Geoprocessing Toolbox.
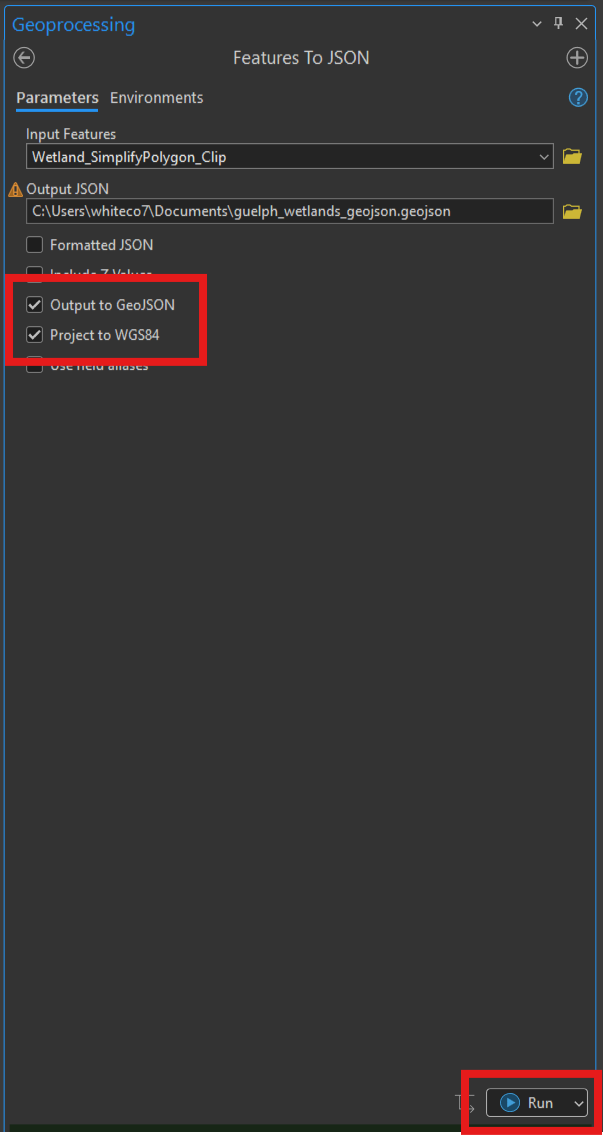
• Open the Features to JSON tool. Specify your spatial layer as the Input Features. Save the file to your computer. Check the Output to GeoJSON and Project to WGS84 boxes. Click Run.
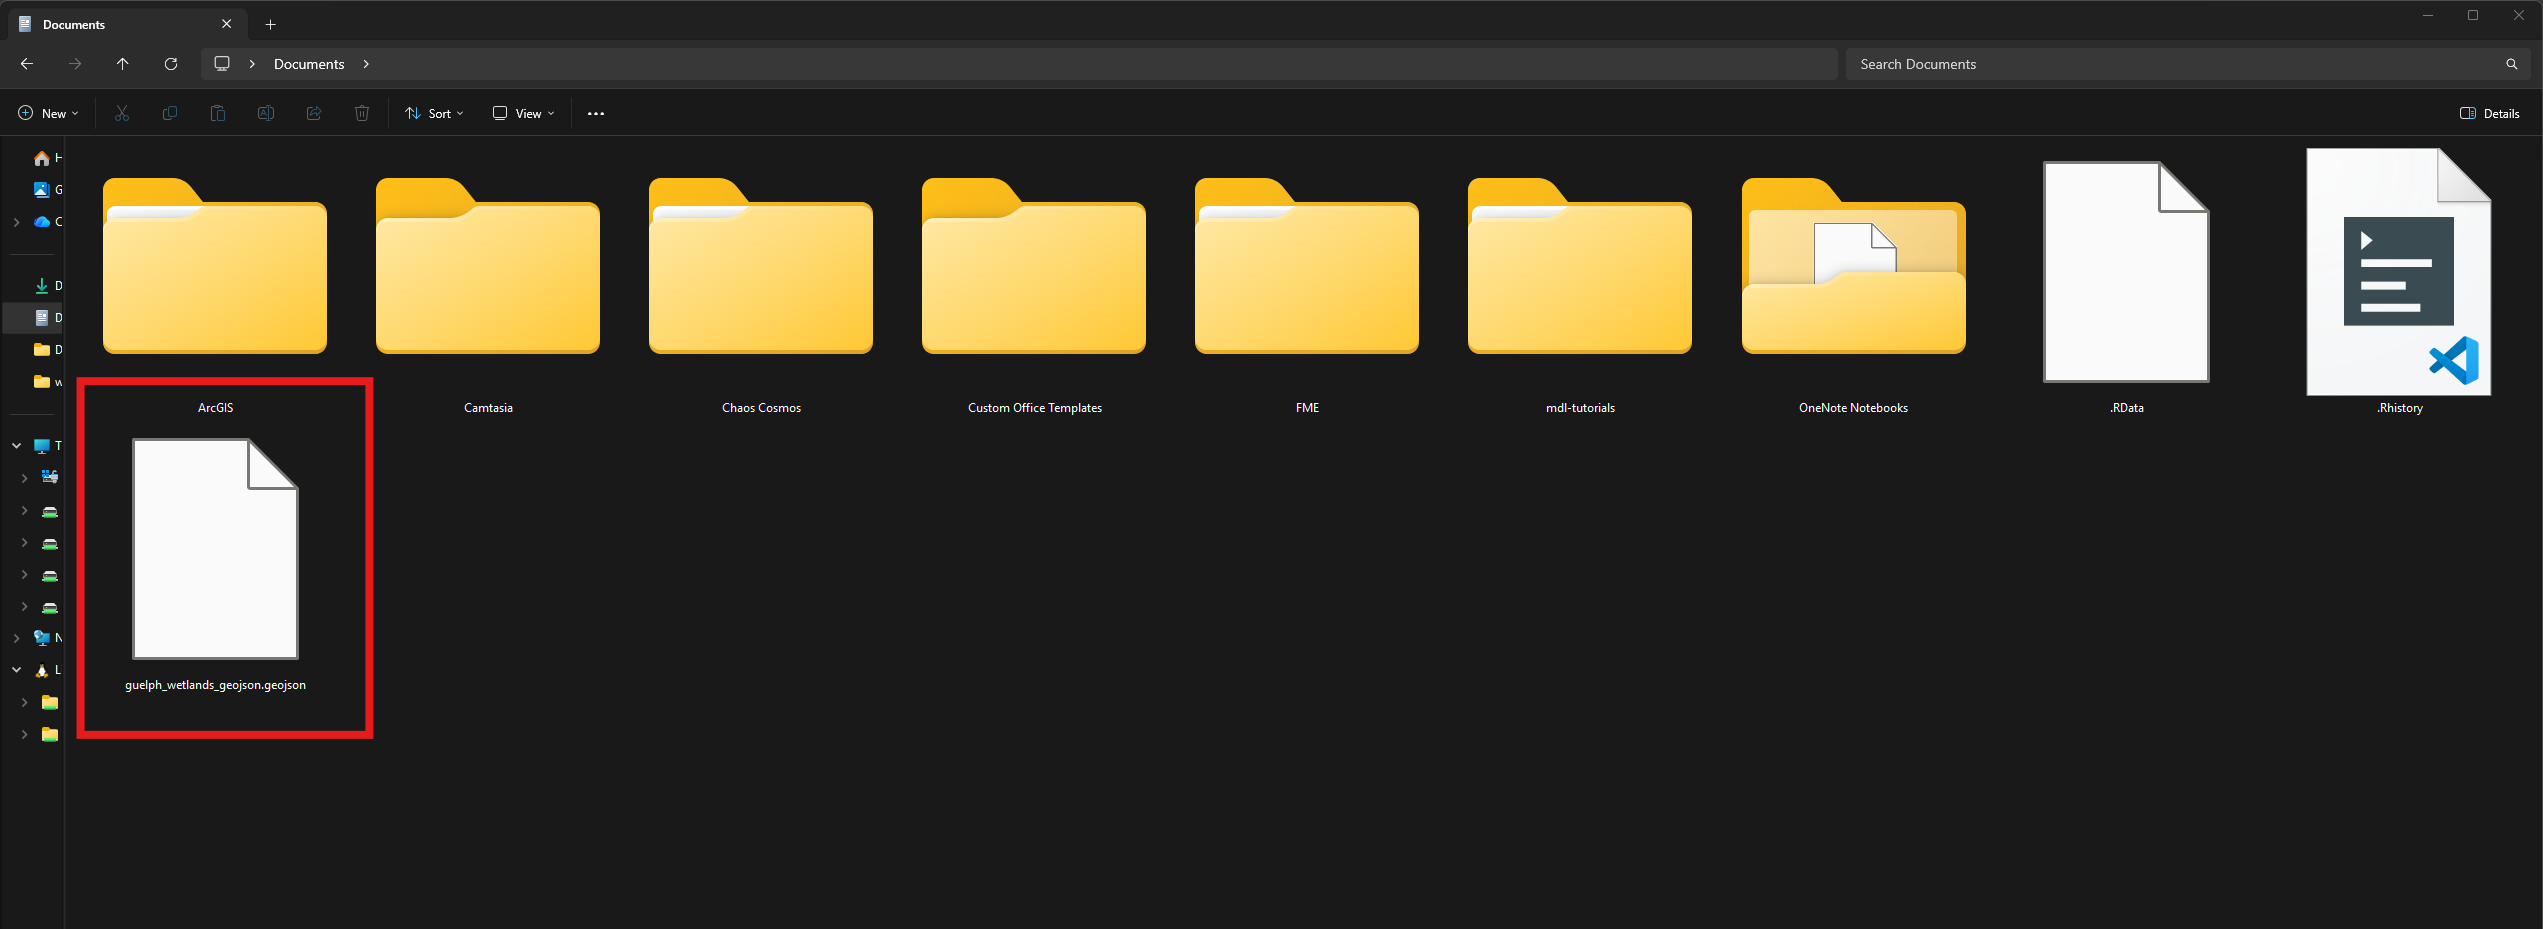
• The tool should output a .geojson file to your computer’s filesystem. Make sure the file is under 100 MB - that’s the maximum size ArcGIS Online will support for GeoJSON.
• Log in to ArcGIS Online and visit your Content section.
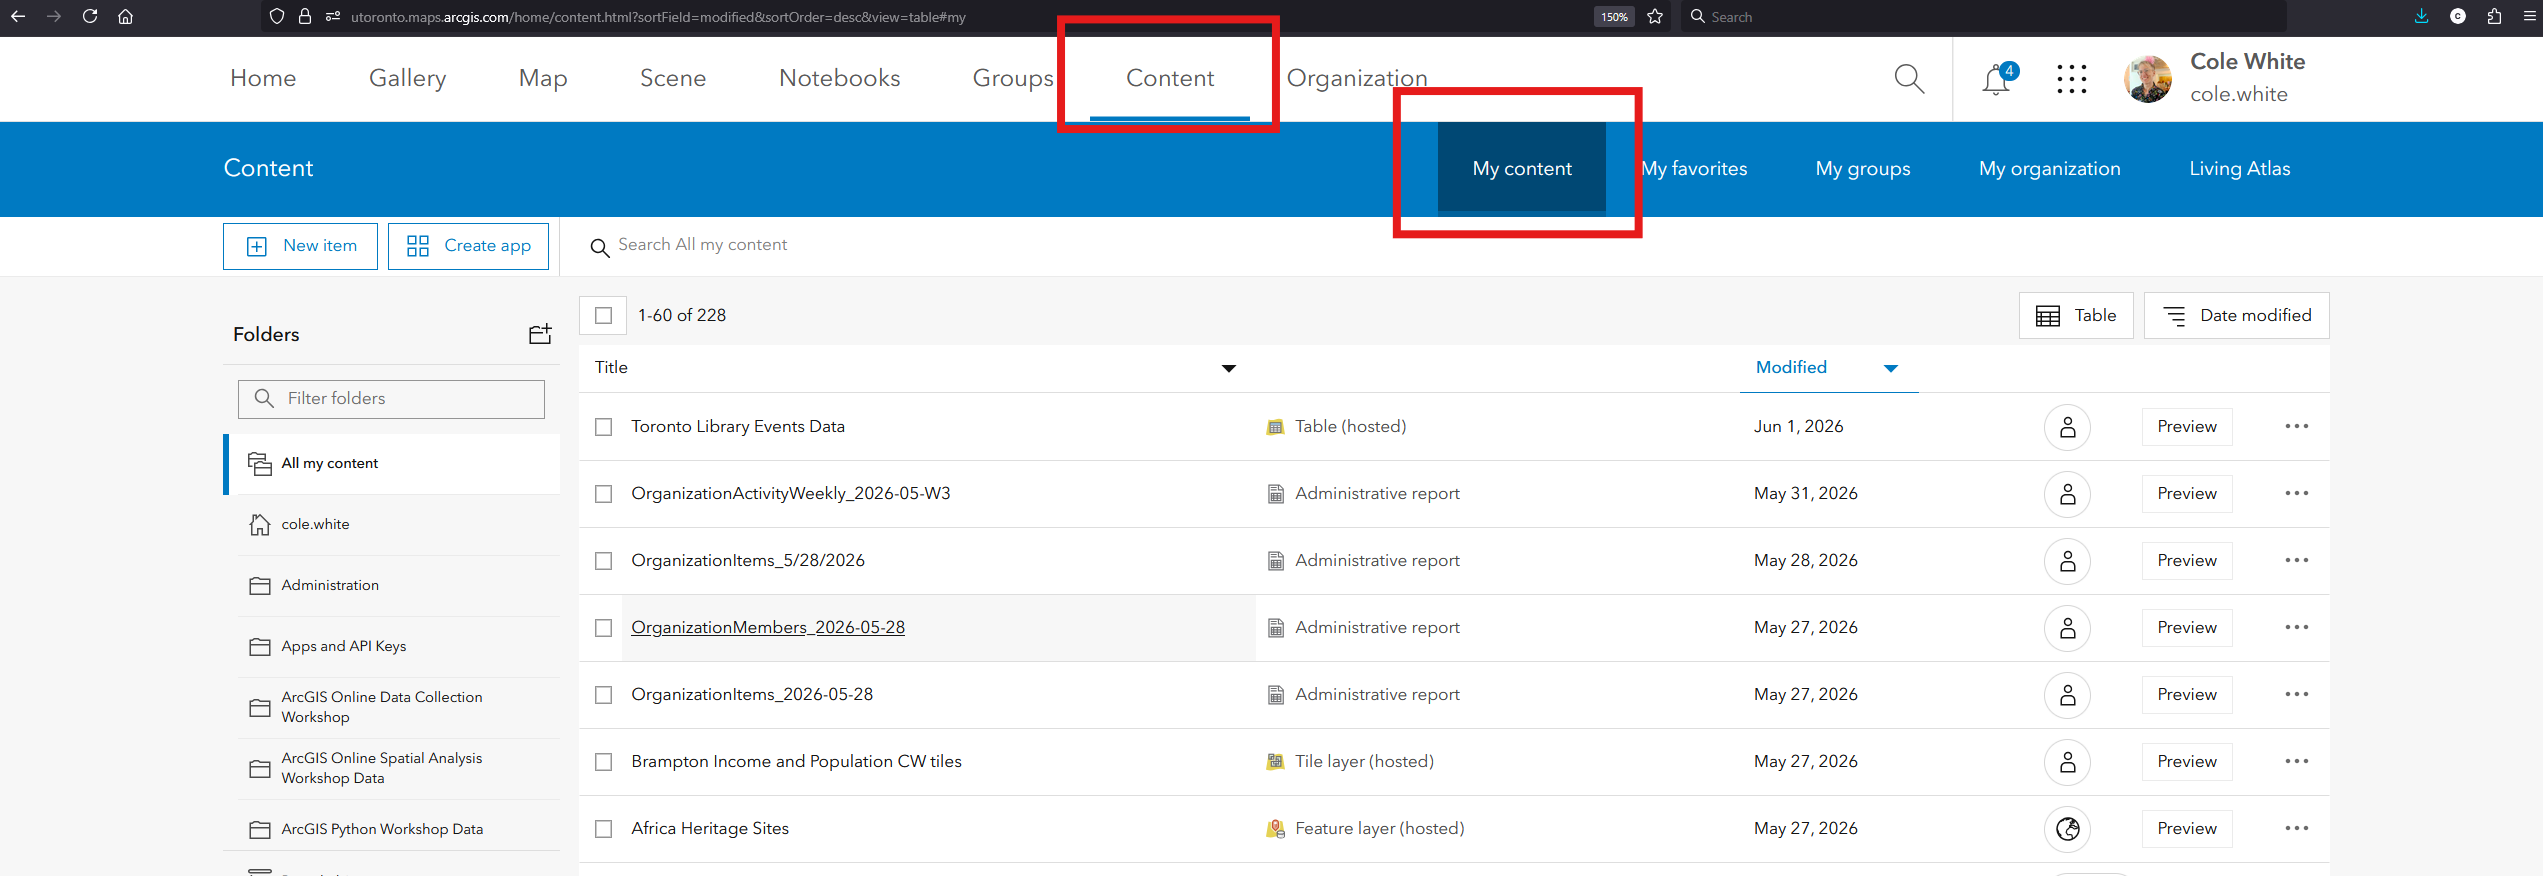
• Click the New Item button.
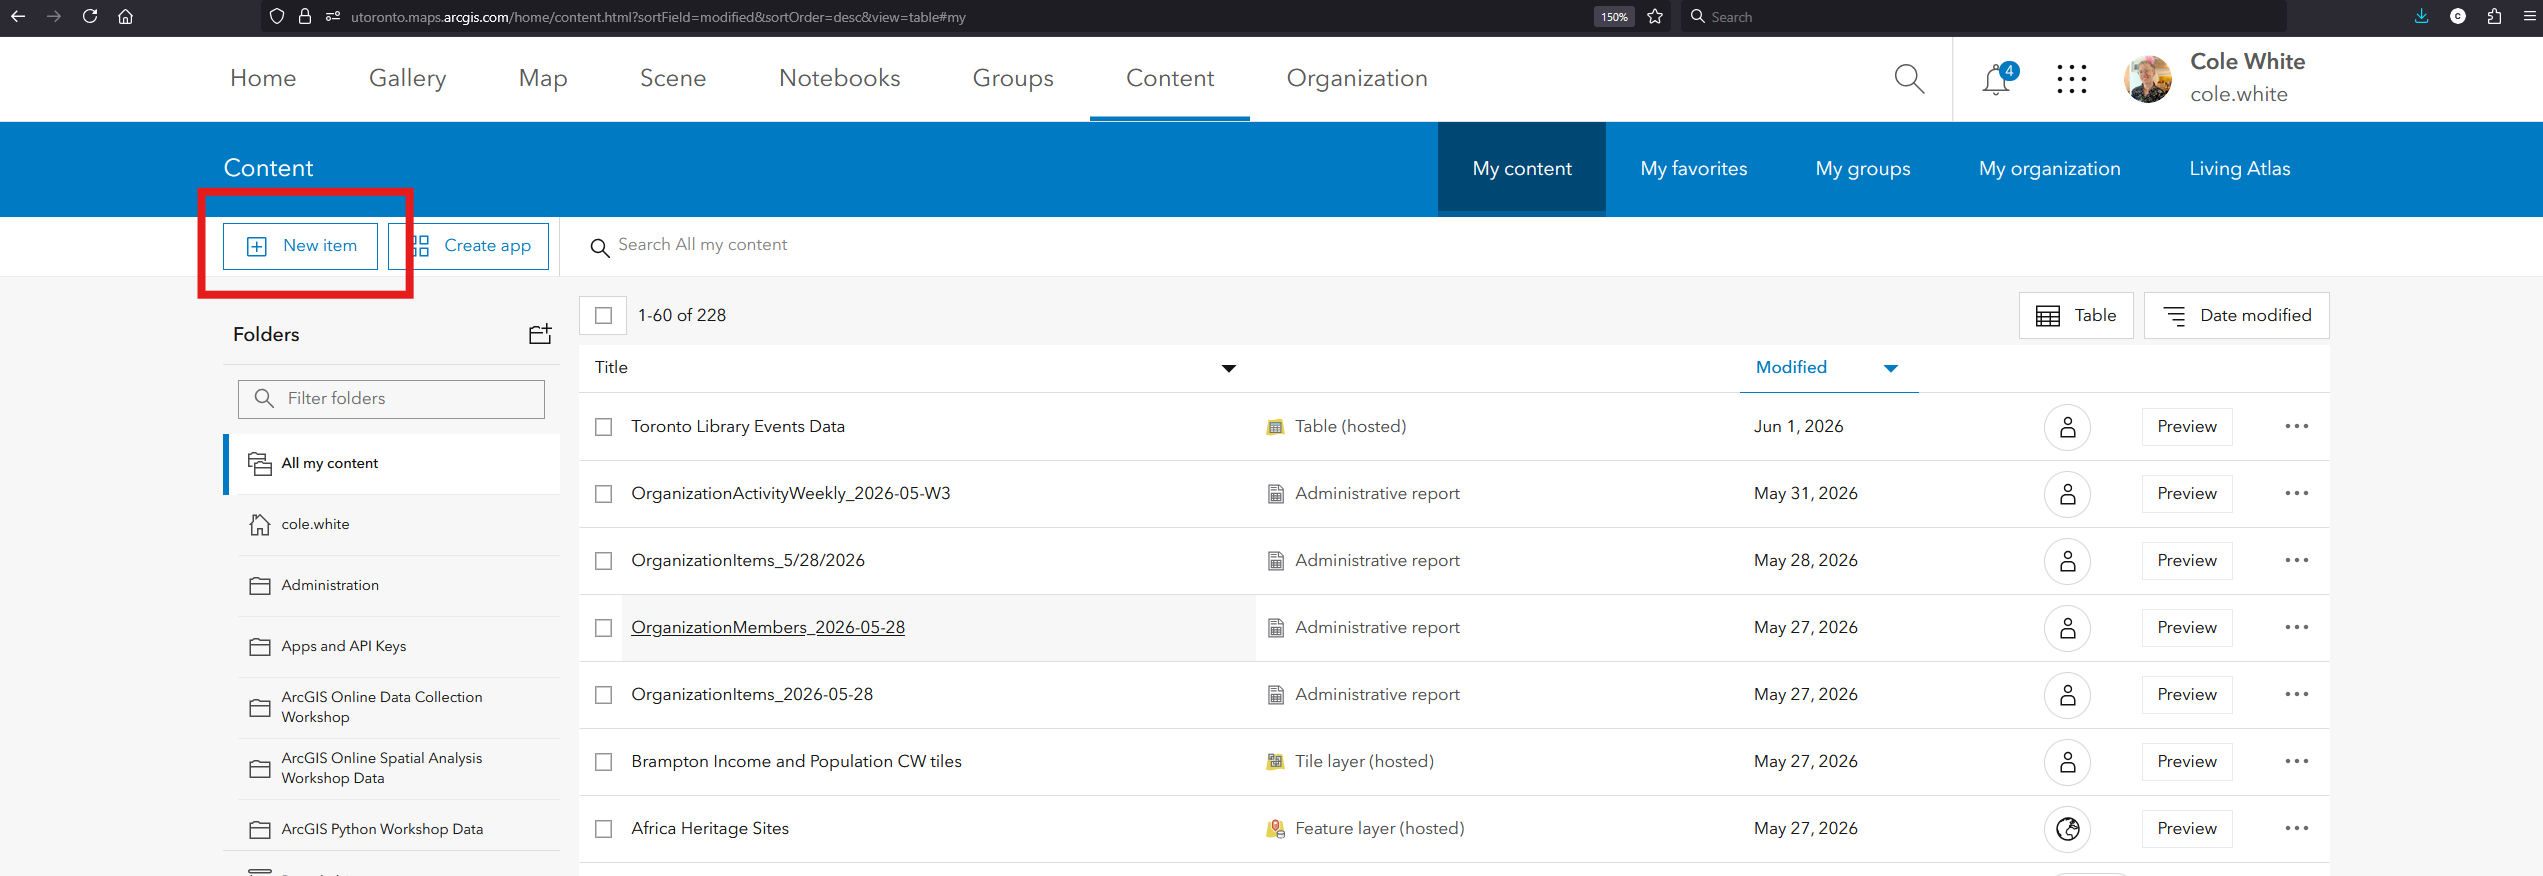
• Choose Your Device.
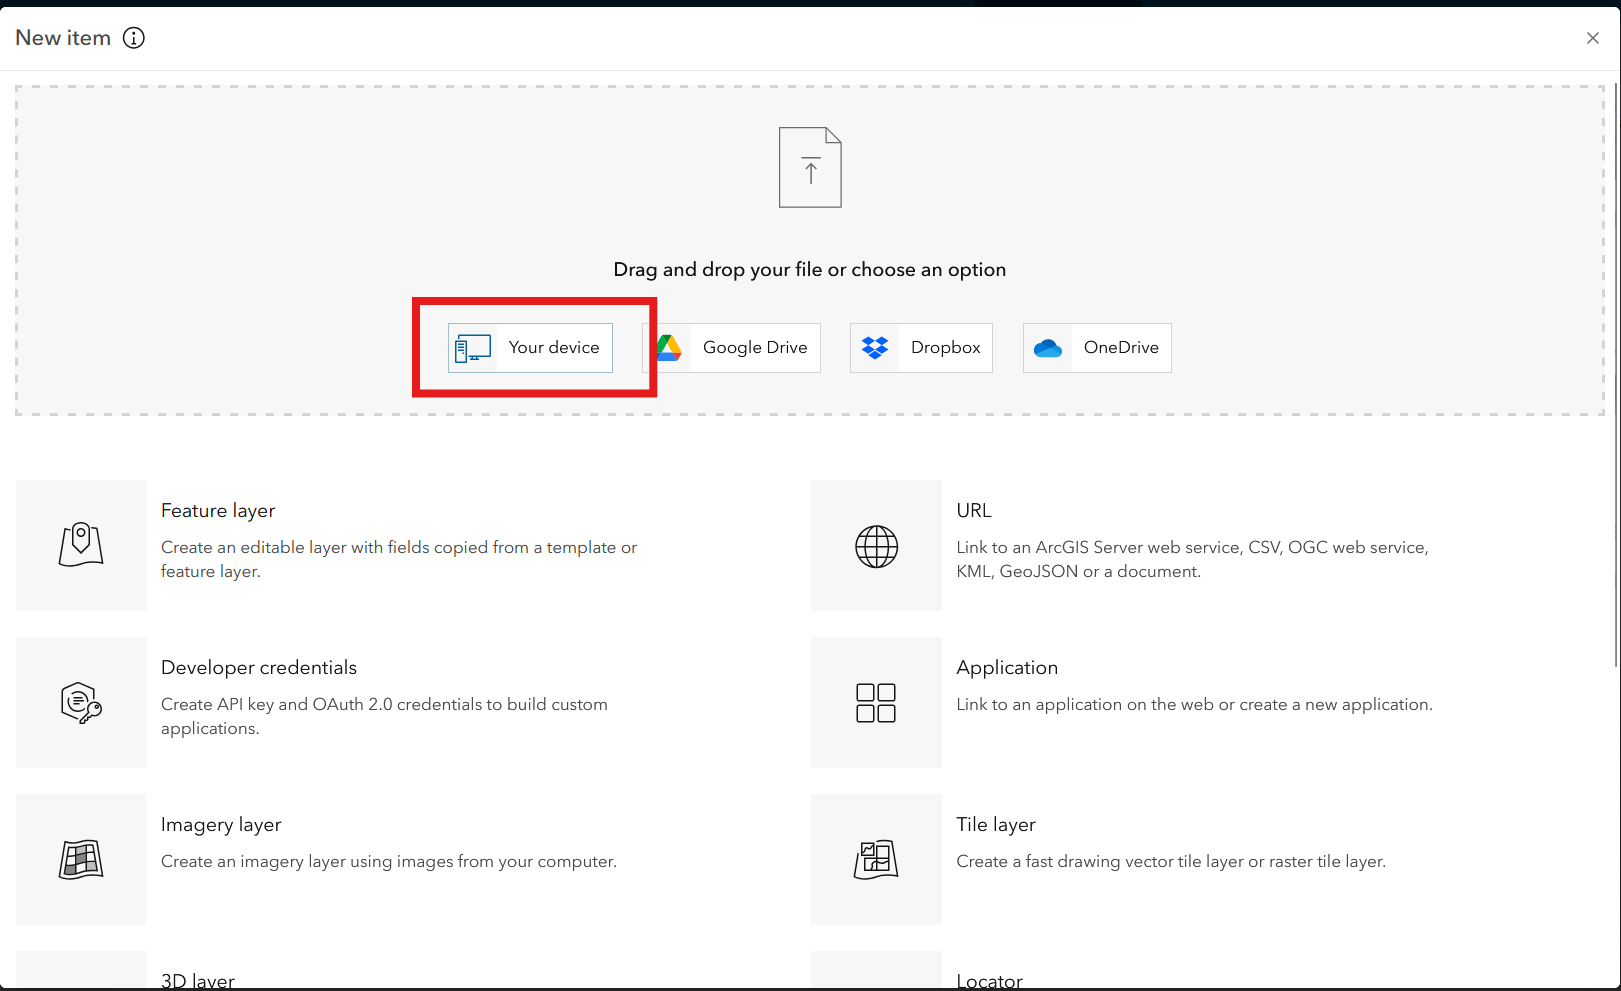
• Navigate to your GeoJSON file, select it, and click Open.
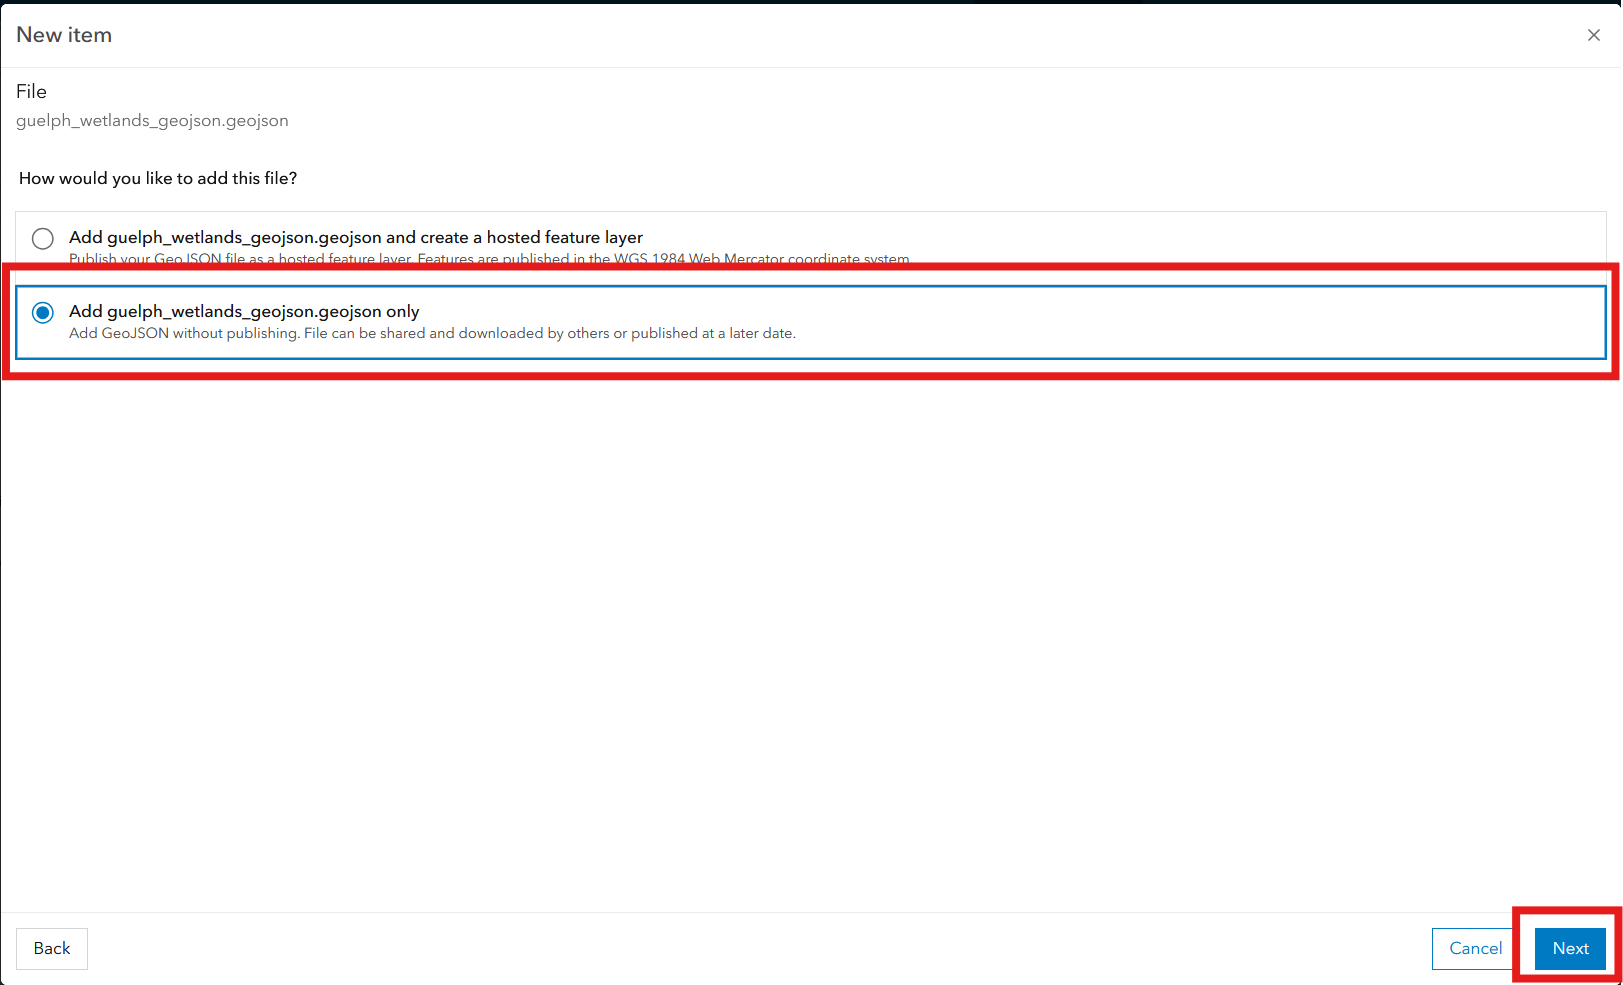
• This is the important part: click the second option shown here to add the GeoJSON data without creating a hosted feature layer. Click Next.
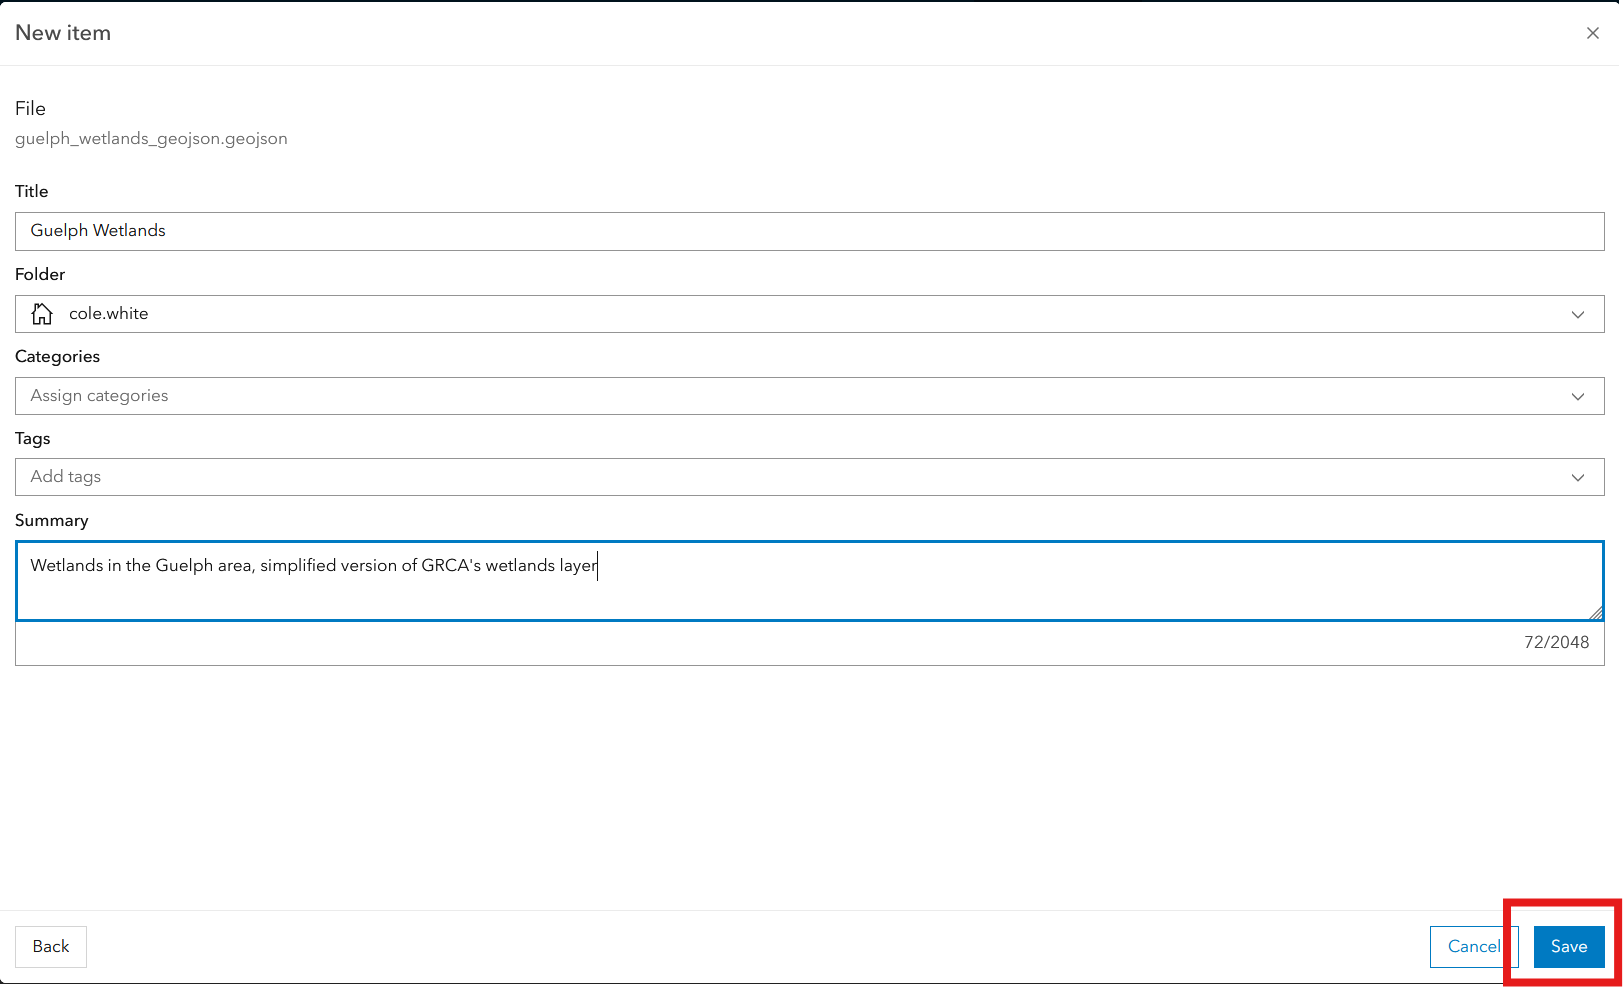
• Give the new item a name, and optionally input other metadata. Click Save.
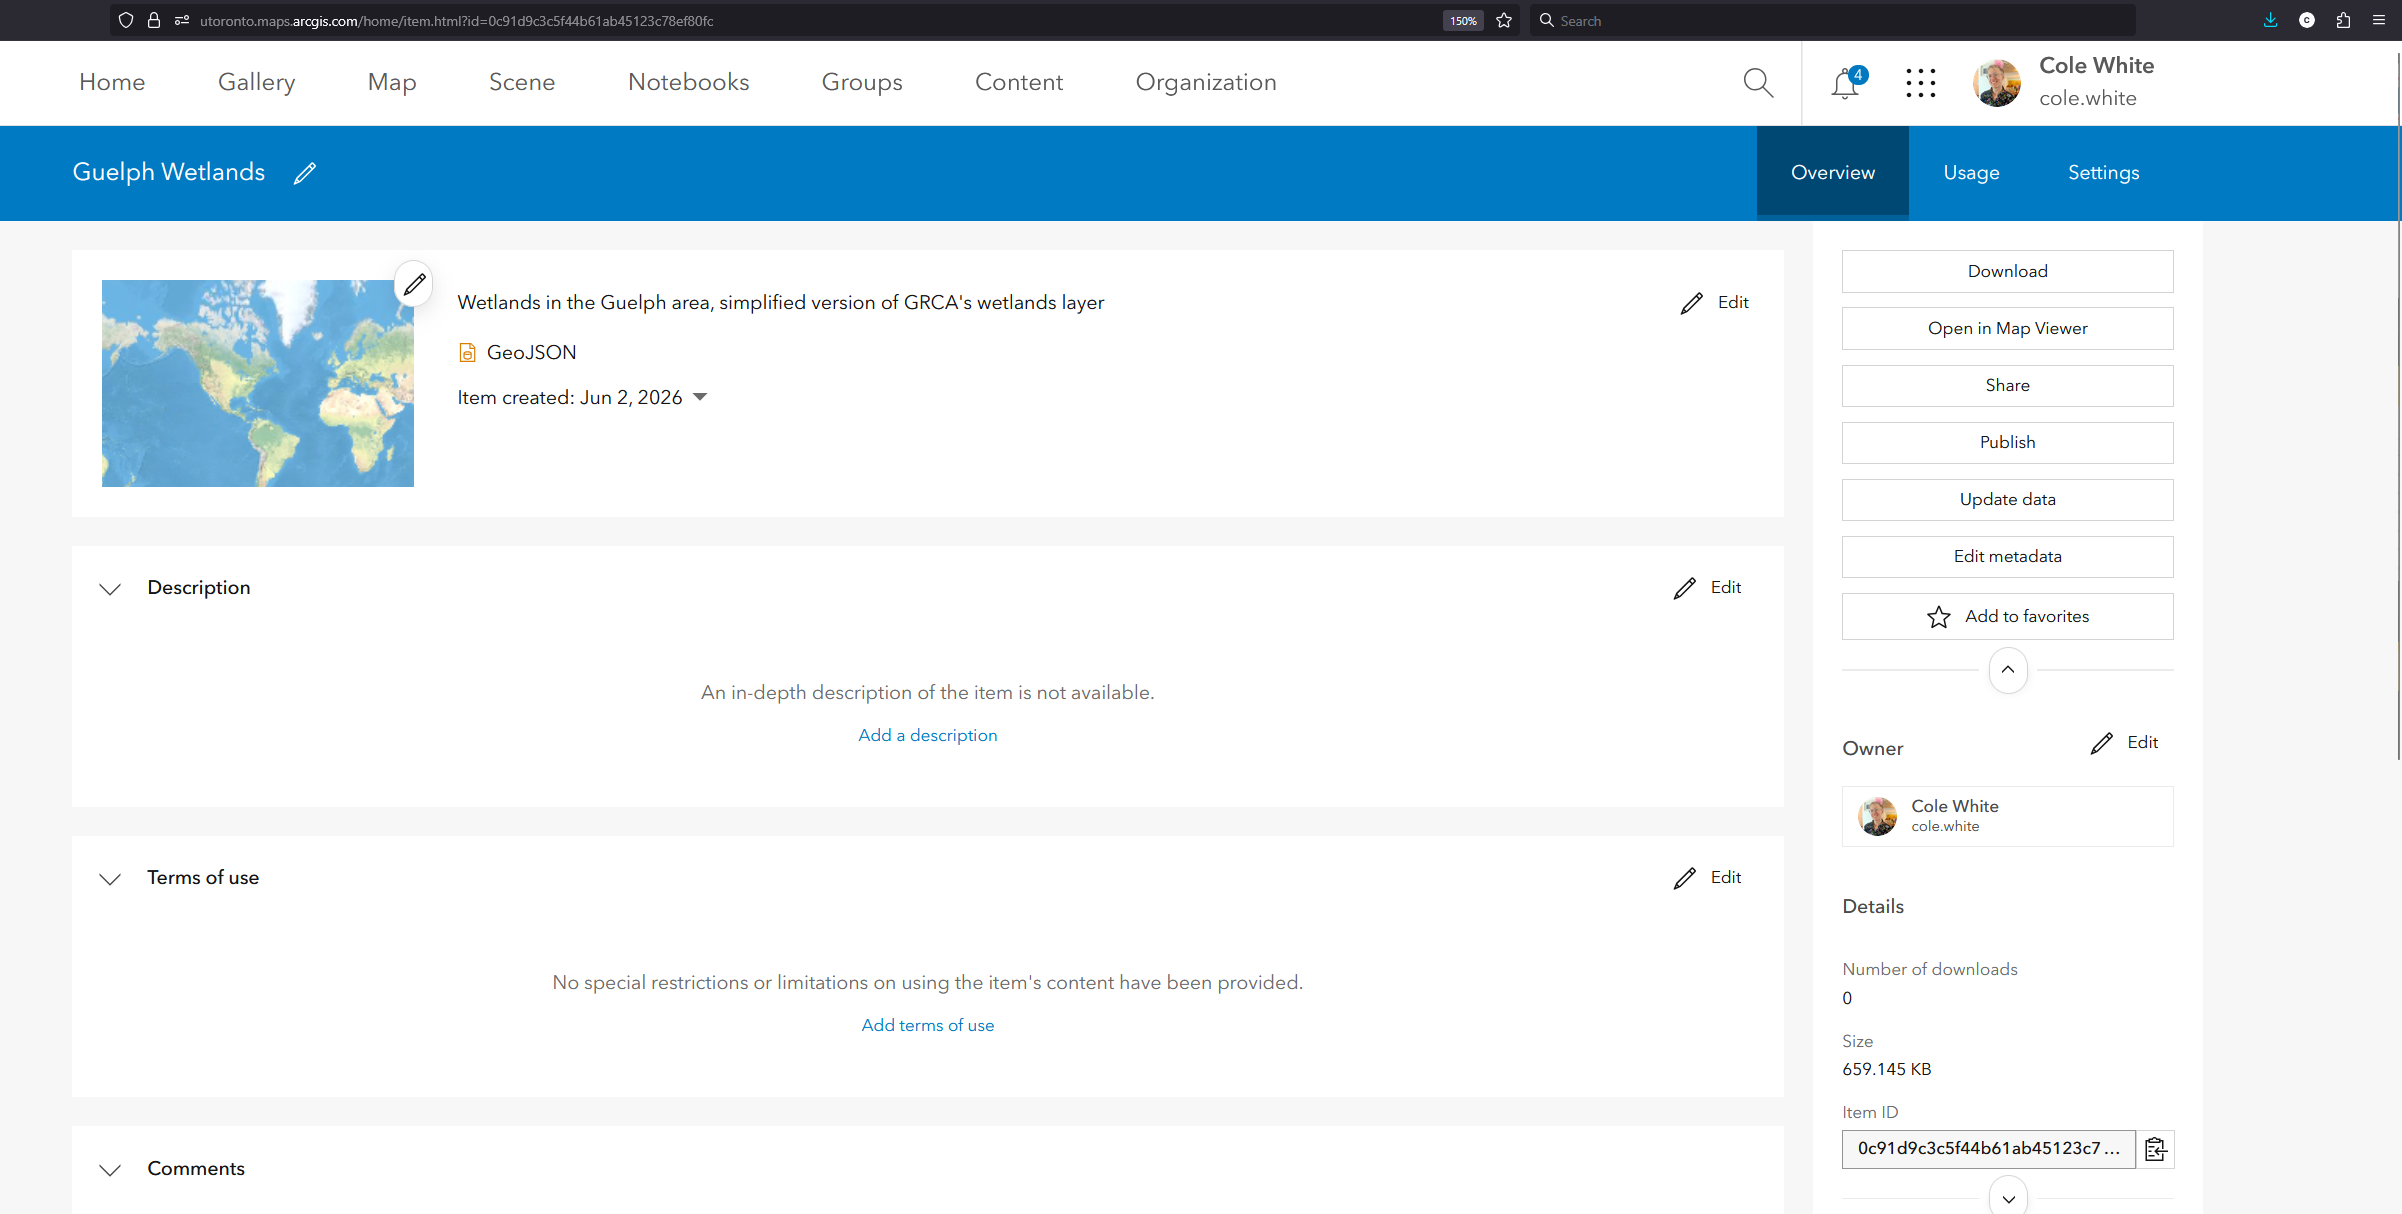
• You’ll now be shown the Item Details page for the new GeoJSON layer. From here, it can be added to your ArcGIS Online projects and visualized in the Map Viewer.
Creating a GeoJSON file in ArcGIS Online
• Log in to ArcGIS Online. Navigate to the Item Details page of the hosted feature layer you’d like converted to GeoJSON.
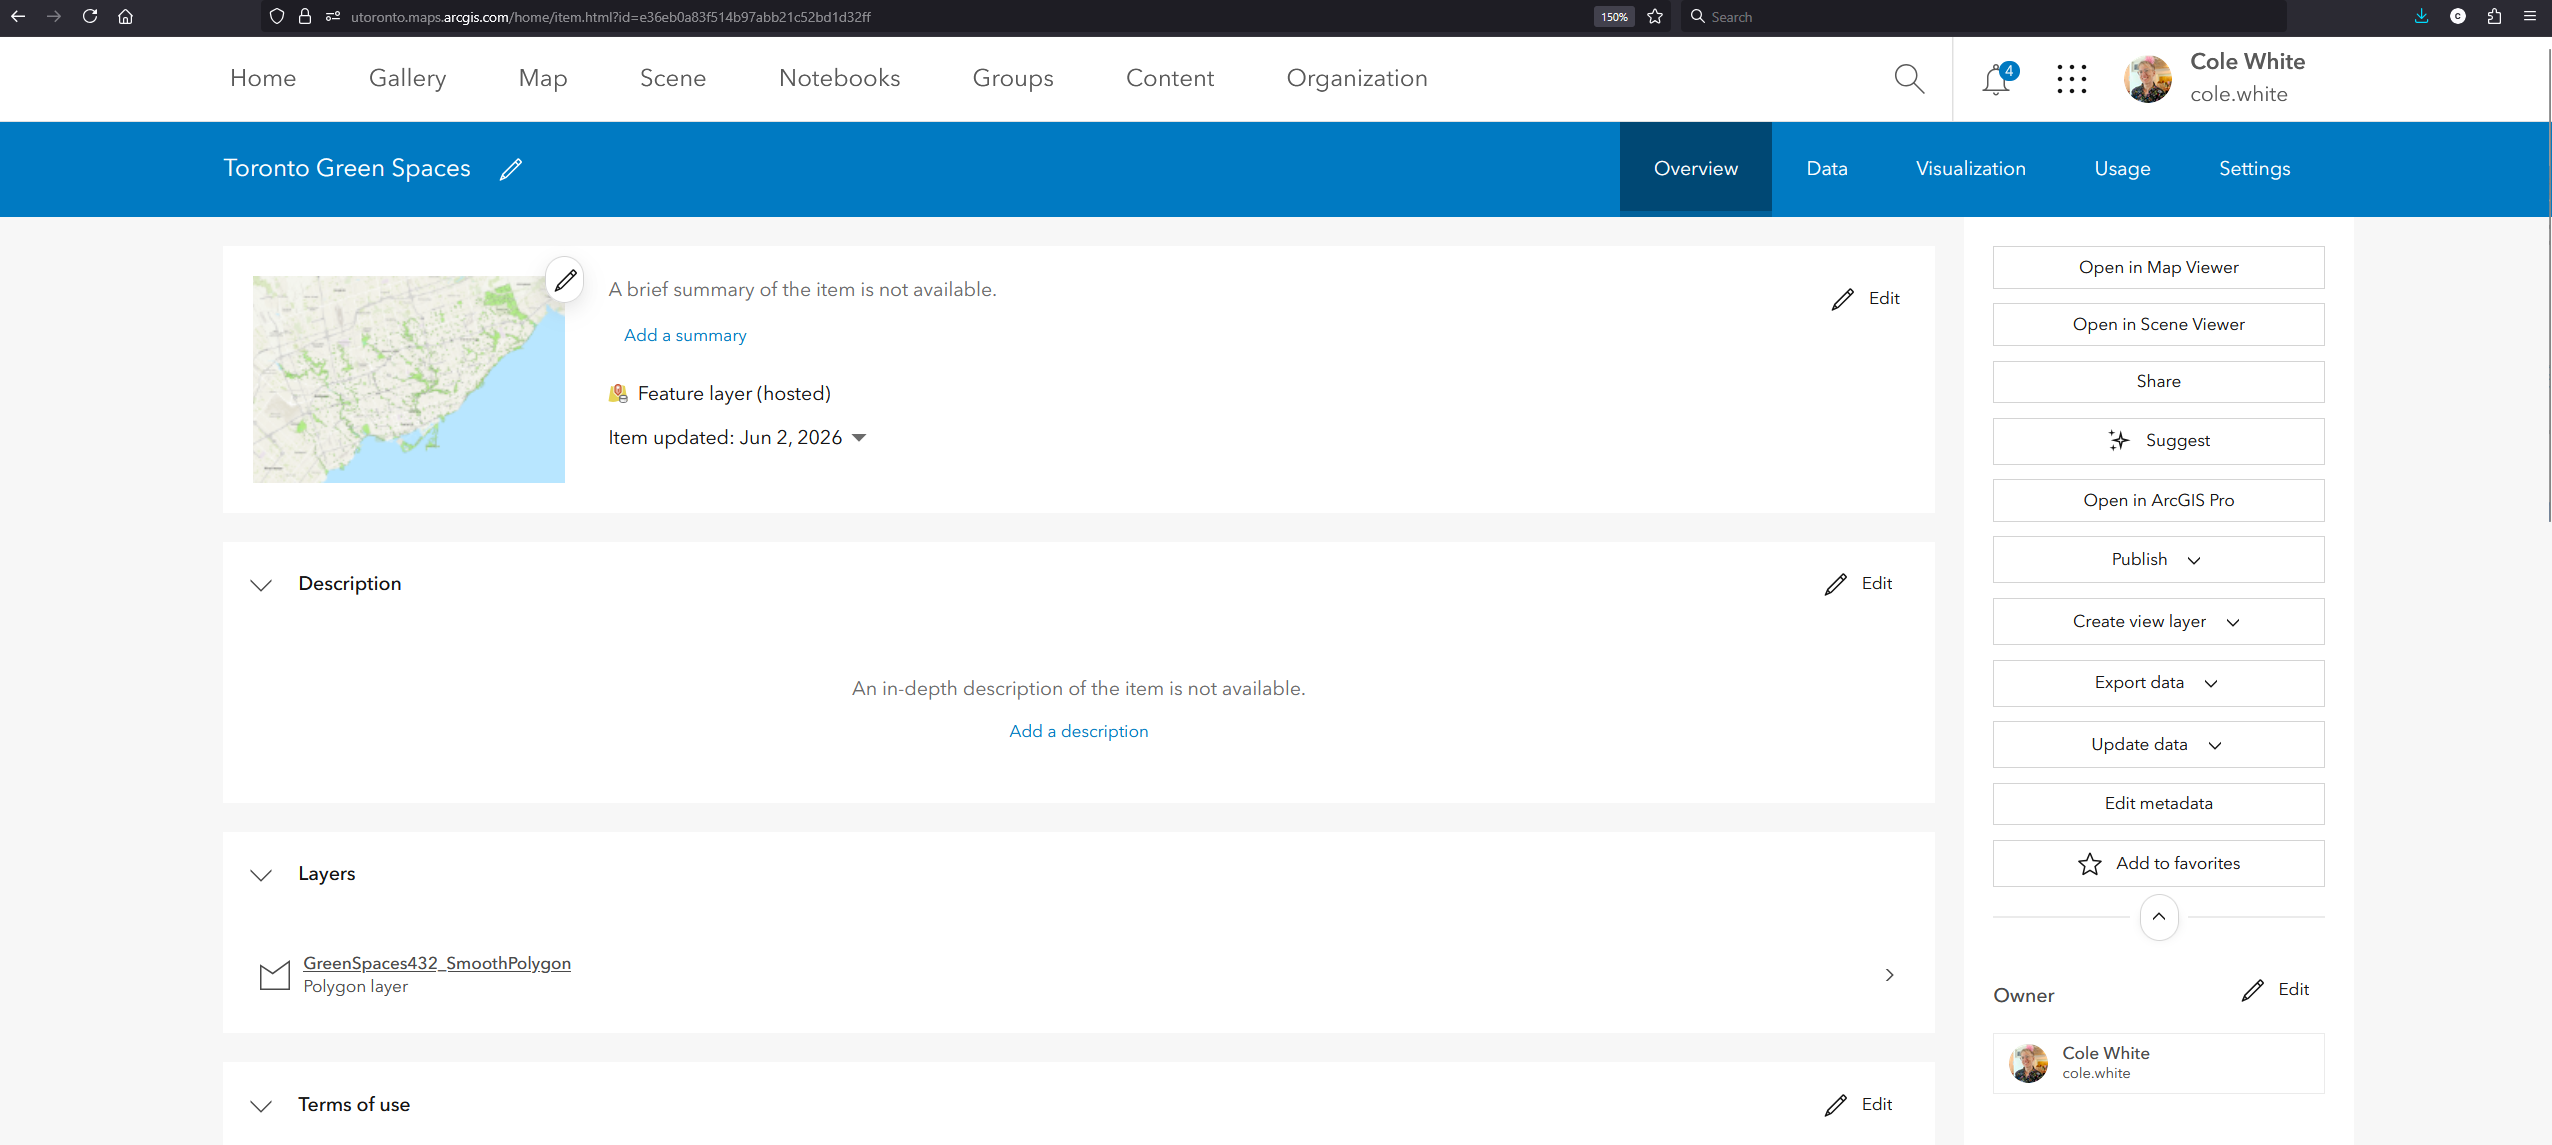
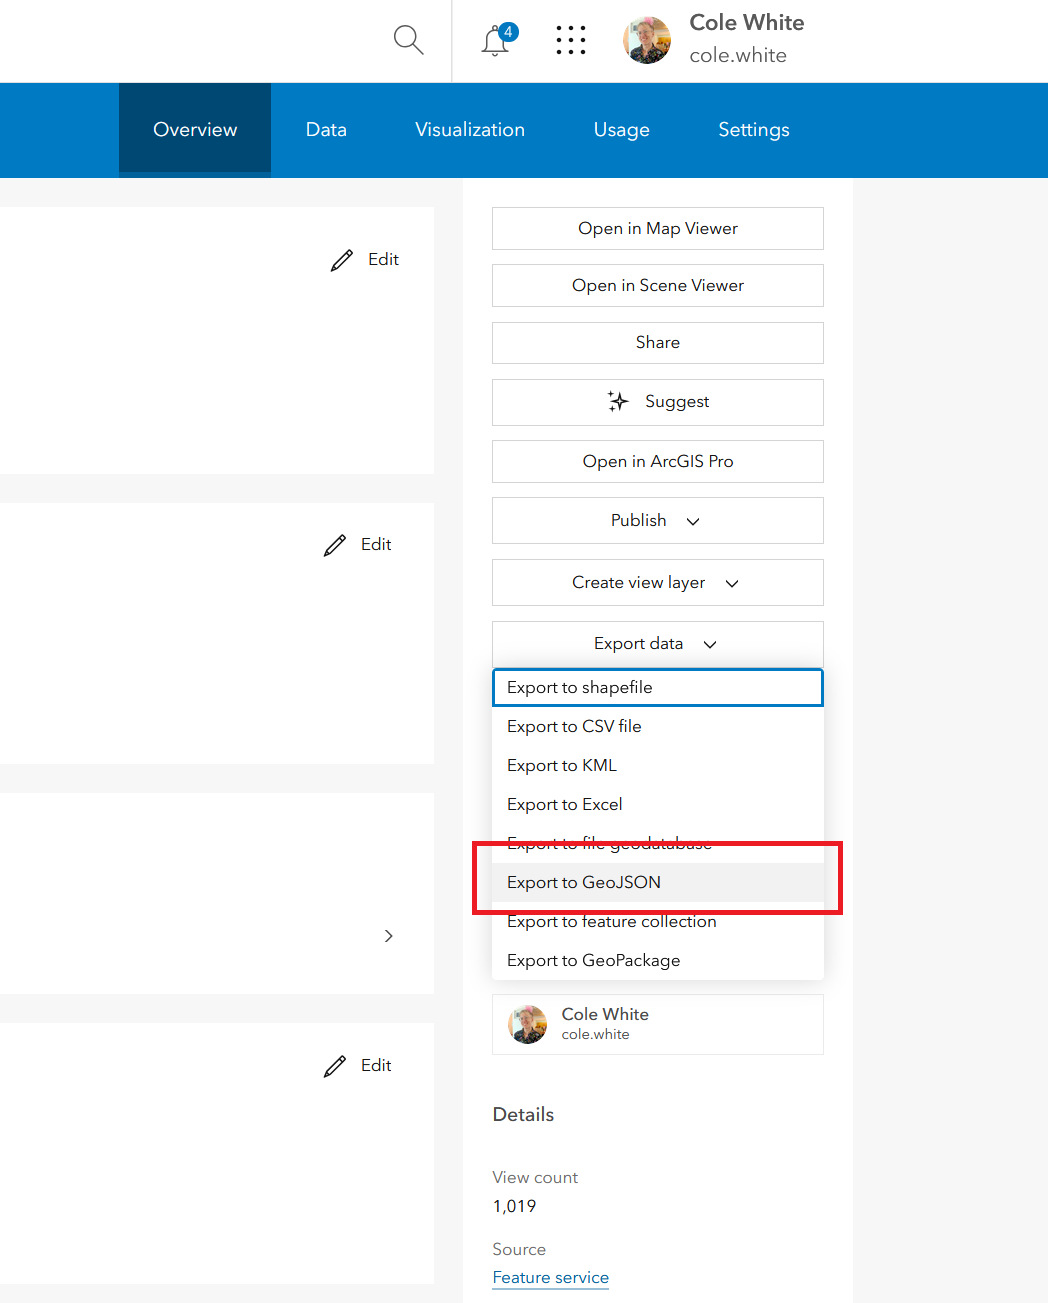
• Choose Export data -> Export to GeoJSON from the pane on the right of the page.
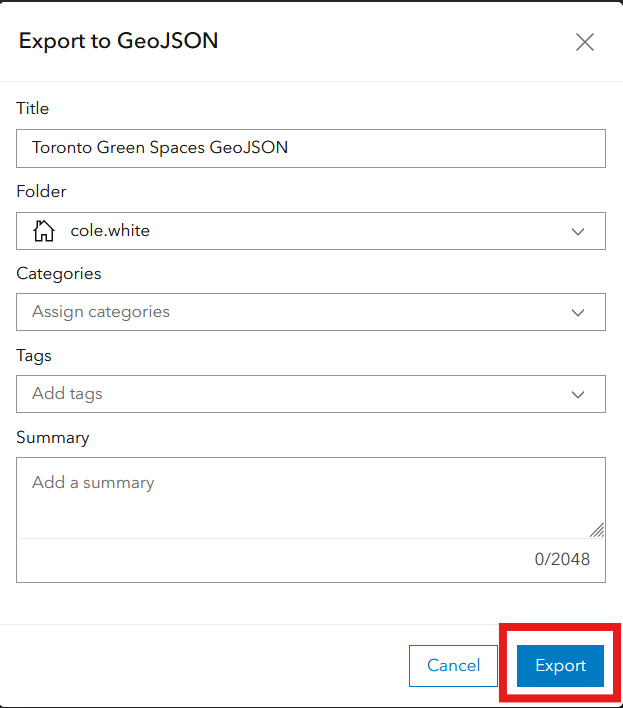
• Give the GeoJSON file a descriptive name. Optionally fill in the other metadata fields. Click Export. (The process might take some time, depending on the size of the dataset.)
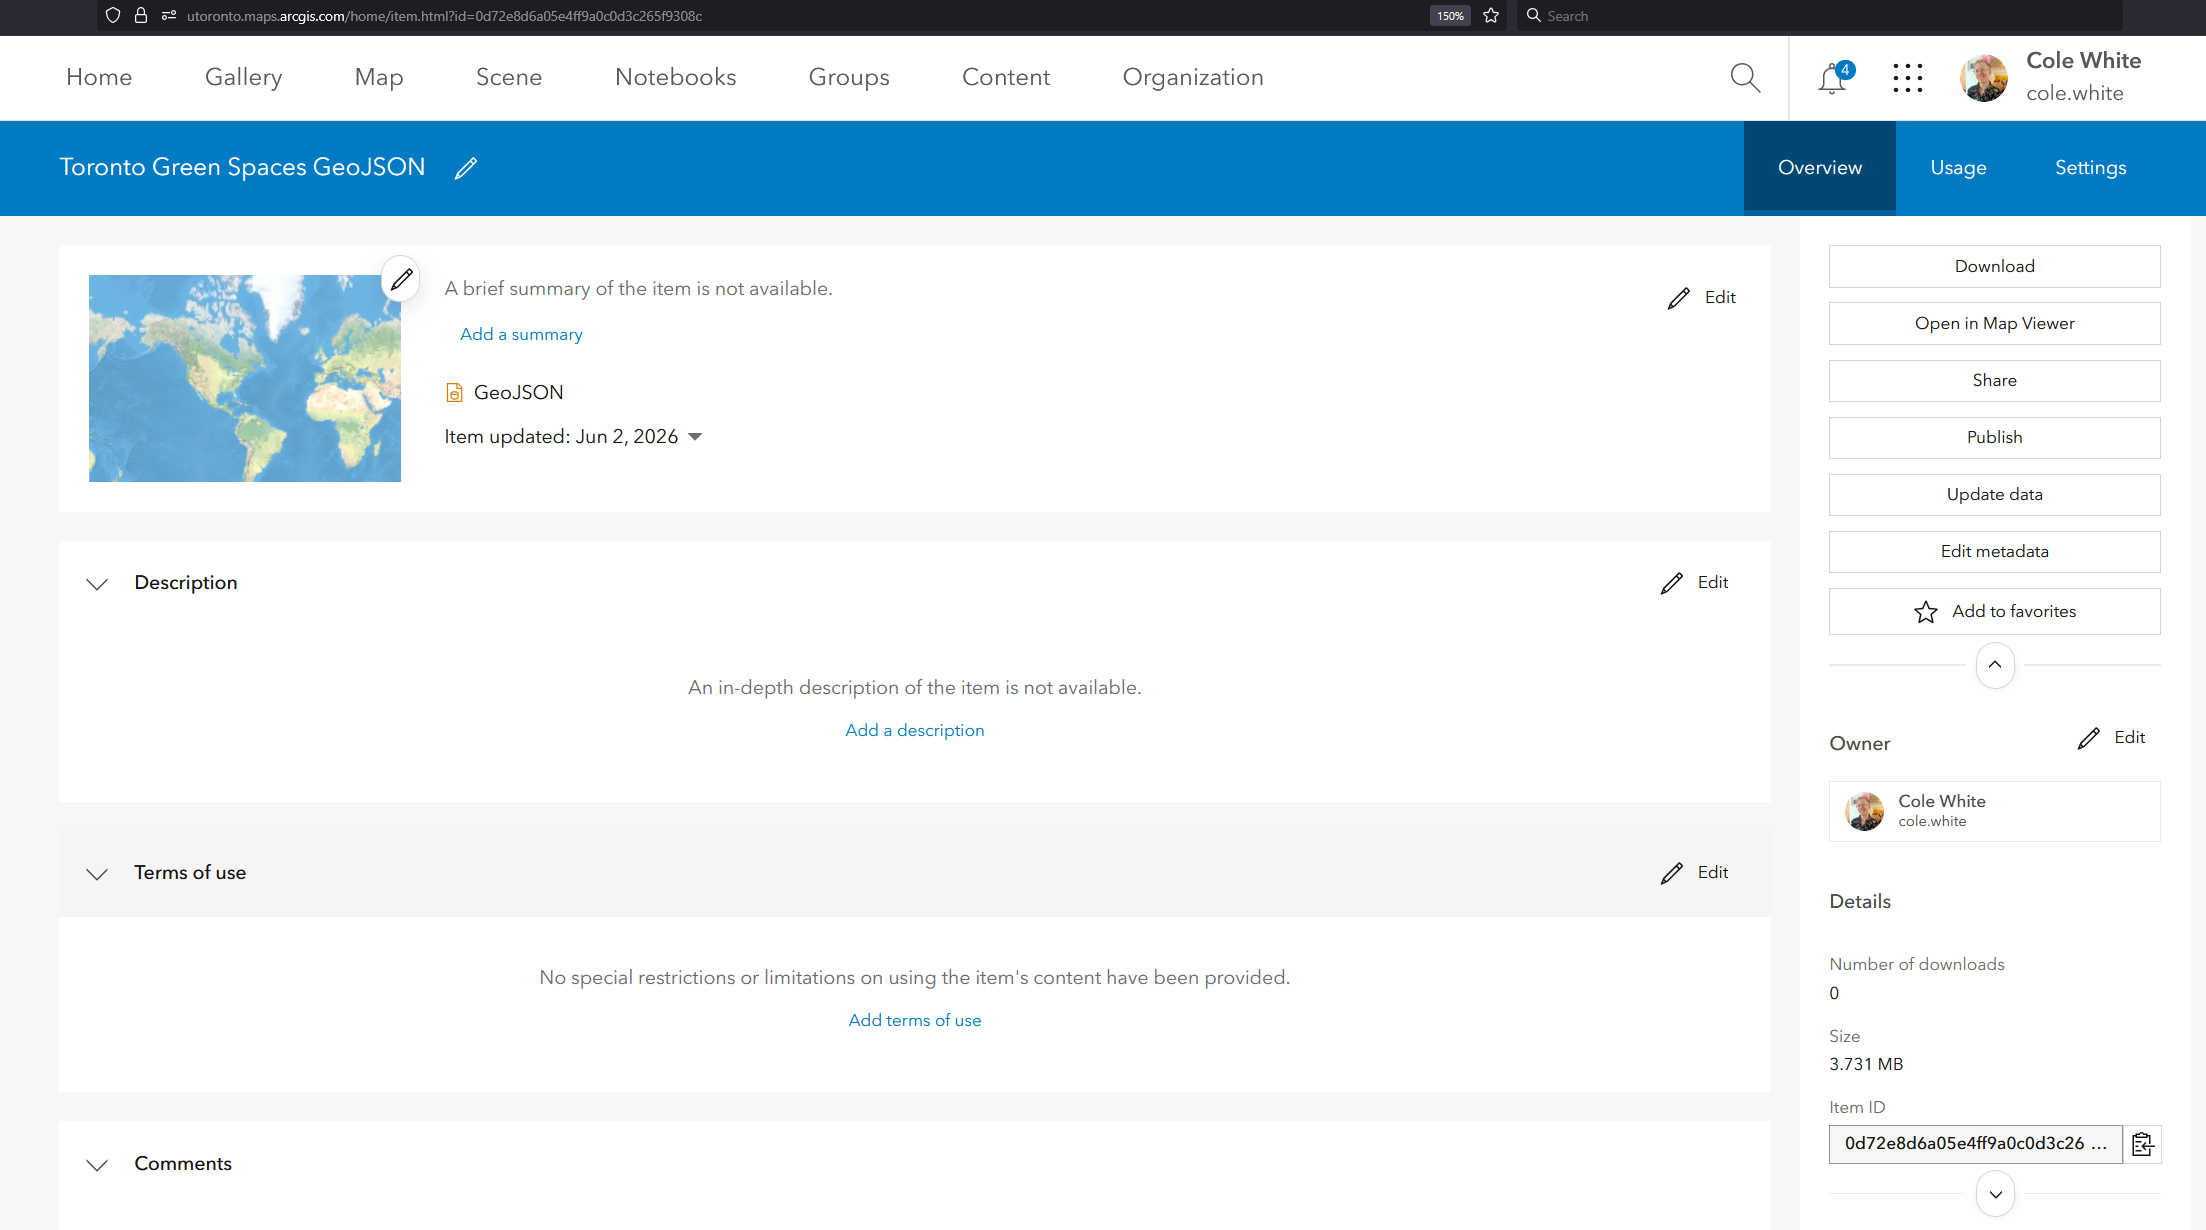
• When the export has completed, you’ll be brought to the Item Details page for the new GeoJSON layer. You can now add this layer to your projects and visualize it in the Map Viewer.
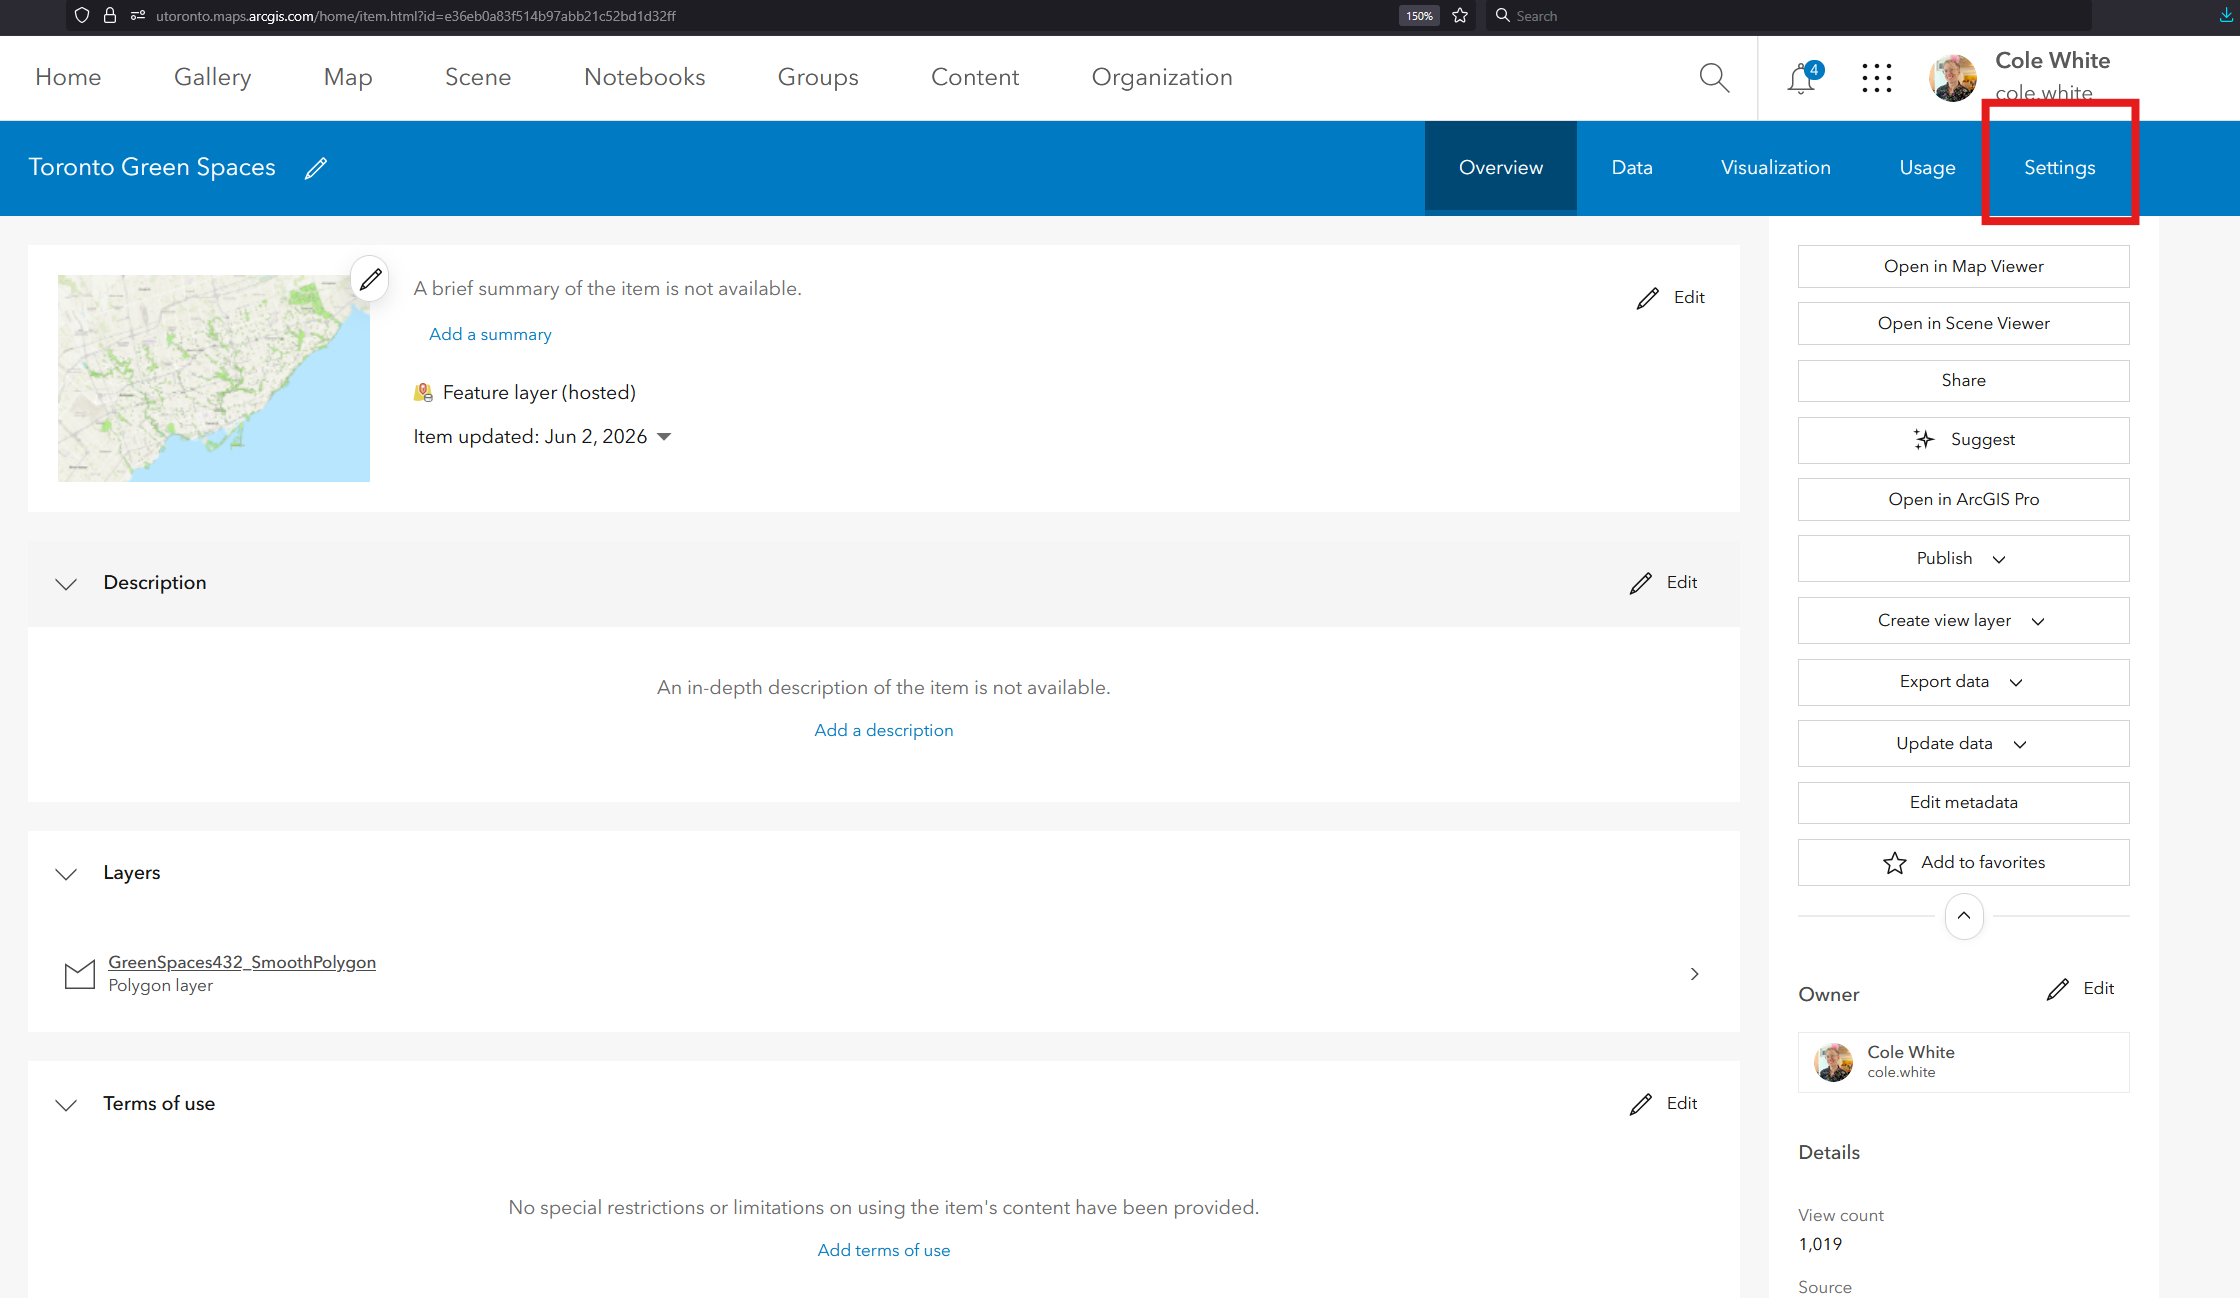
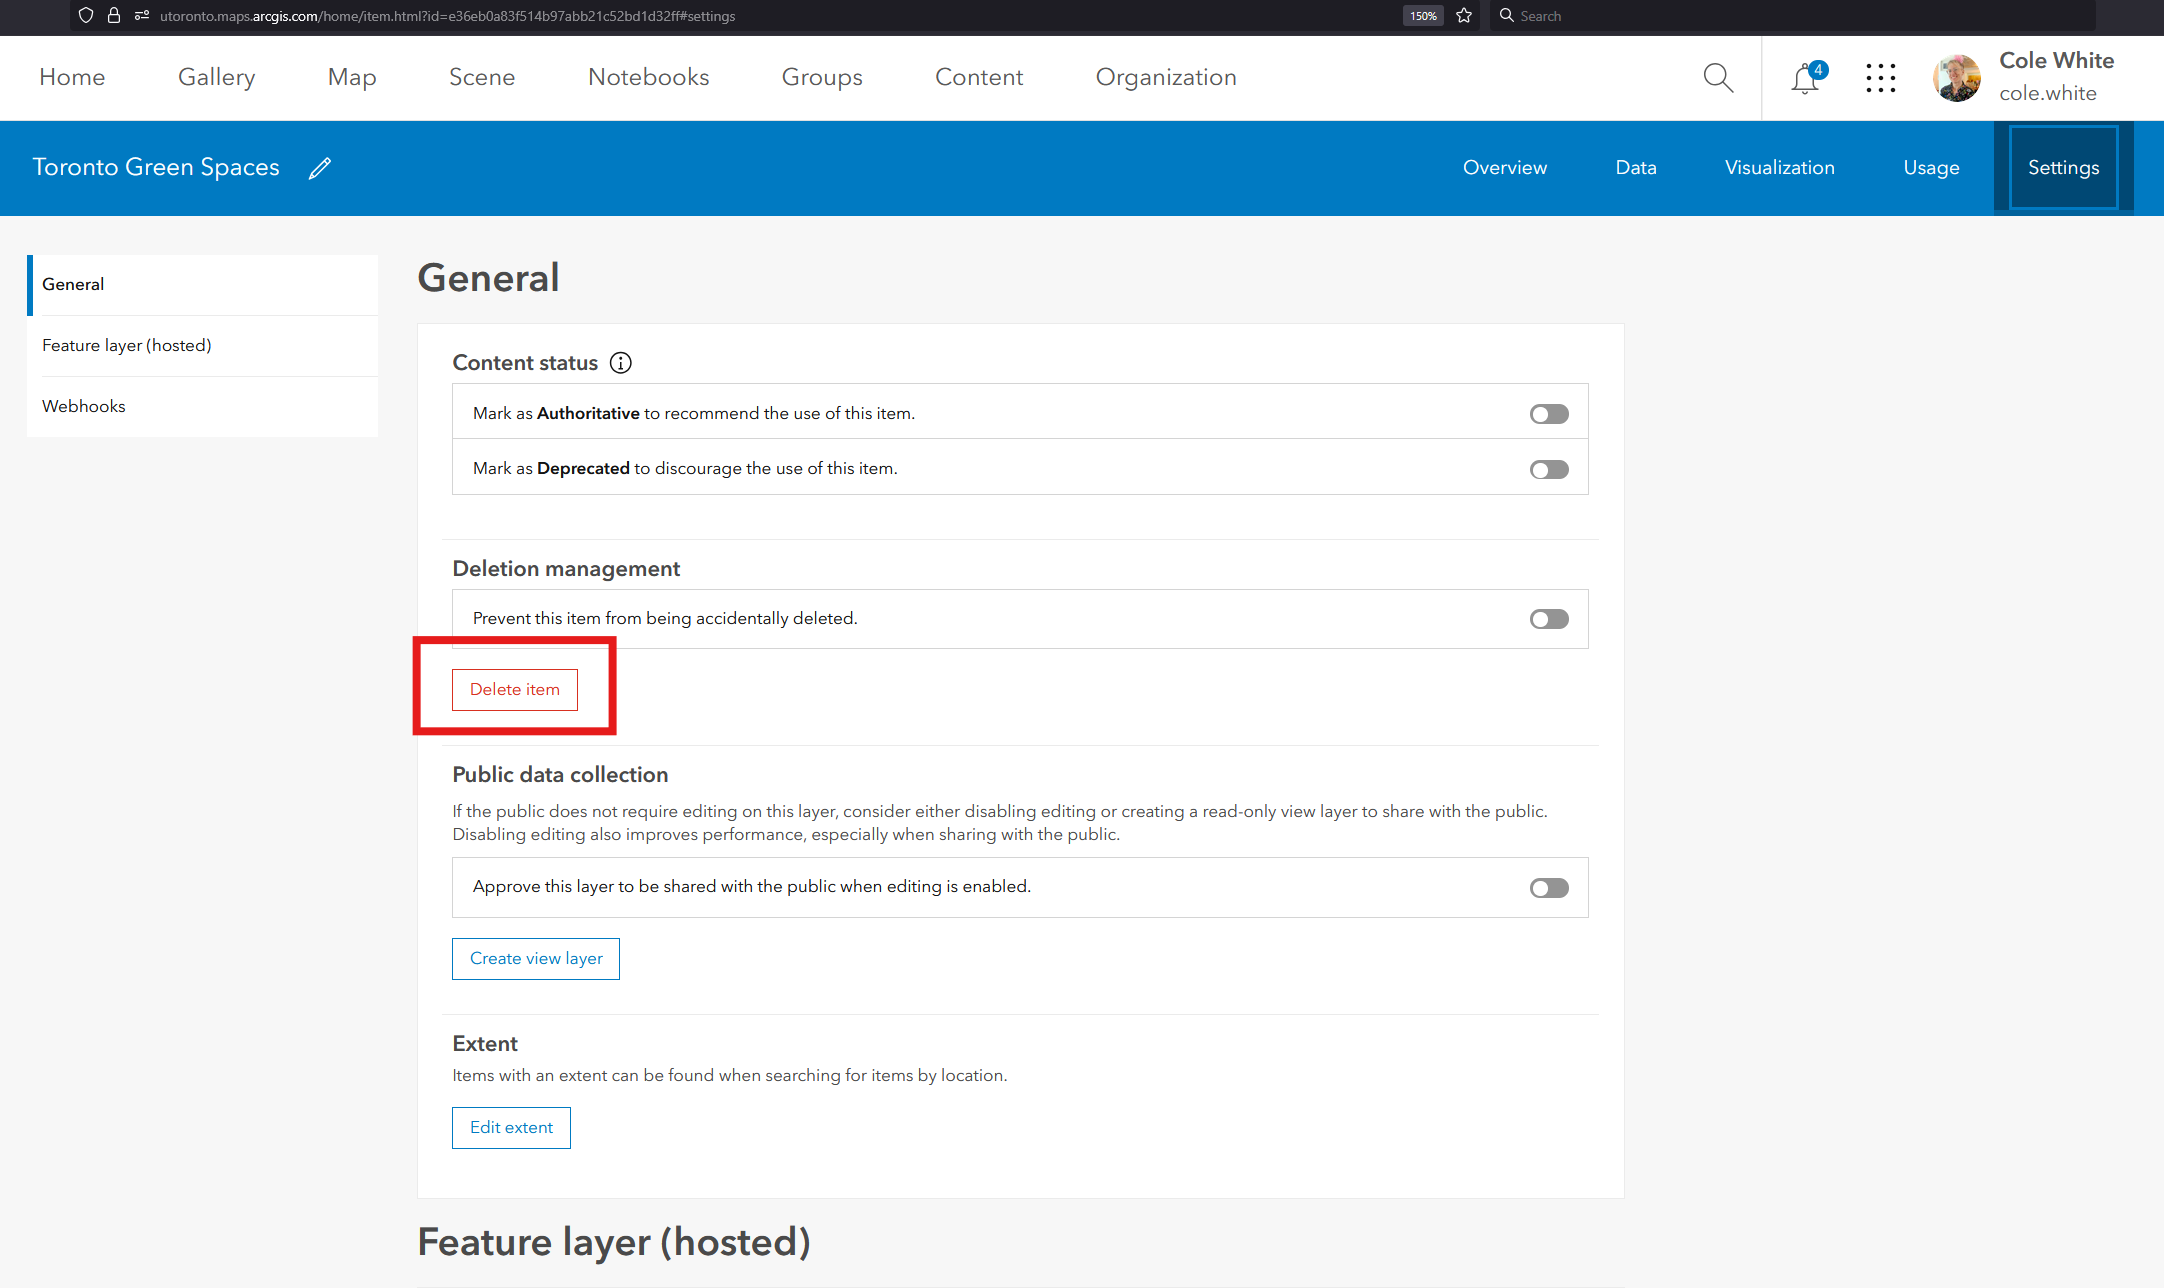
• Now you’ll need to delete the original hosted feature layer. To do this, navigate back to its Item Details page and click Settings
• Click the Delete Item button.
• Click Show More.
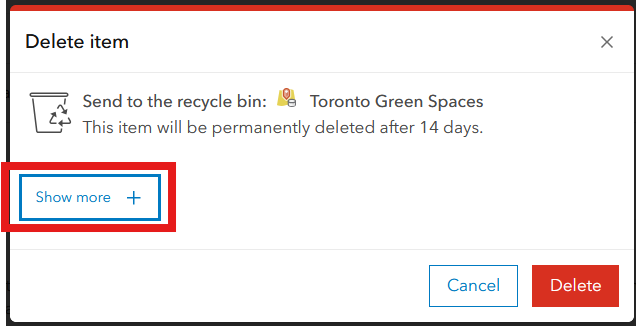
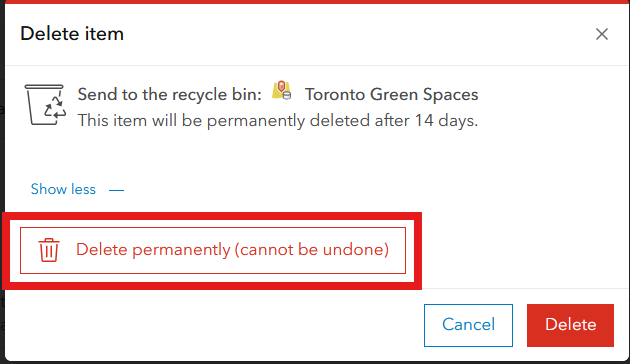
• Click Delete permanently (cannot be undone).